
NIST Disaster Recovery Plan Template Guide
A disaster recovery plan is only useful if people can follow it during an outage. In this guide, I’d boil the article down to one point: your template should name what gets restored first, who makes the call, where backups live, how recovery steps run, and when the plan gets tested and updated.
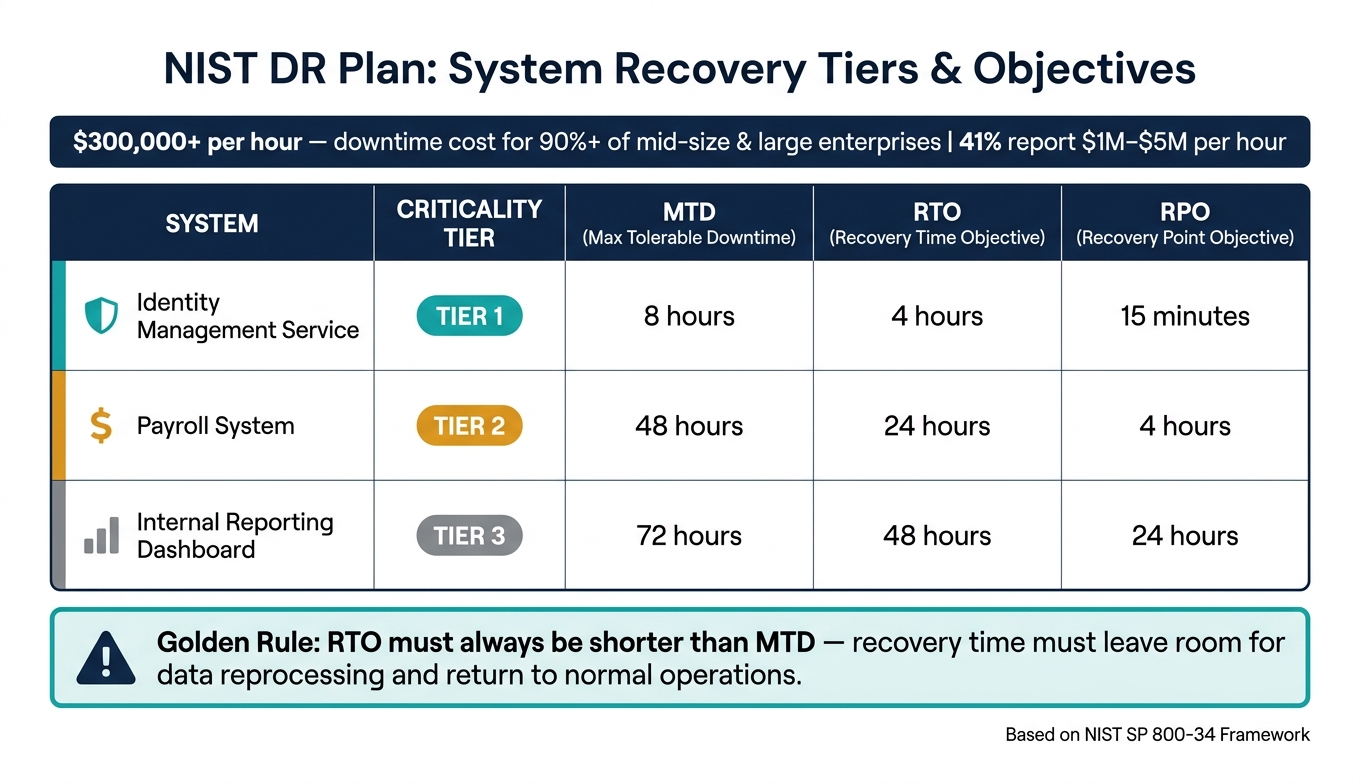
I’d also keep one number front and center: the article cites downtime costs of $300,000+ per hour for over 90% of mid-size and large enterprises, with 41% reporting $1 million to $5 million per hour. That’s why a DR template can’t just be a document. It has to be a working set of instructions tied to RTOs, RPOs, backup proof, and step-by-step runbooks.
If you want the short version, here’s what the article says your plan should include:
- Purpose and scope so people know what the plan covers
- Activation rules so staff know when to declare a disaster
- BIA-based priorities with system tiers, MTD, RTO, and RPO
- Named recovery roles with backups, call paths, and approval limits
- Asset and dependency records so teams restore systems in the right order
- Backup details and restore test logs to show data can be restored
- System runbooks with numbered recovery steps, checks, and user messages
- Test, training, and review dates so the plan stays current
- Version history and approvals so teams and auditors can track changes
A simple way to think about it: if a server fails at 2:00 a.m., your team should be able to open one file and see who acts first, what gets restored first, what backup to use, and how to confirm the system is back. That’s the standard this article pushes toward.
NIST SP 800-34 Explained 🔥 Disaster Recovery & BCP & Cyber Resilience
sbb-itb-c68f633
Build the Core Sections of the Template
NIST Disaster Recovery Plan: System Tiers, RTO & RPO at a Glance
Turn the NIST framework into something people can USE under pressure. NIST SP 800-34 lays out the core fields responders need first so they can spot scope, owners, and recovery steps without digging around. These fields are the base of the plan. If the template is hard to scan or leaves out key details, teams can waste time figuring out what applies and who’s running the response.
Purpose, Scope, Assumptions, and Activation Criteria
Start with the basics.
The Purpose statement should be short - just one or two sentences that explain why the plan exists. For example: "Restore operability of mission-critical systems within defined RTOs and RPOs following an unplanned disruption."
The Scope should spell out exactly what the plan covers: applications, infrastructure components, data sets, network services, and business functions. A solid scope might name an ERP platform, identity services, virtual infrastructure, file services, and the office network at a specific site. It should also say what’s out of scope, such as personal devices or systems owned by another department. That kind of detail helps teams avoid gaps and overlapping ownership.
The Assumptions section records what the team is counting on for recovery to work. That can include staff availability, access to valid admin credentials, vendor support, internet connectivity, and access to an alternate site or cloud environment. It should also say what the team is not assuming. For example: "No guaranteed site access during a regional disaster." Writing this down keeps the plan grounded in reality and shows where extra controls may still be needed.
Activation criteria need to be clear and measurable. Don’t use vague language. The plan should kick in when an outage is expected to go past the system’s RTO, when a primary data center is lost, when a cyber compromise is confirmed, or when a critical dependency fails and blocks business operations. The template should also name who can declare a disaster - such as the CIO, CISO, or a designated disaster recovery lead - and include a short escalation path plus notification contacts.
System Description, BIA Summary, and Recovery Objectives
For each covered system, document its function, users, business process, hosting location, and dependencies. Dependencies should be listed in the order they need to come back online. That detail matters because recovery teams need to know what has to be restored first and what must be available before a system can safely return to service.
Once the system description is in place, use the BIA data to set priorities and recovery targets.
The BIA summary turns impact findings into recovery order. The simplest format is a table with one row per system, showing the criticality tier, maximum tolerable downtime (MTD), RTO, and RPO side by side.
| System | Criticality Tier | MTD | RTO | RPO |
|---|---|---|---|---|
| Identity management service | Tier 1 | 8 hours | 4 hours | 15 minutes |
| Payroll system | Tier 2 | 48 hours | 24 hours | 4 hours |
| Internal reporting dashboard | Tier 3 | 72 hours | 48 hours | 24 hours |
One rule needs to be built right into the template: RTO should be shorter than MTD. Why? Because the organization still needs time after technical recovery to reprocess data and get normal operations back on track.
A payroll system may be able to wait longer than an identity management service. A transaction database may need a much tighter RPO than an internal reporting dashboard. Putting these values in one place gives IT teams a usable recovery order and gives business leaders a plain view of how those thresholds were set.
Preventive Controls, Recovery Strategy, and Document Control
The preventive controls section lists the safeguards already in place. That can include redundant internet links, multifactor authentication, endpoint protection, UPS units, off-site or immutable backups, environmental controls, patch management, and network segmentation. Each control should connect to the recovery method it supports.
For example:
- Redundant links support failover
- Immutable backups support ransomware recovery
After the controls and recovery strategy are written down, the template should make ownership and revision tracking easy to follow.
Document control is what makes the plan auditable. Track the version number, owner, approver, approval date, last review date, and change log. A change log entry might record a backup platform migration, an updated RTO after a system upgrade, or a new alternate recovery site added after a vendor contract change. Good document control helps with audit readiness and lowers the chance that responders rely on out-of-date procedures.
Define Recovery Roles, Assets, and Backup Records
After you set the plan scope and recovery targets, the next step is simple: assign clear ownership and show that backups can actually restore. A DR template looks fine on paper, but it falls apart in a live incident if the team can't spot owners, priorities, and backup status in seconds. This is the part that turns the template into something people can use under pressure.
Recovery Roles and Communication Flow
In an incident, fast decisions depend on one thing: everyone knows who acts, who approves, and who steps in next. Document these roles:
- DR lead: activates the plan and coordinates recovery
- System owner: validates business priorities and approves data restoration scope
- Communications lead: handles internal and external notifications
- Executive approver: authorizes major recovery decisions
For each role, record the person's full name, title, primary and secondary contact methods, on-call schedule, and decision authority level. For example, note whether someone can approve failover within Region A up to $50,000 in emergency cloud spend.
Don't write escalation as a static contact list. Write it as a sequence of actions. Spell out what triggers escalation, such as a Tier 1 outage lasting more than 15 minutes, and how fast each step should move. Auto-escalate if the primary on-call does not acknowledge within 5 minutes. Escalate to the DR lead and manager if the issue remains unresolved within 30 minutes.
Include vendor contacts too. For cloud providers, telecom carriers, and critical SaaS vendors, list contract IDs, SLA terms, support tiers, and direct escalation numbers. When a system is down, nobody wants to dig through an inbox for a support case number.
Asset Lists and System Tiering
Once ownership and escalation paths are set, map each critical system to the people and dependencies behind it.
Organize asset lists by system and dependency, not only by device type. Record the asset ID, owner, tier, hosting environment, data stores, and dependencies. A Tier 1 payment processing app, for example, should connect to its web servers, database cluster, API gateway, identity provider, and any third-party service it relies on.
Set tiers from BIA results. Show each system's tier and the BIA reason behind it. Tiers drive recovery order: higher-tier systems come back first, and the team assigns people and infrastructure in that same order.
A common problem is marking too many systems as Tier 1. When everything is top priority, nothing is. Recovery teams lose focus fast. Review tiering decisions with business leaders and check them again at least once a year, or any time BIA results change.
Backup Schedules, Storage Locations, and Verification Records
Use the asset inventory to connect each system to its backup source, storage location, and restore test record.
For each system, document the backup type, target data scope, frequency, retention period, primary storage target, off-site or cross-region replication details, encryption status including algorithm and key management method, and the last restore test date and result.
Backup frequency matters, but restore test results matter more. An untested backup is not evidence of recovery. Each backup record should read like proof that the system can come back when needed.
Customer DB: daily full backup at 11:30 PM CT; 35-day retention; AES-256; replicated to secondary region; last restore test: 08/15/2026, 47 minutes, no data loss.
Keep these records current after every system change. Update asset and backup records whenever a system is added, reconfigured, or decommissioned so the template stays accurate between tests.
Write Recovery Procedures and Keep the Plan Current
Step-by-Step Recovery Runbooks
Once you've documented roles, assets, and backups, turn that material into recovery steps people can actually use. A runbook should be short, numbered, and easy to execute. In a live incident, technicians need a sequence to follow - not something they have to interpret on the fly.
Build each system-specific runbook around seven phases: Activation, Containment, Failover, Restoration Order, Credential Access, Validation Testing, and User Communication. At the top, add a short system summary, the criticality tier, and a clear activation trigger.
In Activation, confirm the incident ID and notify the DR lead. In Containment, spell out the actions that prevent more damage, like isolating affected servers or changing network routes. In Restoration Order, list the recovery sequence in the same order set by the BIA so the most critical services return first. In Credential Access, note where break-glass accounts, encryption keys, and admin credentials are stored, along with role-based access limits. In Validation Testing, define the smoke tests, health checks, and transaction tests that must pass before users come back. In User Communication, include ready-to-send email, portal, or SMS templates for internal users and external parties. End each runbook with exit criteria for the return to normal operations.
For example: 1. Confirm outage on DB-Prod using the monitoring dashboard. 2. Notify the on-call DBA via the paging system. 3. Switch traffic to the read-only replica in the us-west region. 4. Restore the latest validated backup from 09/09/2026, 11:00 p.m. on the primary cluster.
NIST SP 800-34 is plain about this: procedures must be detailed enough for a replacement team to execute them without prior system knowledge. So put the system names, server locations, required tools, and credential access paths inside the runbook itself. Don't scatter that information across a separate wiki or leave it in someone's memory.
Assign both a lead and an approver to each runbook so the team knows who can approve exceptions. Keep server names, owners, and configuration details current in the document. Aim for one to three pages per runbook. Add time estimates next to steps, like Step 4: Restore database from last known good backup – estimated 30 minutes. Use bold for critical warnings such as Do not restart Node-2 until Node-1 passes health checks. For high-impact systems, add a one-page first-60-minutes reference card that covers only the most time-sensitive actions.
Testing, Training, and Review Cycles
Writing runbooks is only half the job. A runbook that has never been tested is just a guess about how recovery will go.
NIST training guidance says test depth should match system criticality. For critical systems, use this three-tier cadence:
| Test Type | Frequency | Best For |
|---|---|---|
| Tabletop exercise | Quarterly | Validating roles, communication, and plan logic |
| Functional test | Semiannually | Hands-on component testing, partial failover, backup restores |
| Full-scale simulation | Annually | End-to-end failover of production-like environments |
For every exercise, record the date (MM/DD/YYYY), participants, systems covered, scenario used, results measured against RTO/RPO targets, and any corrective actions. That log is your evidence trail - not only for internal improvement, but also for auditors who need proof that testing took place. Then roll corrective actions into the next revision.
Review timing should follow both the calendar and the change log. Schedule a formal annual review for all runbooks, with Tier 1 systems reviewed every 12 months by the system owner. But don't stop at calendar dates. Define event-based triggers too: a major incident or near-miss, a move to a new cloud provider, a staffing change in a key DR role, a vendor change that affects SLAs, or a new compliance requirement. Each trigger should lead to a documented update within 30 days, with the trigger type, date of change, reviewer name, and a short summary of what changed.
Record corrective actions in version control right after each exercise.
Approval, Versioning, and Audit Readiness
After testing, lock the working version and track every change from one control page. Add a plan control page for current status and review dates - a single header section that answers the governance questions before anyone even opens a runbook. Include these fields:
- Plan Owner
- Approver(s)
- Current Version Number
- Effective Date (MM/DD/YYYY)
- Next Review Due Date
Each runbook should also have its own header with System Name, System Tier, Runbook Version, and Last Reviewed By.
Use incremental version numbers: 1.0 for the first release, 1.1 for minor updates, and 2.0 for major structural changes. Keep a Revision History table with Version, Date (MM/DD/YYYY), Author, Approver, and Change Summary.
| Version | Date (MM/DD/YYYY) | Author | Approver | Change Summary |
|---|---|---|---|---|
| 1.0 | 06/01/2026 | J. Smith | A. Lee | Initial release |
| 1.1 | 07/15/2026 | J. Smith | A. Lee | Updated contact paths and backup step timing |
| 2.0 | 09/01/2026 | M. Chen | A. Lee | Reworked runbook structure and added validation steps |
Store archived versions in a controlled repository with read-only permissions. Put a visible banner on every current runbook, such as Current Version: 2.3 – Effective 09/01/2026, so no one accidentally follows an outdated file pulled from a local folder.
Audit readiness comes down to proof. Every claim should point to evidence. If the plan says ERP backups are tested at least twice per year, there should be a testing log entry, a results record, and supporting artifacts like monitoring screenshots or restored data verification reports in a linked evidence folder - for example, See Evidence: DR-Test-ERP-2026-06-10. Keep archived versions according to policy and audit requirements so auditors can trace how procedures changed over time and whether known gaps were fixed.
Conclusion: A Checklist for a NIST-Aligned Plan
Use this final checklist to check your policy, BIA, controls, recovery plan, testing, and upkeep. The goal is simple: make sure your team knows how to restore services when the pressure is on.
Use this checklist against the current version of the plan:
| Area | What to Confirm |
|---|---|
| Structure | Plan includes purpose, scope, activation criteria, escalation paths, and BIA summary |
| Roles | Every recovery role has a named primary, a backup, current contact details, and a call tree |
| Assets & Tiers | All critical systems are inventoried, tiered by BIA results and tied to RTO/RPO, and mapped to dependencies |
| Backups | Schedules, storage locations, and recent restore test results are documented per tier |
| Runbooks | Step-by-step procedures exist for each Tier 1 and Tier 2 system, with validation steps and rollback guidance |
| Testing & Review | Test schedule is set, training is current, last exercise is logged, and next review date is assigned |
| Governance | Current version number, effective date, approval records, and change history are on the cover page |
An untested plan leaves you with the same downtime risk it was built to cut.
Fix any missing item before the next test or incident.
FAQs
How do I set realistic RTO and RPO targets?
Set RTO and RPO targets based on business impact and the resources you have available, not random numbers picked out of thin air. Start by identifying your most critical systems, define baseline performance metrics, and bring finance and IT into the process so the targets line up with business goals and risk tolerance.
Use system tiers to give your most important systems tighter recovery timelines. A customer-facing payment platform, for example, will usually need a much shorter recovery window than an internal file archive.
Review the results on a regular schedule and adjust them monthly or quarterly as business needs shift.
What should I do if a backup restores but the system still fails validation?
Treat the system as compromised or corrupted, not functional. Check the backup source to confirm whether the data was already corrupted before the restore.
Review system logs for validation errors. Then revert to an earlier known-good backup, or follow your documented manual recovery procedures to restore operations while protecting security and data integrity.
How often should a disaster recovery plan be updated?
A disaster recovery plan isn't something you write once and stick in a folder. It needs regular attention so it stays in step with your business goals and the way your infrastructure changes over time.
A good routine looks like this:
- Run forensic acquisition drills at least every six months
- Do broader system assessments quarterly or twice a year, including gap analyses and reviews of discovery and normalization logic
That kind of steady review helps keep the plan current and usable when it matters most.