
How to Set ChromeOS Policies for Schools
Managing Chromebooks in schools requires strict policies to ensure safety, security, and productivity. ChromeOS policies help IT administrators control device usage, block unauthorized access, and protect students online. Key steps include:
- Disable Guest Mode and Incognito Mode: Prevents bypassing filters and ensures activity tracking.
- Forced Re-enrollment: Automatically re-enrolls devices after a factory reset.
- Sign-in Restrictions: Limits logins to school-managed accounts only.
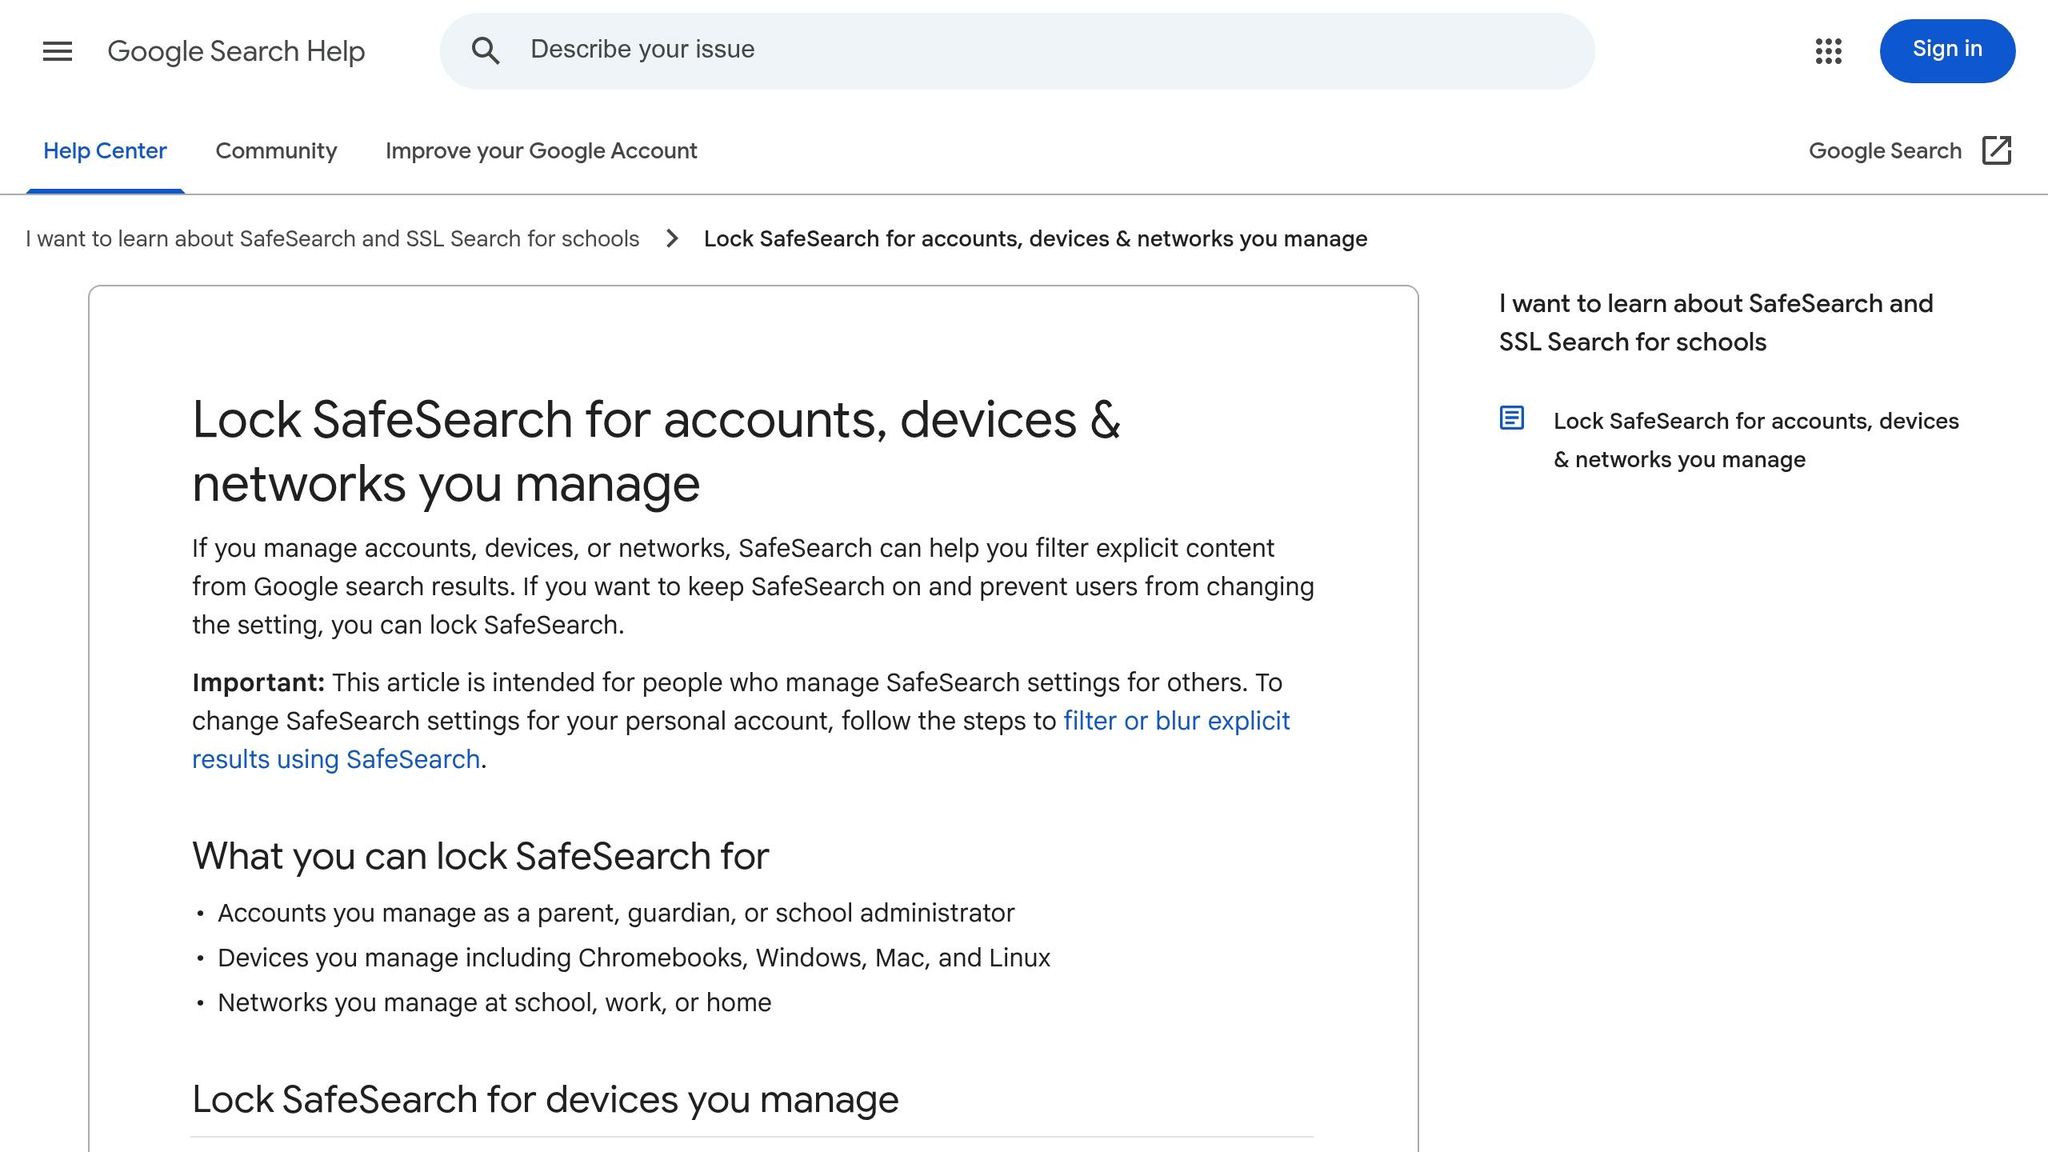
- SafeSearch and YouTube Restricted Mode: Blocks inappropriate content.
- Organizational Units (OUs): Group users/devices for targeted policy application.
- Google Workspace for Education Setup: Necessary for managing accounts and policies.
- Testing Policies: Use a staging environment to verify configurations before deployment.
Tools like AdminRemix's Chromebook Getter simplify bulk management tasks, saving time for IT teams. Proper setup and regular reviews ensure secure, efficient device management in schools.
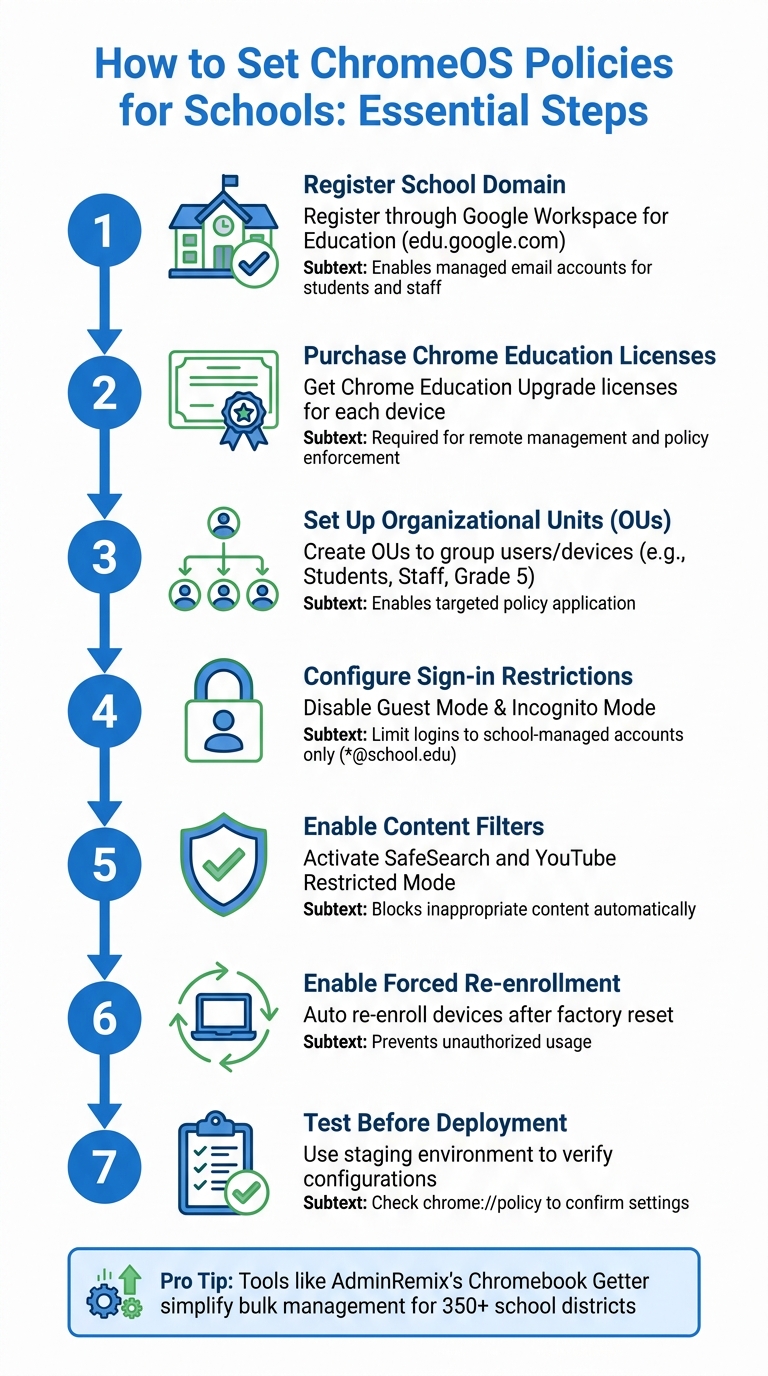
ChromeOS Policy Setup Process for Schools: 7 Essential Steps
Prerequisites for Setting ChromeOS Policies
To start managing ChromeOS devices for your school, the first step is to register your school domain through Google Workspace for Education (edu.google.com). As Ciarán Ó Muirgheasa advises:
I would recommend you register your school as the first step. This will allow you to create and manage accounts for all users within your school domain.
This registration is essential because it enables you to create managed email accounts for both students and staff, which are necessary to implement user-level policies.
You'll also need to purchase Chrome Education Upgrade licenses for each device. These licenses (previously known as Chrome Device Management licenses) allow for remote management, enabling you to push applications and enforce policies on Chromebooks. Without these licenses, you won't be able to apply device-level controls or enroll Chromebooks into your school’s domain.
Lastly, ensure your administrator account has the required Mobile Device Management (MDM) privileges. This access is necessary to configure and deploy policies through the Google Admin console.
Setting Up Google Workspace for Education
Once your school domain is registered, the next step is to create email accounts for all students and staff. These accounts are critical for managed logins and the distribution of policies. To make logging in easier, you can configure the "Autocomplete domain" setting in the Admin console. This eliminates the need for users to manually type the "@school.edu" portion of their email address.
Pre-configuring Wi-Fi networks is another key step. This ensures that devices automatically connect and receive policies as soon as they are enrolled. Additionally, enable the "Forced re-enrollment" setting to prevent unauthorized usage if a device is factory reset.
After setting up accounts and network configurations, organize your devices and users into Organizational Units (OUs). This structure allows for precise and efficient policy management.
Understanding Organizational Units (OUs)
Organizational Units (OUs) are the foundation of ChromeOS policy management. They let you group users or devices with similar needs and apply specific settings to those groups, rather than applying policies across your entire organization. For example, you could allow teachers to use Incognito mode while disabling it for students by placing them in separate OUs.
By default, all users and devices are placed in a top-level organizational unit. From there, you can create child OUs - like "Students", "Staff", or "Grade 5" - to further segment your management. Child OUs inherit settings from their parent unit, which means you can set organization-wide policies at the top level and then customize settings for specific groups in the child units. As Google Workspace Help explains:
Organize users and devices into separate OUs to tailor settings as needed.
If you need to modify an inherited setting, you can apply a "locally applied" setting directly to the child OU. Additionally, you can move users or devices between OUs at any time to adjust which policies apply to them.
sbb-itb-c68f633
Accessing the Google Admin Console
Once your Google Workspace for Education is set up and your Organizational Units are in place, the next step is accessing the tools to manage your ChromeOS devices. The Google Admin Console is your central hub for configuring policies, but you'll need the correct credentials and permissions to get started.
Logging into the Admin Console
Head over to admin.google.com and sign in using your IT administrator credentials. Note that standard user accounts - including those for teachers or staff - won't have access to these tools. Your admin account must have the "Mobile Device Management administrator" privilege. Without it, you won’t see the Chrome management options.
If you're assigning roles to other IT staff, it's a good idea to stick to a "least privilege" approach. For instance, if someone is managing device groups, they’ll need the Mobile Device Management privilege along with the Groups privilege. Avoid granting full Super Admin access unless absolutely necessary.
Once you're logged in, navigate to the Chrome Management Settings Overview to start configuring your device policies.
Chrome Management Settings Overview
After signing in, you'll find the ChromeOS policy controls under Menu > Devices > Chrome. This section is where you'll spend most of your time managing ChromeOS settings. Here’s a quick breakdown of the key areas:
- Device settings: These apply to the hardware itself, regardless of who logs in. For example, you can control guest mode or set sign-in restrictions.
- User & browser settings: These policies follow users across devices. You can enforce SafeSearch, restrict Incognito mode, or apply other user-specific rules.
The Admin Console also has a handy search bar that understands plain English commands. For example, typing "improve device accessibility" can help you quickly find the relevant controls. This feature is especially useful when you're unsure of a policy's exact name or location. Just make sure to select the right Organizational Unit before applying any changes so that your policies affect the intended group of users or devices.
With these basics covered, you’re ready to start configuring the ChromeOS policies to manage and secure your school’s devices effectively.
Configuring Core ChromeOS Policies
Now that you’re familiar with the Admin Console layout, it’s time to dive into the policies that help protect students and keep devices secure. These settings are the backbone of your school’s ChromeOS management strategy, so it’s worth taking the time to configure them carefully.
Sign-in Restrictions and Guest Mode Settings
To manage Chromebook access, head to Devices > Chrome > Settings > Device settings in the Google Admin console. The first step? Disable guest mode. According to Google's Help Center:
If you select Disable guest mode, a user must sign in using a Google Account or Google Workspace account. When a user signs in using guest mode, your organization's policies are not applied.
For K‑12 EDU domains, this setting is already turned off by default.
Next, set up sign-in restrictions to block students from using personal Gmail accounts on school devices. Use the "Restrict sign‑in to a list of users" option and add a pattern like *@your-school-domain.com to ensure only authorized accounts can log in. To make things easier for younger students, enable the autocomplete domain feature. This way, an address like @schooldomain.edu is automatically suggested during sign-in, reducing errors.
Before making any changes, double-check that you’ve selected the correct Organizational Unit. Once sign-in restrictions are in place, you can move on to defining device usage schedules for added security.
Setting Device Usage Schedules
Controlling when devices can be used is another layer of security. The Device Restriction Schedule policy (introduced in ChromeOS 132) allows you to lock Chromebooks during specific time periods each week. As Matt Drasner noted:
Device Restriction Schedule, a new ChromeOS device policy, will soon be available in the Admin console to control when school Chromebooks can be logged into at home.
When active, these restrictions end sessions and display a "Device can't be used" message.
To configure this, go to Devices > Chrome > Settings > Device settings and find the "Device restriction schedule" option. If you want a less strict approach, consider the Device Off Hours policy. This lets you relax restrictions during non-school hours, allowing guest mode or personal account sign-ins instead of fully locking the device.
Don’t forget to set the Timezone policy to prevent students from changing the device clock to bypass restrictions. You can also use the "Disabled system features" policy to block access to tools like Crosh and chrome://set-time.
Enabling SafeSearch and Blocking Incognito Mode
Blocking Incognito mode is crucial because it prevents students from bypassing content filters and browsing history tracking. These settings fall under User & browser settings, meaning they follow a student’s profile across any managed device.
To block Incognito mode, navigate to Devices > Chrome > Settings (the User & browser settings page opens by default). Select the appropriate Organizational Unit, scroll to the Security section, choose Disallow incognito mode, and click Save.
For SafeSearch, search for "SafeSearch" at the top of the settings page. Then, enable "Always use SafeSearch for Google Search queries" and "Force Strict Restricted Mode for YouTube."
Policy changes typically take effect within minutes but can take up to 24 hours to fully propagate. After applying the updates, verify them by opening chrome://policy on a student device, clicking Reload policies, and confirming that IncognitoModeAvailability is set to 1.
Deploying and Testing ChromeOS Policies
Assigning Policies to Organizational Units
Once you've set up your OUs (Organizational Units) and core settings, the next step is to assign policies that target specific groups or devices. For better control, consider creating child OUs like "Teachers", "Students", or "Grade 10" to apply settings that meet the needs of each group [14, 17].
Child OUs automatically inherit settings from their parent OU, but you can override these inherited settings for unique policies. It's important to note that user policies follow the individual across devices, while device policies are tied to the hardware itself and affect anyone who logs in [4, 5]. If you need more precise control, Group-Based Policies (GBP) can override OU-level settings. For example, GBP is ideal for temporary needs, like enabling developer tools for a coding club, without having to move users out of their primary OU.
To move multiple devices into a new OU, navigate to Devices > Chrome > Devices, select the devices, and click Move. While most settings apply within minutes, allow up to 24 hours for full propagation. After assigning policies, always test their functionality in a controlled environment.
Testing Configuration Before Deployment
Testing your policies in a controlled environment is essential before rolling them out across your organization. Set up a "Test" or "Staging" OU to ensure your configurations work as planned [14, 17]. Move one device from each hardware model into this test OU and apply the new policies there first.
You can check individual devices by typing chrome://policy into the browser. This will display the enforced policies. Use the Reload policies button to confirm that settings like IncognitoModeAvailability or SafeSearch are applied correctly. Testing helps you catch potential conflicts, such as higher-level platform policies unintentionally overriding your settings. Additionally, the Natural Language Processing (NLP) search feature in the Admin console can simplify locating specific settings. For instance, you can type keywords like "block incognito mode" or "improve device accessibility" to find and adjust relevant policies.
Once you're confident that the policies work as intended in the test OU, you can deploy them across the broader organization without worry.
Tools to Simplify ChromeOS Policy Management
AdminRemix provides specialized tools designed to make ChromeOS policy implementation and device management smoother and more efficient.
Using AdminRemix for Bulk Chromebook Management
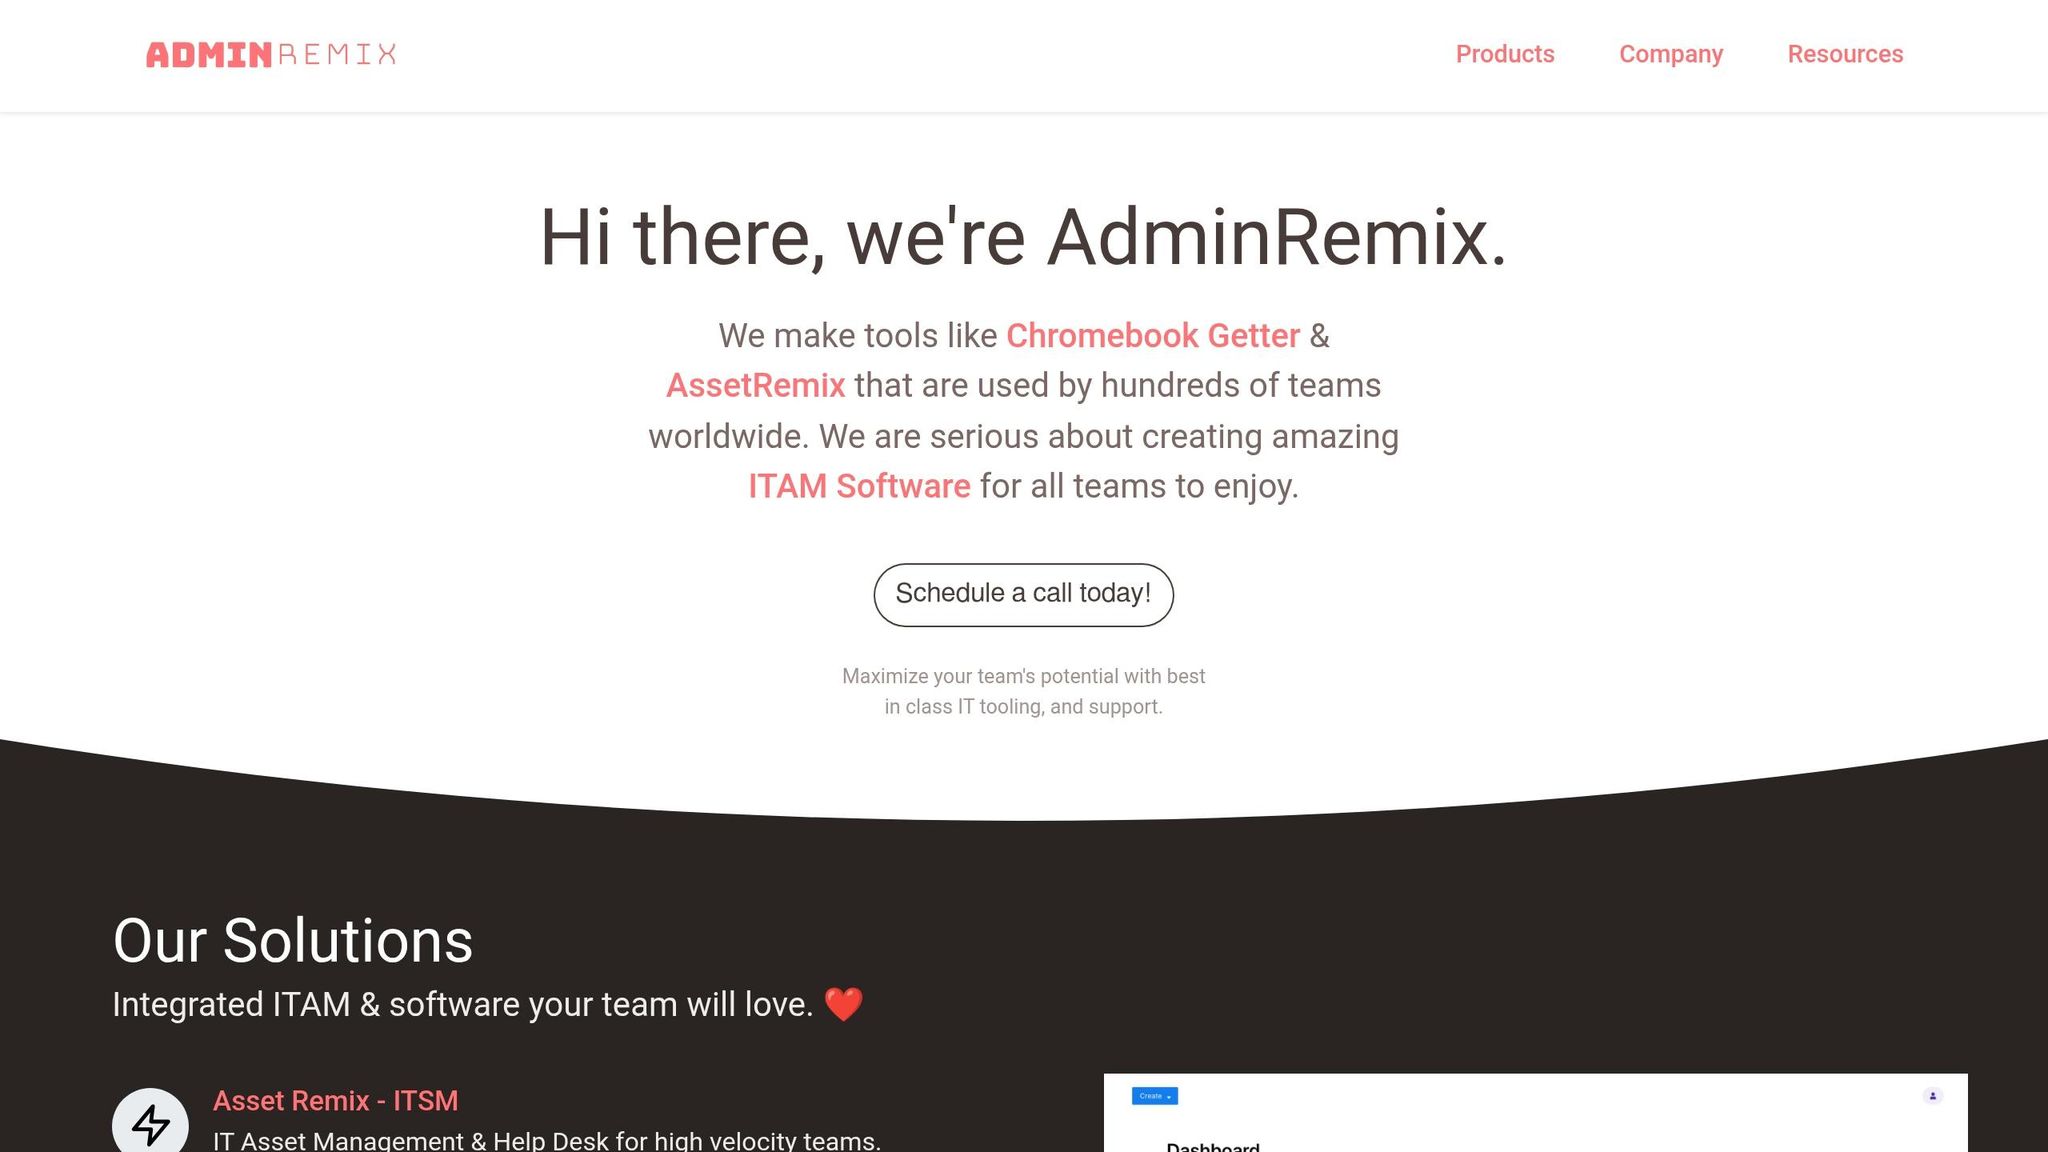
Managing a large fleet of Chromebooks through the Admin Console can be a tedious process, especially when it comes to bulk tasks. That’s where Chromebook Getter by AdminRemix comes in. This tool simplifies Chromebook inventory and metadata management by integrating directly with Google Sheets, offering a spreadsheet-based solution for bulk operations. Trusted by over 350 school districts and used by more than 3 million users via the Google Workspace Marketplace, it’s a game-changer for device management.
Built on Google App Script, the tool ensures quick processing and prioritizes data privacy. IT admins can handle bulk actions like disabling, deprovisioning, or rebooting devices without needing to navigate the Admin Console for each task. The Batch Retrieval Mode allows admins to scan or paste lists of asset tags or serial numbers, while filtering options make it easy to sort devices by enrollment date or status.
"Chromebook Getter has been an amazing tool in my Chromebook management process. I've been able to ditch GAM when it comes to Chromebooks." - Curtis Doherty
For US$20.75 per month per user, premium features include an Auto Update Expiration (AUE) report, which identifies devices nearing the end of their life cycle - helping schools budget more effectively. Admins can also create and delete organizational units (OUs) directly from the interface, avoiding the delays often experienced in the standard Admin Console. This seamless integration with Google Sheets significantly reduces manual work, making policy management more efficient.
Other AdminRemix Features
AdminRemix also offers AssetRemix, a tool for unified IT asset tracking across school districts. Priced at US$99 per month or US$999 annually, it supports unlimited assets, agents, and SSO/Directory sync. The platform enables bulk check-in and check-out using barcode scanners, and students or staff can log in to view their assigned devices, ensuring accountability.
"Simple & easy to use. With pricing that fits my budget!" - Stanley Johnson, Green Meadows Technical School
Additionally, User Getter simplifies G-Suite user metadata updates across OUs using Google Sheets. Like Chromebook Getter, it integrates seamlessly with Google Workspace for Education, eliminating the need for complex tools like GAM or switching between multiple platforms. Together, these tools provide a streamlined, user-friendly approach to managing ChromeOS devices and user data.
Conclusion
Best Practices Recap
Managing ChromeOS policies effectively hinges on a few key practices. First, organize your devices and users into Organizational Units (OUs). This allows you to apply tailored settings efficiently. Keep in mind that groups can override OUs when you need to adjust specific settings without disrupting your entire hierarchy. Another essential step is enabling forced re-enrollment. This ensures that wiped devices automatically rejoin the domain, reducing the risk of unauthorized access.
For added security, enforce account restrictions and secure modes by limiting sign-ins to approved email domains, such as *@school.edu. Additionally, tools like Chromebook Getter from AdminRemix can simplify bulk device management, making IT administration more efficient.
By following these practices, you not only enhance device security but also streamline IT operations across your institution.
Final Thoughts on IT Management
Managing ChromeOS policies requires consistent effort and adaptability. While the core practices provide a solid foundation, there are ongoing strategies to keep in mind. For instance, while most policy changes take effect within minutes, some may take up to 24 hours to propagate across all users. Testing configurations in a staging environment before deploying them broadly is a smart way to avoid disruptions. Regular updates to ChromeOS mean your environment will continue to evolve.
To stay on top of things, schedule routine audits to verify policies. Use chrome://policy on individual devices to check compliance, and adjust settings as educational needs shift throughout the year. Additionally, consider enabling Device Off-Hours to give students more flexibility outside of school hours, while maintaining strict controls during the day. Proactive policy reviews not only ensure compliance with regulations like CIPA but also help create a safer online experience for students.
FAQs
What’s the difference between device and user policies in ChromeOS?
Device policies focus on the physical ChromeOS device itself, influencing settings such as hardware configurations and network access. These policies apply universally to all users of the device. On the other hand, user policies are tied to individual user profiles. They come into play whenever a user signs in, governing settings like app permissions and website access. In short, device policies handle the device's overall functionality, while user policies tailor the experience for each specific user.
How do I stop students from bypassing restrictions with a factory reset?
To stop students from getting around restrictions by performing a factory reset on ChromeOS devices, make sure the devices are enrolled in management with policies that require re-enrollment after a reset. You can enable forced re-enrollment in the Google Admin console, which ensures that policies and restrictions are automatically restored after a reset.
It's also a good idea to regularly check the status of your devices and use tools like bulk deprovisioning to keep control and prevent students from permanently bypassing restrictions.
How can I confirm a policy actually applied on a Chromebook?
To check if a policy is active on a Chromebook, type chrome://policy into the browser's address bar. You'll see a list of policies, and the ones currently in effect will appear under the "Applies to" column.
Another way to confirm if the device is managed is by clicking the time in the bottom-right corner of the screen. If you notice a managed device icon, it indicates that policies set by an administrator are likely in place.