
Google Workspace Tips for Incident Management
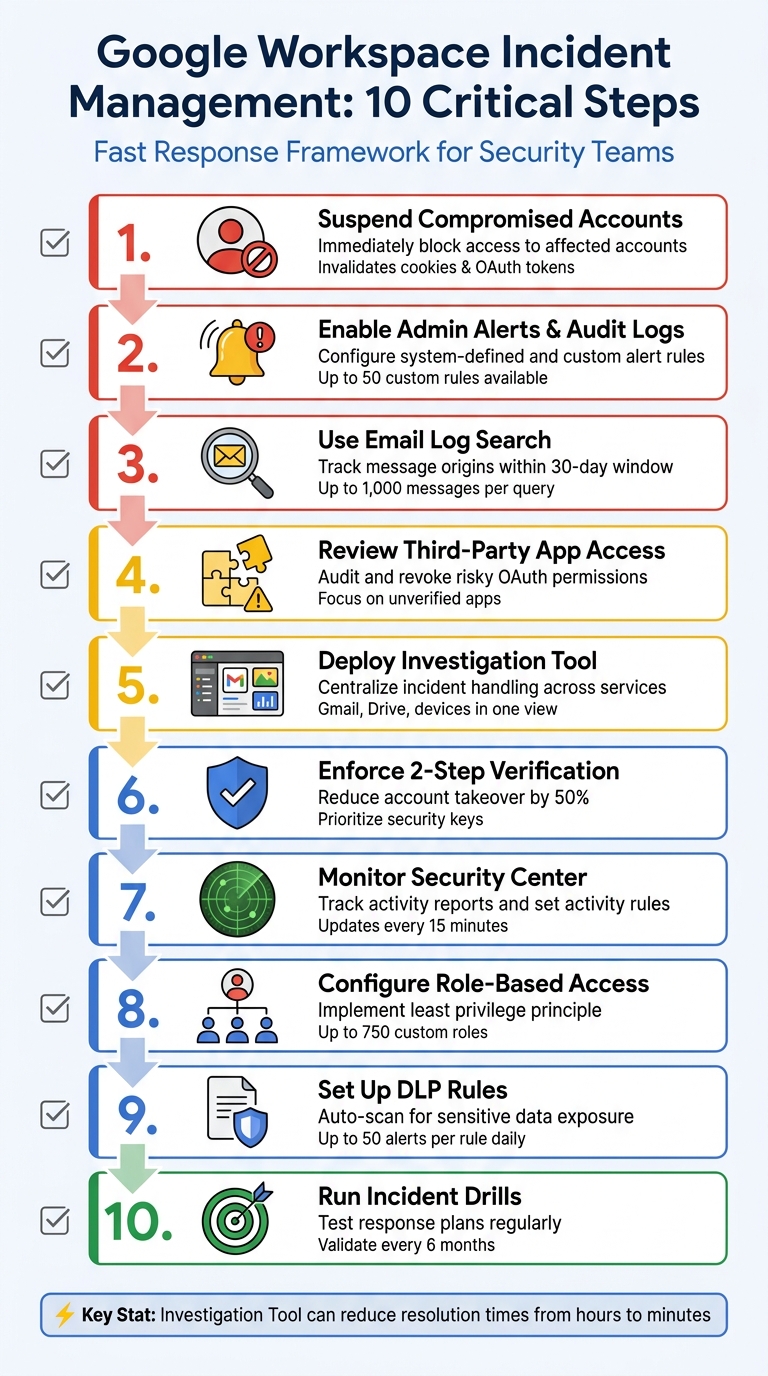
When managing security incidents in Google Workspace, the key is acting fast and using built-in tools effectively. From suspending compromised accounts to setting up admin alerts, Google Workspace provides tools to help IT teams respond efficiently. Here's a quick summary:
- Suspend Compromised Accounts: Immediately block access to affected accounts to prevent further damage.
- Admin Alerts & Audit Logs: Enable alerts for suspicious activities and use audit logs for detailed investigations.
- Email Log Search: Track email origins and take actions like deleting malicious emails.
- Third-Party App Access: Regularly review and block risky app permissions.
- Investigation Tool: Centralize incident handling across Gmail, Drive, and devices.
- 2-Step Verification (2SV): Strengthen account security by enforcing 2SV for all users.
- Activity Monitoring: Use the Security Center to track and respond to ongoing threats.
- Role-Based Access Control: Limit user permissions to reduce security risks.
- Data Loss Prevention (DLP): Automatically scan and restrict sharing of sensitive data.
- Incident Simulations: Conduct drills to ensure your team is prepared for real incidents.
These steps ensure quick responses, protect sensitive data, and minimize disruptions during security incidents. Keep reading for detailed guidance on using these tools effectively.
10-Step Google Workspace Incident Management Response Process
Prevent, Detect, Respond An Intro to Google Workspace Security and Incident Response
sbb-itb-c68f633
1. Suspend Compromised User Accounts Right Away
When dealing with a security breach, your first move should be to immediately suspend any compromised accounts. This action stops attackers from accessing Gmail, Drive, Calendar, and other Google Workspace services, while also ensuring all data remains intact for investigation purposes. Suspension does more than a simple password reset - it invalidates sign-in cookies and OAuth tokens, effectively cutting off access.
"A single click on a phishing email can escalate into a company-wide lockout in minutes. ... Attackers exploit every delay." - John Pettit, CTO, Promevo
To suspend an account, head to the Admin console and navigate to Directory > Users. Find the affected account and click Suspend user. If multiple accounts are compromised, use the CSV template to update the "New Status Upload Only" column to Suspended and upload it via the "Add or update multiple users" tool.
Keep in mind that suspended accounts still incur regular billing charges and lose access to Vault for new communications. Additionally, new emails and calendar invites won’t reach the suspended account.
Before reinstating access - especially if Google flagged the account as "at risk" - make sure to follow the official Administrator security checklist to confirm the threat has been fully neutralized.
Once compromised accounts are suspended, shift your attention to reviewing alert and audit settings to uncover more details about the breach.
2. Set Up Admin Alerts and Audit Logging
To stay on top of potential security issues, it's essential to configure admin alerts and audit logging in Google Workspace. These tools help you quickly identify and analyze incidents. Google Workspace offers two types of alert rules: system-defined rules (pre-configured by Google) and custom rules (created by you to address specific needs). The Alert Center acts as your hub for viewing, filtering, and managing all security notifications.
Start by enabling system-defined critical event rules, such as "Suspicious login" or "Device compromised", in the Admin console. These rules send alerts to designated administrators, though they cap the number of emails at 25 within a two-hour window to reduce the risk of overwhelming your inbox. For more tailored monitoring, you can create up to 50 custom reporting rules. These might include conditions like external file sharing, and you can assign severity levels - High, Medium, or Low - to help prioritize your team's responses. All these alerts work seamlessly with Google Workspace's investigation tools, creating a streamlined approach to incident management.
"Too many notifications can lead to alert fatigue - where critical events are missed due to noise." - Christine Page, Marketing Content Manager, Promevo
Audit logs are another key feature, recording activities like login attempts, file access, email usage, and administrative changes across your Google Workspace environment. You can use the Audit and Investigation tool to search these logs by criteria such as user email, event name, or date range. Keep in mind that reporting rules may take up to 24 hours to activate.
To ensure critical alerts reach the right people, forward them to a dedicated Google Group and a backup email address. For added security, set up a secondary email outside your domain (like a personal Gmail account) for the primary administrator. Make it a habit to review the Alert history regularly, documenting actions taken to maintain a thorough and permanent audit record.
3. Use Email Log Search for Investigations
When dealing with email-related incidents, Email Log Search is an essential tool for tracking message origins and understanding the scope of the issue. This feature allows you to search emails by sender, recipient, domain, or IP address within a 30-day window, retrieving up to 1,000 messages per query. Each message includes up to 15,000 log entries that detail its delivery journey, providing the insights needed for targeted investigations.
The Message ID is the most precise search parameter you can use. Found in every email header, this unique identifier helps locate all instances of a specific email across your organization - even those older than 30 days. For phishing or spoofing investigations, the Sender IP field can pinpoint the email's network origin. Additionally, checking the Return-Path address in the header can provide more accurate results. The tool also tracks post-delivery status, showing if users marked the email as spam, deleted it, or took other actions. Keep in mind, Email Log Search doesn’t display message content. For that, you’ll need Google Vault or Gmail delegation. Also, searches involving large datasets may take up to an hour to fully populate, so factor this into your timeline during active incidents.
Once you've identified suspicious emails, act quickly. Export your search results to Google Sheets or a .csv file to create a record for your incident report. Then, use bulk actions to neutralize threats by deleting malicious emails from inboxes, marking them as spam or phishing, or moving them to quarantine for further analysis. To broaden your search, remove recipient filters to identify all impacted users.
To access Email Log Search, ensure you have the "Gmail Settings" administrator privilege. For searches extending beyond 30 days, include both the Message ID and the recipient's full email address.
After tracing email origins and taking initial steps, leverage other Google Workspace tools to further secure your environment.
4. Review and Remove Third-Party App Access
Third-party apps connected to your workspace can be a weak link in your security. If one of these apps gets compromised, it could expose sensitive data, send phishing emails, or extract files without triggering standard alerts. Regularly reviewing these connections helps you identify and address potential risks.
To start, go to Security > Access and data control > API controls, then click Manage Third-Party App Access. Here, you’ll find two important tabs: Configured apps (apps with existing policies) and Accessed apps (third-party apps currently in use by your users).
Pay close attention to unverified apps and those with risky OAuth scopes. Use filters to find apps that haven’t been reviewed by Google. Expand the app details to see which services it can access. Apps with high-risk OAuth scopes, such as full Gmail or Drive access, should be reviewed immediately. If an app poses a threat, change its access level to Blocked to revoke its tokens and stop further access.
In an active security incident, time is of the essence. Use the Security Investigation Tool to filter OAuth log events for "Grant" actions. Identify suspicious entries, and then click Revoke access tokens for users. To stay ahead of potential threats, set up Activity Rules to get alerts whenever users authorize apps with sensitive scopes. This proactive monitoring helps you maintain tighter control over app access.
For long-term protection, restrict access to high-risk services at the organizational level. In the API controls section, use Manage Google Services to set Gmail and Drive to Restricted. This ensures that only trusted apps explicitly approved by you can access these critical services.
5. Use the Investigation Tool and Admin Quarantine
When incidents arise, the Security Investigation Tool becomes your go-to hub. It consolidates data from Gmail messages, Drive logs, device logs, and OAuth logs, enabling you to search for unusual activity, pinpoint affected users, and act swiftly. This centralized approach builds on earlier alert and logging methods, helping you respond faster to security breaches.
One standout feature is column-based pivoting. For example, by clicking on a recipient's email address in your Gmail search results, the tool can instantly run a Drive query for that user. This helps you check if sensitive files have been shared externally. This ability to connect data across sources cuts down the time it takes to assess the extent of an incident.
Once malicious emails are identified, you can take immediate action directly within the tool. For Gmail-related issues, select the suspicious messages and choose "Send message to quarantine." If dealing with a larger phishing attack, use the "Select All Results" option to isolate thousands of emails at once. Keep in mind that emails older than the Vault retention policy (usually 30 days) will be deleted instead of quarantined.
The tool also simplifies managing incidents in Drive. You can audit file permissions and revoke external access right from the search results. For compromised devices, it allows you to remotely wipe corporate data or block the device. Similarly, if a user account is affected, you can suspend access or enforce a password reset - all without leaving the investigation interface.
Lastly, pay attention to the Tasks icon at the top of the Admin console when performing bulk actions. It helps you track the progress of large-scale quarantine operations while continuing your investigation. Additionally, all queries and actions are logged in the Admin console, ensuring accountability and providing a thorough record for post-incident reviews. Use these logs to monitor task progress and maintain a complete view of the incident lifecycle.
6. Turn On Login Challenges and 2-Step Verification
Once you've contained an incident, the next step is to strengthen your defenses to prevent future unauthorized access. One of the most effective ways to do this is by enabling 2-Step Verification (2SV). This extra layer of security helps protect accounts even if passwords are compromised. As Google Workspace Help puts it, "2SV is the first line of defense that can cut account takeover by as much as 50%". That statistic alone highlights why implementing 2SV is a must for reducing the chances of repeat incidents.
Start by enforcing 2SV for super administrator accounts since they have access to the most sensitive data. Before rolling it out across your organization, make sure your own super admin account has 2SV activated. To enable it, go to the Admin console and navigate to Security > Authentication > 2-step verification. From there, select the relevant organizational unit and check the box for "Allow users to turn on 2-Step Verification." You can either enforce it immediately or set a future date to give users time to enroll.
For the best protection, opt for the "Only security key" setting in 2SV. Physical security keys and passkeys are highly resistant to phishing attacks, unlike SMS or phone call verification methods, which are more vulnerable. If you need more flexibility, choose the "Any except verification codes via text, phone call" option. This allows secure methods like Google prompts and authenticator apps while blocking less secure telephony-based options. Additionally, set up a grace period for new users - ranging from 1 day to 6 months - so they can initially log in with just a password while completing their 2SV setup.
Login challenges provide another layer of protection by requiring additional verification when Google detects suspicious activity. For example, you can require employees to enter an ID or use passwordless sign-ins with passkeys, which rely on biometrics or device screen locks instead of traditional passwords. To stay on top of potential issues, set up admin alerts for unusual sign-in activity. If a user gets locked out, you can temporarily disable login challenges for 10 minutes or provide backup verification codes to restore access.
To monitor 2SV enrollment progress, head to Reporting > User Reports > Security and add the "2-step verification enrollment" column. Make sure to store backup codes offline and keep spare security keys for administrators. This ensures uninterrupted access during emergencies or unexpected lockouts.
7. Check Activity Reports and Security Center
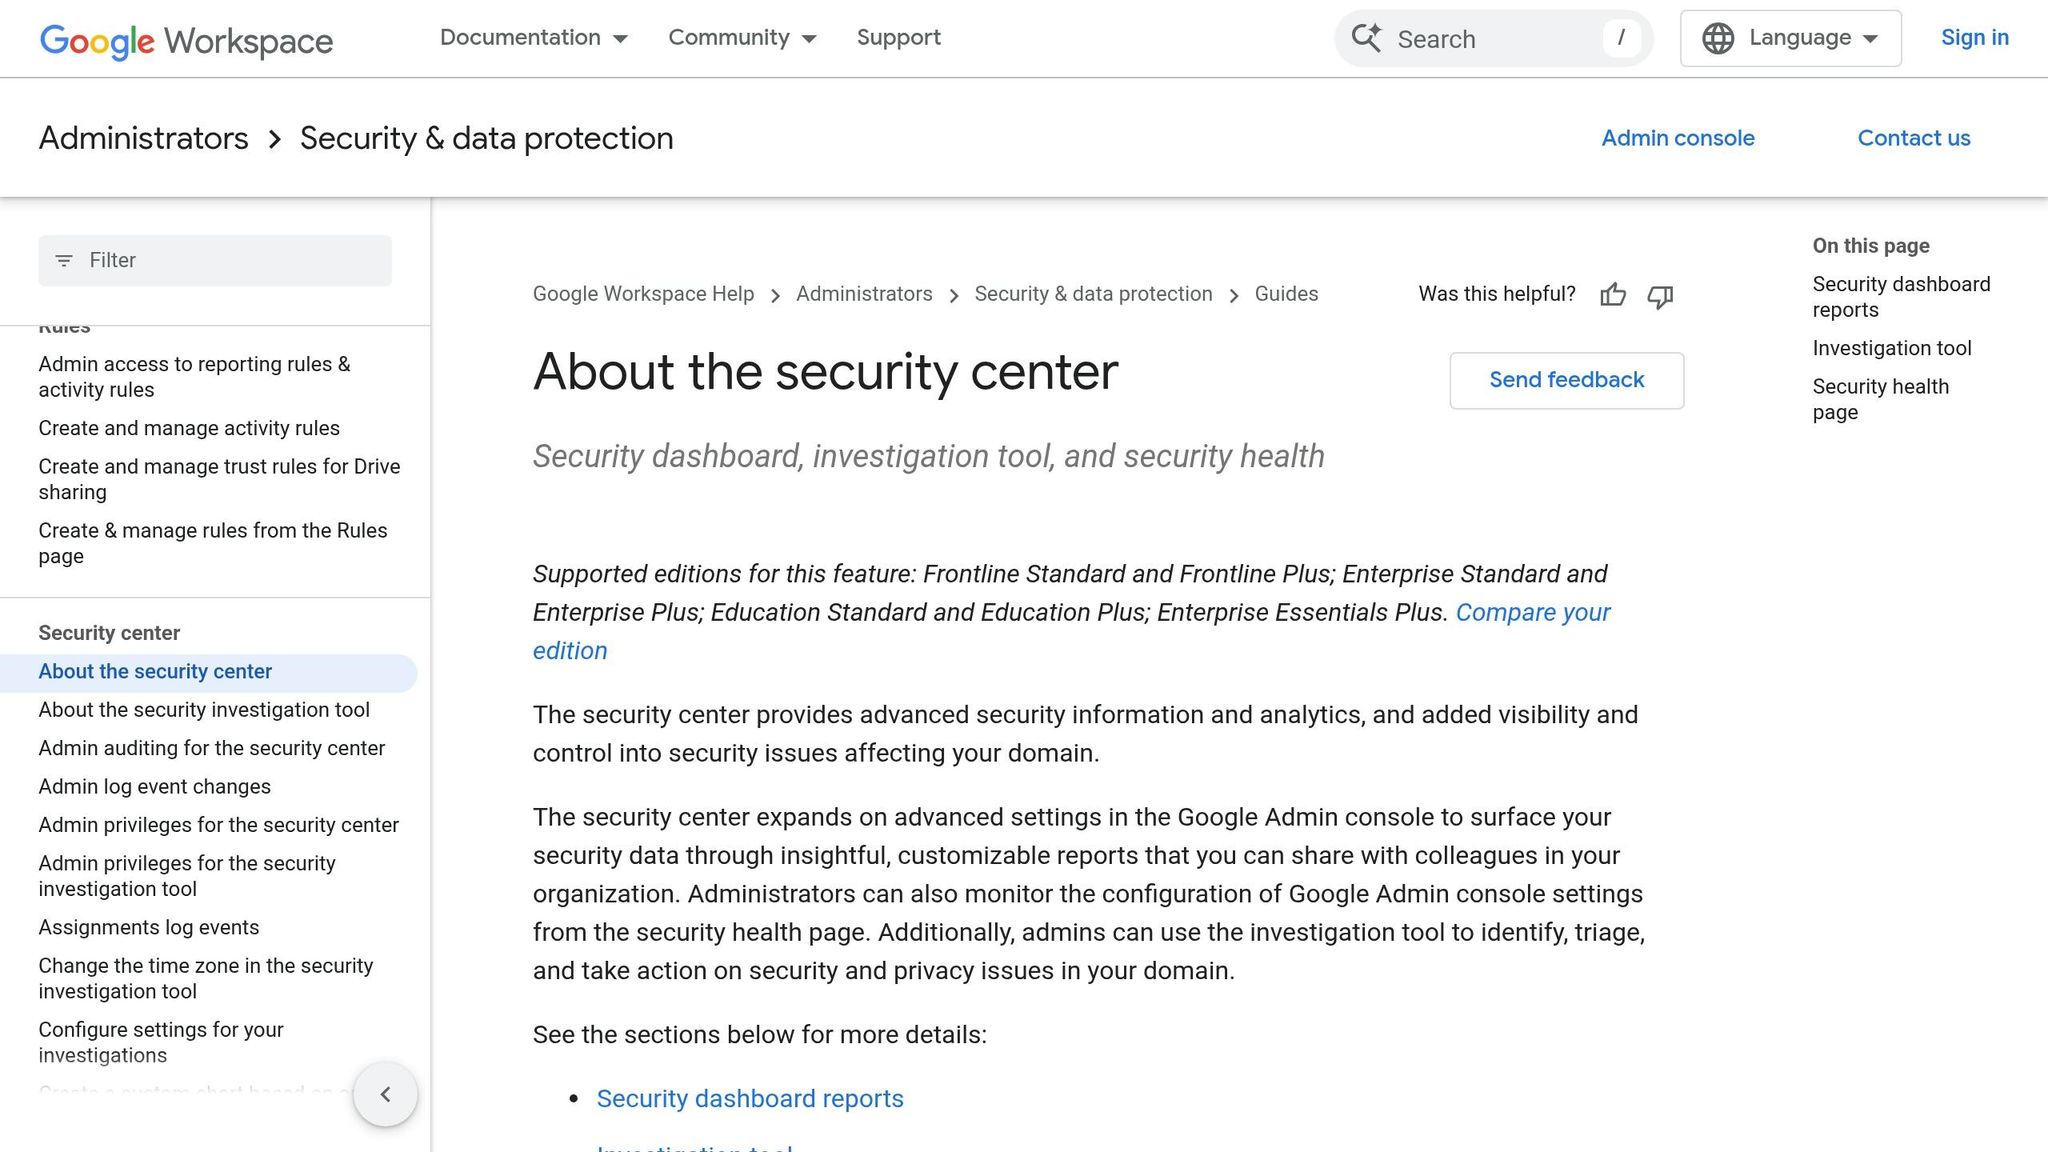
Once you've secured your accounts, it's crucial to keep a close eye on activity across your domain. Google Workspace's Security Center provides three key tools to help you monitor and respond to incidents effectively: the Security Dashboard for detailed reporting, the Security Investigation Tool for incident triage and action, and the Security Health page for keeping tabs on configuration settings, updated every 15 minutes. Together, these tools help you stay on top of potential threats, combining incident response with preventative measures.
During an active incident, the Security Investigation Tool is invaluable. It allows you to dig into Gmail, Drive, and device logs to quickly assess the scope of a phishing attack or other security event. From the same interface, you can take immediate action - such as suspending compromised accounts, resetting passwords, or flagging messages as phishing. A standout feature is the "pivot" function, which lets you connect the dots between related events. For example, you can trace how an unusual IP address is linked to other suspicious activities within your domain.
To prevent issues from escalating, you can set up activity rules that trigger alerts or actions based on specific conditions. For instance, you might configure a rule to suspend an account after five failed login attempts within an hour. To avoid overwhelming your team with notifications, these rules are capped at five alerts per hour. Keep in mind that thresholds apply across your entire domain, so a rule for five failed logins will trigger once the combined count across all users hits that number.
For broader oversight, make it a habit to review Activity Reports regularly. These reports provide detailed data, including login events, Gmail metadata, and OAuth log events that reveal which third-party apps are accessing your organization's data. You can refine your searches by focusing on specific Google Groups - like your executive team or finance department - to zero in on high-risk areas while improving search efficiency. If you need to analyze data outside of Google Workspace, you have the option to export search results, with support for up to 100,000 rows.
The Alert Center serves as a centralized hub for critical notifications, such as leaked passwords, suspicious logins, or malware detections. If you're using Business Plus or Enterprise editions, the VirusTotal integration adds another layer of protection, enabling deeper analysis of alerts to uncover threat relationships and geographical patterns. Lastly, regularly check the Security Health page to ensure your console settings - like email forwarding and Drive sharing - align with best practices. These steps help round out your continuous monitoring and security strategy.
8. Set Up Role-Based Access Control and Drive Permissions
To strengthen your incident response strategy, take control of user roles and file permissions by implementing Role-Based Access Control (RBAC). This approach enforces the principle of least privilege, limiting what users can access and reducing the risk of an attacker moving freely if an account is compromised. In Google Workspace, you can create up to 750 custom roles for your organization, with the ability to assign up to 1,000 roles per organizational unit.
Instead of granting full Super Admin rights, assign custom roles tailored to specific tasks. For example, a "Support Desk Admin" role can handle password resets and basic troubleshooting without unnecessary access to billing or domain settings. Pre-assigning roles ensures that multiple responders are ready to act quickly, minimizing delays during incidents. Just like audit logging, clearly defined roles also make it easier to track admin actions and assign accountability when something goes wrong.
Protect Super Admin Accounts
Super Admin accounts are particularly sensitive because they can bypass Single Sign-On (SSO) and log directly into Google Workspace using only a username and password. To reduce risks, create dedicated Super Admin accounts separate from regular user accounts. These accounts should ONLY be used for administrative tasks. Enforce Multi-Factor Authentication (MFA) for all accounts with administrative privileges - this is non-negotiable for securing high-value credentials.
Centralize and Control Drive Permissions
For better control and visibility, manage file access through Shared Drives, assigning permissions to roles like HR or Finance rather than individual users. This keeps access organized and ensures sensitive data is handled appropriately. In the Admin Console, you can restrict users from sharing files outside your organization for specific units and prevent content from being moved to external shared drives.
"It's easier to expand access than to walk it back after an incident." - Colin McCarthy, Principal Architect of Collaboration Cloud, Promevo
Streamline Permissions with Security Groups
Use security groups to manage admin and Drive privileges, making it easier to conduct audits and adjust permissions as needed. Keep in mind that security groups are capped at 250 role assignments per overall organizational unit and within individual units. To prevent "permission creep", schedule quarterly reviews of the Admin Console. This will help you identify users whose roles have changed and revoke unnecessary access.
9. Configure Security Rules and Data Loss Prevention (DLP)
Data Loss Prevention (DLP) rules are designed to automatically scan files and messages for sensitive information like Social Security numbers, credit card details, or confidential business data. If a violation is detected, DLP can take immediate actions such as blocking external sharing, issuing user warnings, or disabling downloading and printing.
Google Workspace applies these DLP policies across multiple platforms, including Drive, Gmail, Chat, Calendar (beta), and Chrome, ensuring broad protection. When setting up new rules, it's a good idea to start with "audit-only" mode. This logs potential violations without interrupting workflows, giving you the chance to fine-tune the rules and reduce false positives. For quicker setup, you can use predefined templates tailored to common scenarios, like safeguarding HIPAA or PCI data. These DLP configurations work alongside admin alerts and investigation tools, adding an extra layer of defense against data breaches.
For enhanced monitoring, enable Sensitive Content Storage to retain DLP snippets (matched content plus 100 surrounding characters) for up to 180 days. Assigning severity levels - High, Medium, or Low - to each rule helps prioritize risks on your DLP dashboard.
When creating rules, select the "Alert center" option so super administrators are notified immediately. Keep in mind, though, that each DLP rule can generate up to 50 alerts per day. To avoid overwhelming notifications, apply rules to specific groups or organizational units. Log entries typically appear within an hour of the action. These alert practices should align with your incident response strategy to ensure ongoing protection of sensitive data.
Be aware that any changes to DLP settings may take up to 24 hours to fully propagate. After reviewing an incident, you can use the "Remove sensitive content" feature in the investigation tool to delete snippets from logs, reducing the risk of exposing sensitive data to other administrators unnecessarily.
10. Run Incident Simulations and Response Drills
Put your incident response plan to the test by turning theory into action. Regular drills help transform a static set of instructions into a process your team can confidently execute under pressure. With attackers' median dwell time expected to rise to 11 days in 2024, it's critical to ensure your response plan works effectively before facing an actual breach. These drills build on earlier prevention strategies, preparing your team for real-world scenarios.
Start with tabletop exercises that simulate incidents like lost admin credentials, ransomware attacks, or service outages during off-hours. Assign specific roles before each drill, such as an Incident Lead, Communications Owner, IT Operators, and Compliance Contact. Use tools like a shared Google Doc to clearly define and communicate these roles.
"Plans look good on paper, but you only know their strength when you test them. That's why regular drills should be part of your incident response strategy."
– John Pettit, CTO, Promevo
In early 2026, Google Developers introduced a tutorial for an automated incident response system using Google Chat, Vertex AI, and Apps Script. This system can simulate incidents triggered via a web page, automatically create a Chat space, add responders through the Admin SDK, and use Vertex AI to summarize the entire interaction into a Google Doc post-mortem. These tools allow for end-to-end drills, testing both human and automated workflows.
After each drill, review the logs as part of your ongoing monitoring efforts (refer to Section 7). Store response templates and procedures in a Shared Drive with restricted editing permissions, and use AI tools to analyze and summarize bottlenecks. Incorporating these insights into a continuous improvement plan can refine your readiness. Solutions like AdminRemix (https://adminremix.com) can also centralize runbooks and enhance team collaboration during drills.
Finally, schedule regular forensic acquisitions to validate your response protocols. Conduct these acquisitions at least every six months across workstations, servers, and cloud assets to ensure your evidence preservation and chain of custody processes remain reliable.
Conclusion
Managing incidents effectively in Google Workspace hinges on acting quickly, maintaining visibility, and exercising control. Swiftly suspending compromised accounts, setting up admin alerts, and utilizing the Investigation Tool for quick, point-and-click solutions can transform potentially chaotic situations into manageable ones. The Investigation Tool, for example, can cut resolution times down from hours to minutes. For deeper analysis, Enterprise editions allow the export of up to 30 million rows of log data. Together, these tools and strategies create a cohesive approach to incident response.
Centralizing communication through Google Chat spaces and the Security Center ensures all team members stay updated in real time, avoiding the inefficiencies of scattered communication channels. Additionally, using tools like Apps Script and Vertex AI minimizes administrative overhead. Features like DLP rules, role-based access controls, and regular incident drills round out a solid framework for incident management.
During active investigations, bulk metadata management becomes a crucial element. Tools such as AdminRemix's User Getter (https://adminremix.com) allow administrators to quickly pull detailed user and permission data across large environments. This is particularly useful for assessing the scope of phishing attacks or identifying compromised accounts. Over 350 IT teams rely on AdminRemix to protect their data. Pauline McGinnis from Kipp Indy Public Schools shared how this tool has streamlined their processes: "The inventory takes less time and we can retrieve data instantly". This ability to manage metadata at scale complements the other rapid-response tools available.
Beyond addressing immediate threats, these practices help establish long-term security and compliance. Predefined roles replace reactive scrambling with clear, decisive actions, while comprehensive audit trails ensure proper documentation for compliance checks and post-incident reviews. By adopting these strategies, your organization can respond to incidents with speed and precision, ensuring robust protection across Google Workspace services.
FAQs
When should I suspend a user vs reset their password?
To temporarily block access to services like Gmail and Drive without deleting a user's data, you can suspend their account. This approach is helpful in cases of security concerns, policy breaches, or ongoing investigations. On the other hand, resetting a password is a way to restore access after a user loses their credentials or their account is compromised. While suspension prevents access entirely, resetting a password allows access again - unless combined with other restrictions.
How do I choose which Google Workspace alerts to enable without alert fatigue?
To prevent your team from experiencing alert fatigue, focus on enabling alerts that align closely with your organization’s security and operational priorities. Start by reviewing active alerts and their severity levels to pinpoint those that demand immediate action. Use activity rules to customize notifications, filtering out low-impact alerts that don't require attention. Regularly fine-tune your settings to ensure critical issues are highlighted while cutting down on excessive notifications. This way, your team can stay informed and focused without feeling overwhelmed.
What’s the fastest way to find and remove a phishing email from everyone’s inbox?
The fastest way to get rid of a phishing email in Google Workspace is through the Security Investigation Tool in the Admin console. This feature allows you to locate all affected users and remove the email in one go.
How to do it:
- Open the Security Investigation Tool in the Admin console.
- Use filters like subject, sender, or message ID to search Gmail log events.
- Bulk delete the phishing email from all impacted inboxes.
This method ensures the email is swiftly removed, minimizing risks for your organization.