
Chromebook Zero-Touch Enrollment: Setup Steps
Chromebook zero-touch enrollment starts before the first boot - not at the sign-in screen. I use 3 checks to plan setup: confirm device support and reseller pre-provisioning, prepare policies and internet access, then verify enrollment before handoff.
Here’s what I check:
- Before delivery: Confirm model support, licenses, and admin access. Select the organizational unit (OU), generate a token, and have the approved partner register the devices using that token and the Google customer ID.
- At first boot: Have OU policies ready and connect through Wi-Fi or Ethernet so enrollment can finish. ChromeOS Flex does not support zero-touch enrollment.
- Before handoff: Verify each serial number, enrollment status, OU, and applied policies. Resolve failed enrollments, then record asset assignments, OS versions, and update expiration dates.
My rule: <u>test a small batch before the full rollout</u>. A pre-provisioned record confirms preparation - not completed enrollment.
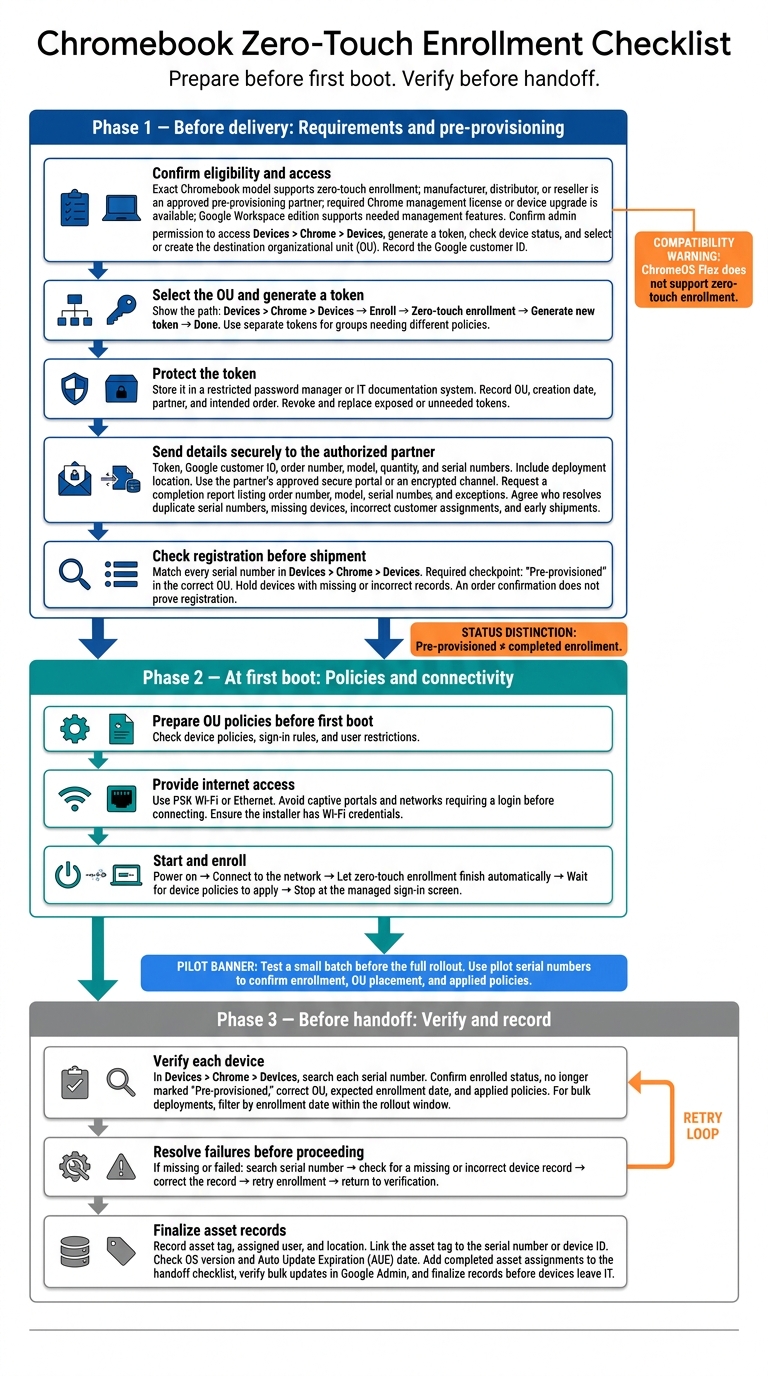
Chromebook Zero-Touch Enrollment Checklist
Step 1: Check Requirements and Arrange Pre-Provisioning
Check Device Support and Management Access
Before placing an order, confirm that the exact Chromebook model supports zero-touch enrollment and that the manufacturer, distributor, or reseller is an approved pre-provisioning partner. Check that each Chromebook has the required Chrome management license or device upgrade, and that your Google Workspace edition supports the management features you need. ChromeOS Flex devices do not support zero-touch enrollment.
Use an admin account with permission to access Devices > Chrome > Devices, generate a pre-provisioning token, and check device status. Confirm that you can select or create the destination organizational unit (OU). Also, record your organization’s Google customer ID - the authorized partner needs it along with the token.
Once you’ve confirmed eligibility and access, generate the token in Google Admin.
Select an Organizational Unit and Generate a Token
In Google Admin console, go to Devices > Chrome > Devices, click Enroll, choose Zero-touch enrollment, and select Generate new token. Follow the prompts, then click Done. Use separate tokens for groups that need different policies.
Store the token in a restricted password manager or IT documentation system. Record its OU, creation date, partner, and intended order. If the token is exposed or no longer needed, revoke it and replace it.
Send Provisioning Details to the Authorized Partner
Send the token, Google customer ID, order number, model, quantity, and serial numbers through the partner’s approved secure portal or an encrypted channel. Include the deployment location and request a completion report with the order number, model, serial number, and any exceptions.
Agree in advance on who will resolve duplicate serial numbers, missing devices, incorrect customer assignments, or early shipments.
Before shipment, match each serial number in Devices > Chrome > Devices. Confirm that every device shows Pre-provisioned in the correct OU. Hold any device with a missing or incorrect record - an order confirmation does not prove registration.
sbb-itb-c68f633
Step 2: Prepare Policies and Complete First Boot
Set Device Policies in Google Admin
After pre-provisioning, check the target OU’s device policies, sign-in rules, and user restrictions in Google Admin. Confirm these settings before first boot.
Prepare Internet Access for Enrollment
Use PSK Wi-Fi or Ethernet for first boot. Avoid captive portals and networks that require a login before connecting. Have the network ready so enrollment can run automatically when you start the Chromebook.
Start the Chromebook and Complete Enrollment
Power on the Chromebook and connect it to the network. Let zero-touch enrollment finish automatically, then wait for device policies to apply. Stop when the managed sign-in screen appears.
Step 3: Verify Enrollment and Fix Issues
Verify the Device Record and Policies
After the first boot, check that the device completed enrollment and landed in the correct organizational unit (OU). Go to Devices > Chrome > Devices and search for each serial number. Confirm that the device is enrolled, is no longer marked Pre-provisioned, and has the expected OU and enrollment date. For bulk deployments, filter by enrollment date to find devices enrolled during the rollout window.
Troubleshoot Missing or Failed Enrollment
If a device is missing or enrollment fails, search for its serial number in Admin Console. Check for a missing or incorrect device record, correct it, and then retry enrollment.
Update Asset Records After Enrollment
Once enrollment is confirmed, record the asset tag, assigned user, and location. Link each asset tag to the Chromebook’s serial number or device ID. Before handoff, check the OS version and Auto Update Expiration (AUE) date.
Chrome Enterprise: Getting started with zero-touch enrollment for Chrome OS
Conclusion: Check Readiness Before Device Handoff
Before deployment day, check that the model, OU, token, pre-provisioning, policies, and network access are ready for first boot. Make sure the installer has the Wi-Fi credentials.
Test a small batch before the full rollout. Use pilot serial numbers to check the enrollment workflow, confirm OU placement, and verify that policies apply.
Add completed asset assignments to the handoff checklist. Then verify bulk updates in Google Admin and finalize asset records before devices leave IT.
FAQs
Can I use zero-touch enrollment for Chromebooks I already own?
No. Zero-touch enrollment is for new Chromebooks purchased through authorized enterprise resellers or Google partners. Before delivery, these partners must register the devices using your organization’s Customer ID and enrollment token.
It isn’t suitable for re-enrolling older devices or devices that weren’t registered through these channels at purchase. For existing devices, use another method, such as manual enrollment with barcode scanning.
What happens if internet access drops during enrollment?
If internet access drops during zero-touch enrollment, setup pauses. The device needs an active connection to communicate with Google, download policies, and finish its configuration.
The device stays pre-provisioned until the connection returns and enrollment can finish. Check that your network connection is stable before starting setup.
How do I fix enrollment into the wrong OU?
If a device enrolls in the wrong Organizational Unit (OU), move it to the correct OU in the Google Admin console.
For bulk updates, use AdminRemix’s Chromebook Getter to pull device metadata into a Google Sheet. Filter for devices in the wrong OU, update the orgUnitPath column, and use Set Chromebooks to sync the changes back to the Admin console.