
5 Steps for IT Asset Inventory Reconciliation
If your asset records don’t match, you can’t trust what you own, where it is, or who has it. And that’s a problem when first-time audits often find 5% to 15% of records are off.
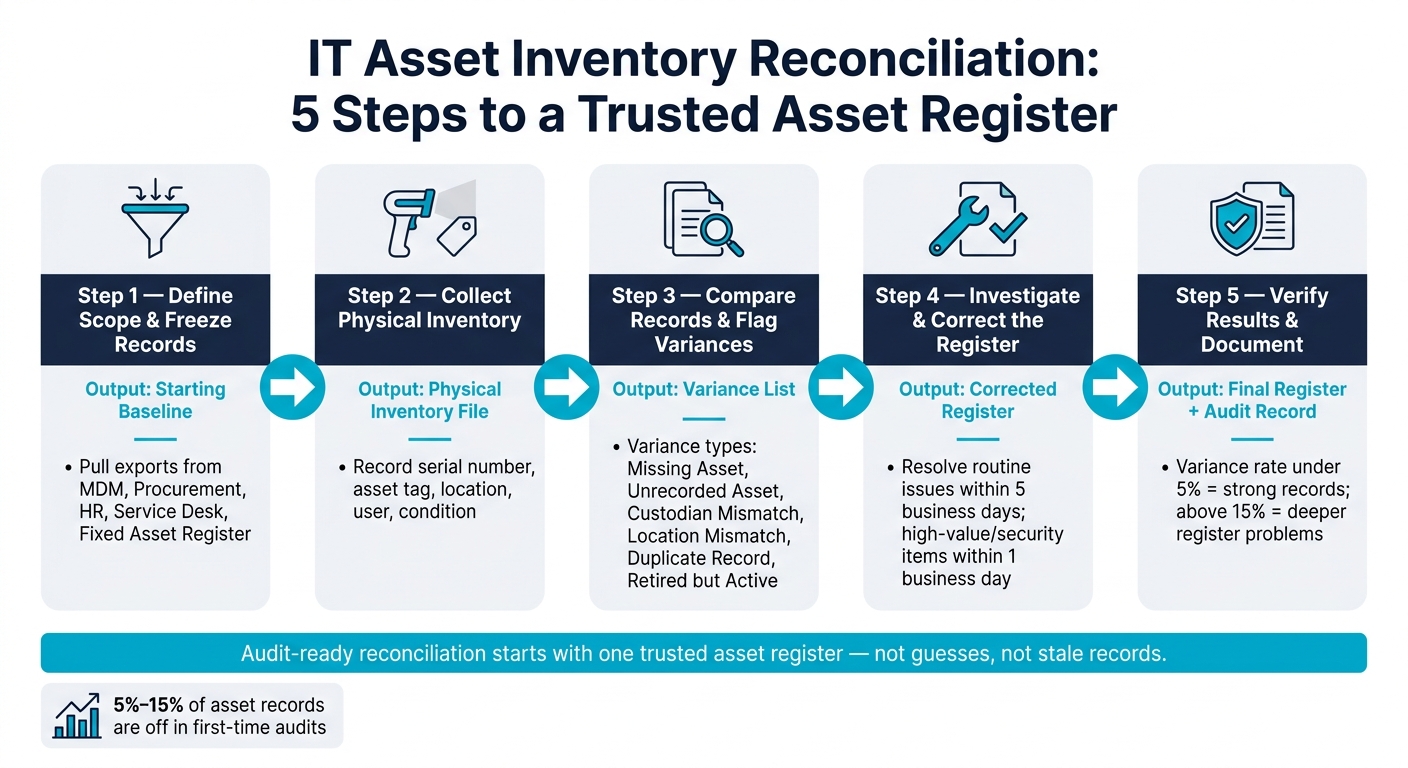
I’d sum up the process like this: set a fixed scope, freeze your source data, count what’s there, flag every mismatch, fix records with proof, and close with a clean register plus a variance log. That gives you one record your IT, HR, and finance teams can use without guessing, as part of a robust IT asset management strategy.
Here’s the full flow in plain English:
- Step 1: Set the scope by asset type, site, or team, then pull exports from MDM, procurement, HR, service desk, and fixed asset records.
- Step 2: Count devices in the field and record serial number, asset tag, location, user, and condition.
- Step 3: Match physical data to system records and sort gaps into clear variance types like Missing Asset, Unrecorded Asset, and Custodian Mismatch.
- Step 4: Check tickets, disposal logs, handoff records, and purchase data before making any change.
- Step 5: Confirm each issue is either resolved or marked for follow-up, then save the final register and reconciliation record.
The goal is simple: one asset register with a clear audit trail. Not guesses. Not stale records. Not duplicate devices on paper.
A fast way to think about it:
| Step | What I’m Doing | Output |
|---|---|---|
| 1 | Set scope and freeze records | Starting baseline |
| 2 | Count devices and gather field data | Physical inventory file |
| 3 | Compare records | Variance list |
| 4 | Check cause and update records | Corrected register |
| 5 | Review and document results | Final register + audit record |
If I were starting this process, I’d focus on one site or one asset class first, use serial numbers as the main match key, and treat anything unclear as under review until I had proof.
IT Asset Inventory Reconciliation: 5-Step Process
IT Inventory Management Explained under 8 MINUTES
sbb-itb-c68f633
Step 1: Define the Scope and Pull Your Starting Records
Set the inventory scope before you start gathering data. This step gives you the reconciliation baseline, which is the fixed point you'll use to judge everything that comes next.
Decide Which Assets and Sites to Include
Start by deciding which asset types belong in this cycle. That can include laptops, desktops, servers, network gear, printers, and specialized endpoints. Leave out peripherals and consumables unless your policy says they must be tracked.
Then lock down the locations. Asset category matters, but location matters just as much. Are you counting headquarters, branch offices, data centers, or remote and hybrid-user home offices? Decide that up front.
If this is your first pass, keep it tight. Focus on one site, one department, or one asset class. That smaller boundary makes mistakes less likely and gives you a cleaner starting point.
Once the scope is fixed, pull only the records that fall inside that inventory boundary.
Gather the Records You Need Before You Start
A strong reconciliation baseline usually comes from five source systems: your discovery or MDM system, procurement records, HR and identity data, service desk history, and the fixed asset register. Each one fills in a different part of the picture.
| Record Layer | Primary Data to Pull | Typical Owner |
|---|---|---|
| Discovery / MDM | Serials, hostnames, OS version, last-seen timestamps | Endpoint / Security |
| Procurement | PO numbers, vendor info, acquisition date, original cost | Finance / Purchasing |
| HR / Identity | Employee status, department, manager, cost center | HR |
| Service Desk | Swap history, loaner logs, repair records, return status | IT Support |
| Fixed Asset Register | Capitalization status, depreciation class, book value | Finance / Accounting |
Before you begin, identify the fields that connect those sources: serial numbers, asset tags, fixed asset IDs, hostnames, and PO or receipt references. Then pull one controlled export from each source at the same time.
That timing matters. If one system export is from Monday and another is from Thursday, you're already comparing moving targets.
Next, decide which system is the source of truth for each field before you start matching records. If a record has no recent activity or no last-seen data, flag it for review instead of treating it as baseline fact. In Step 3, you'll compare these source extracts directly against each other.
Once those extracts are frozen, you're ready to check each asset against the physical inventory.
Assign Roles and Pause Nonessential Asset Moves
Set clear ownership from the start. A simple RACI works well here: IT owns operational truth, Finance owns capitalization and reporting, and HR manages user-assignment data.
There's also one rule that's easy to overlook and well worth following:
don't let staff audit their own department
After roles are assigned, put a freeze on nonessential asset movement during the count window. That means pausing check-ins, check-outs, bulk edits, and reassignments. It keeps the baseline steady and helps preserve audit control while the reconciliation is in progress.
With roles in place and asset activity paused, move on to gathering the physical inventory and system data.
Step 2: Collect Physical Inventory and System Data
With your scope set and nonessential asset moves on hold, it’s time to gather the data that matters. In this step, you’re working with two sets of information: what your team finds on-site and what your systems say you should have.
Use the frozen exports from Step 1 as your system baseline. Start there, then layer in the physical count.
Verify Assets Using Tags and Serial Numbers
During the physical count, record at least these details for each asset:
- asset tag
- serial number
- current physical location
- current user or custodian
- condition: excellent, good, fair, or damaged
Use the serial number as your main identifier. It’s assigned by the manufacturer and is harder to change than an asset tag.
If a tag is missing or unreadable, photograph the serial plate and keep moving. Treat that item as an unregistered asset and flag it for labeling after the count closes. Once the asset is added to the register, print and apply a new label right away.
Here’s a simple field tip that saves time: use the two-person rule during the walkthrough. One person reads the details out loud, and the other records them. It’s twice as fast and cuts down on errors in a big way.
Standardize Fields Before You Compare
Raw data from different systems almost never lines up neatly. Manufacturer names may differ. Location codes may follow different formats. Status labels and user names can vary too. If you compare data before cleaning that up, you’ll end up chasing mismatches that aren’t real.
Standardize the fields first.
| Data Field | Matching Requirement | Primary Source Owner |
|---|---|---|
| Serial Number | Must match exactly | Discovery / Receiving |
| Asset Tag | Must match exactly | ITAM / Asset Team |
| Model / Manufacturer | Map logically (normalize names) | ITAM / CMDB |
| Location | Map to agreed hierarchy | IT + Finance |
| Lifecycle Status | Map via translation table | ITAM / CMDB / Finance |
| Assigned User | Map to HR directory | ITAM / HR |
Pay close attention to Lifecycle Status. A device marked "Disposed" in the fixed asset register that shows up "Active" during the physical count is a high-priority flag - not just a formatting issue.
Once the field names and values line up, the records are ready to compare.
Use AdminRemix to Organize Reconciliation Data
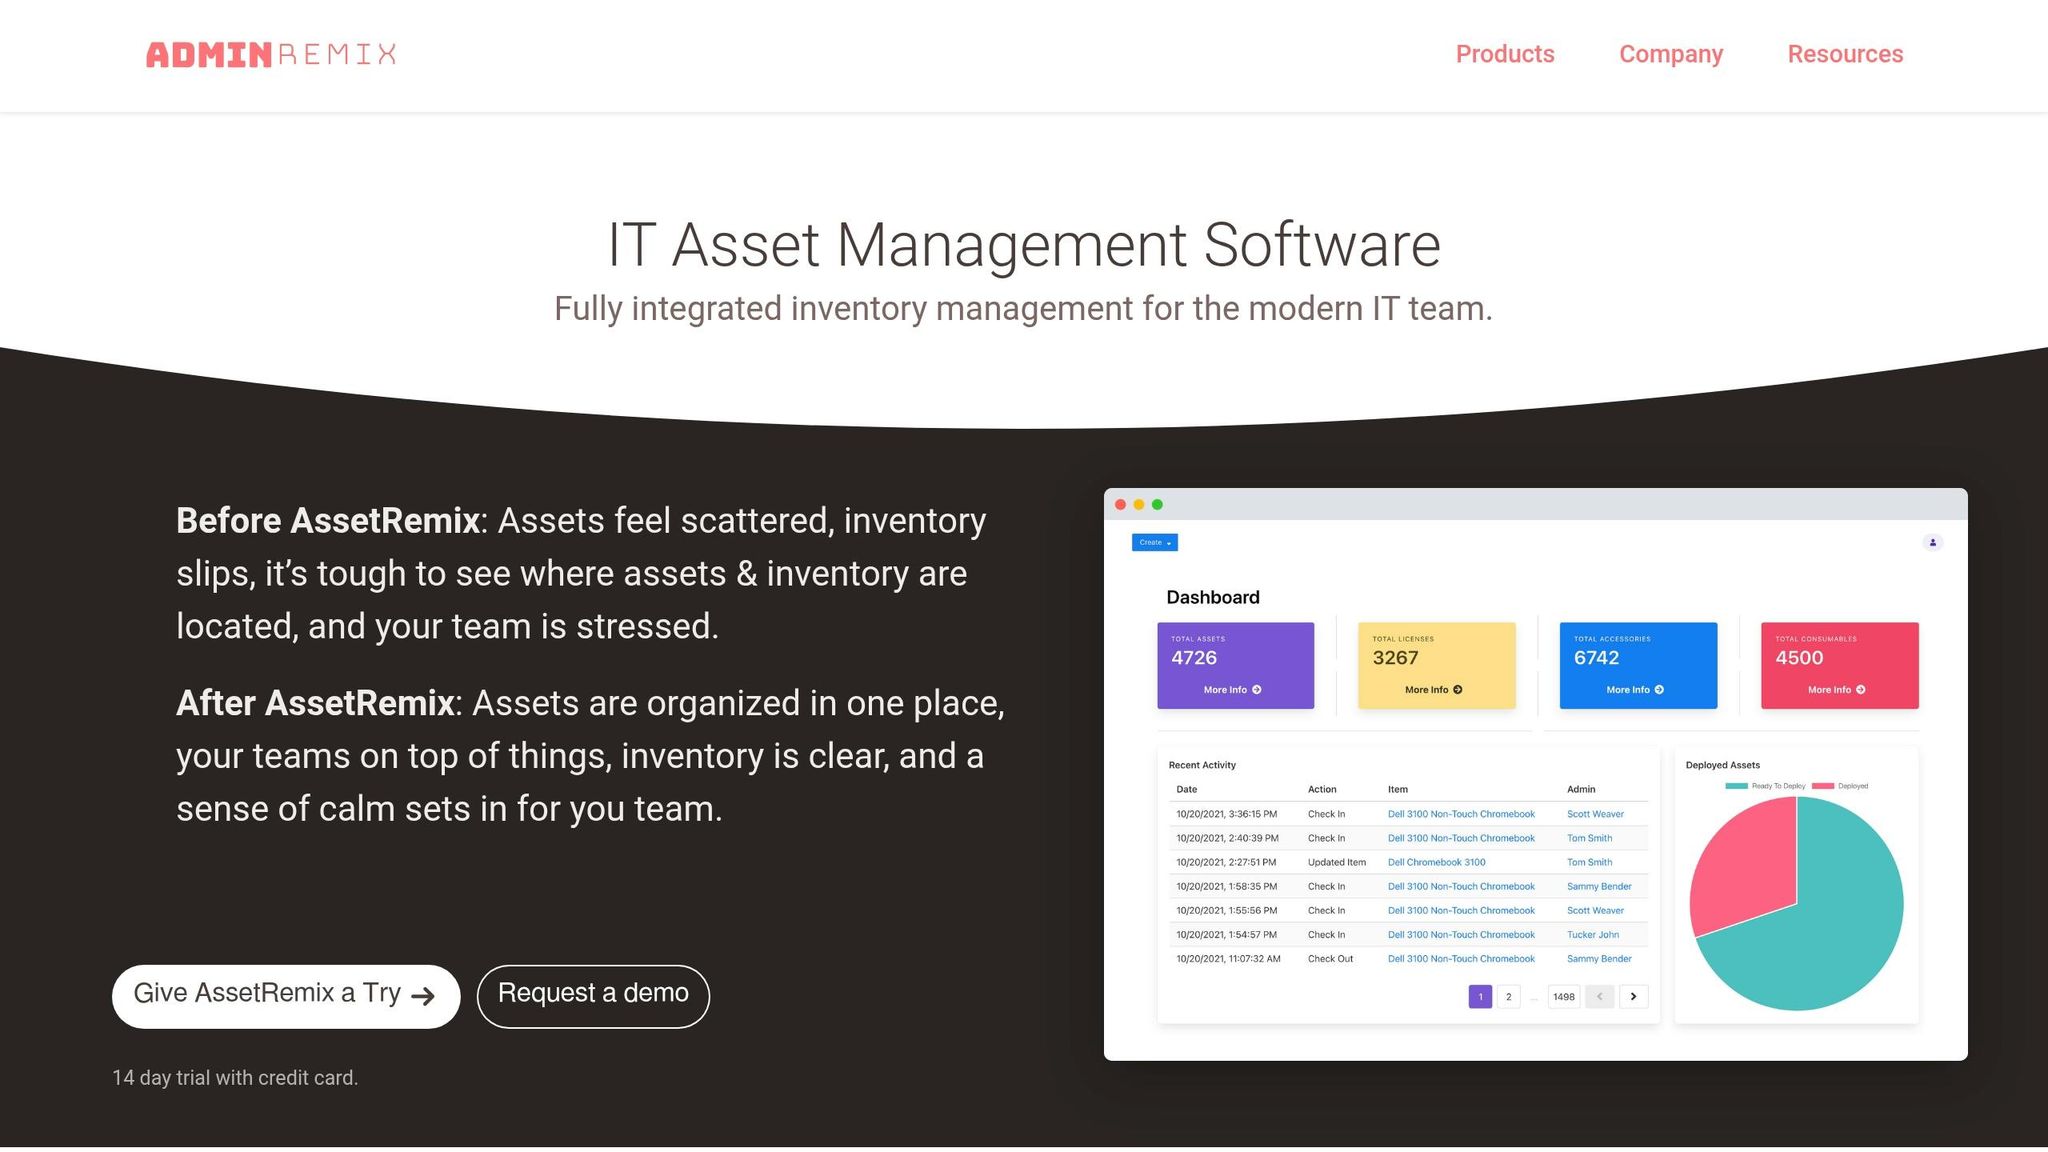
Put the standardized files into one workspace so your team isn’t bouncing between folders, spreadsheets, and exports. AdminRemix's AssetRemix centralizes count sheets and system exports for comparison.
With both data sets standardized and centralized, compare each asset in Step 3.
Step 3: Compare Records and Flag Variances
Now that your exports and physical count data use the same format, compare each asset record against the register and flag every mismatch.
Match Each Asset to Its Register Entry
Start with the serial number. The asset tag is the main ID in the register. After you find a strong match, check the assigned user, physical location, and lifecycle status.
If the serial number is missing or doesn't line up, use the hostname, custodian, PO or receipt, and location to confirm the match. If the asset tag matches but the serial does not, set the record aside for review instead of forcing a merge.
Group Discrepancies by Type
Put mismatches into fixed exception types so your team can review similar issues together. The top-priority exceptions are Retired but Active and Duplicate Record, because they can point to audit and security issues.
| Variance Type | What It Means |
|---|---|
| Retired but Active | Marked retired or disposed in the register, but found active in discovery |
| Missing Asset | In the register, but not found physically |
| Unrecorded Asset | Found physically, but no register entry exists |
| Duplicate Record | Multiple active records appear to refer to the same device |
| Custodian Mismatch | The person using the device does not match the assigned user |
| Location Mismatch | The device is in a different site or room than recorded |
| Status/Condition Mismatch | The physical condition or status does not match what the register shows |
Variance Review Table
Log each variance in a table. This keeps the comparison easy to scan and gives the team a shared reference for Step 4:
| Asset ID | Physical Count Result | System Record Result | Variance Type |
|---|---|---|---|
| AST-102 | Serial: SN123 / User: J. Doe | Serial: SN123 / User: M. Smith | Custodian Mismatch |
| AST-105 | Not Found | Status: Active / Loc: Room 302 | Missing Asset |
| NEW-001 | Serial: SN999 / Loc: Room 101 | No Record Found | Unrecorded Asset |
| AST-110 | Serial: SN456 / Loc: Room 205 | Serial: SN456 / Loc: Room 404 | Location Mismatch |
| AST-115 | Status: Damaged (Broken Screen) | Status: Excellent | Status/Condition Mismatch |
Use fixed variance categories instead of free-text notes. Consistent labels make it easier to sort, filter, and assign follow-up work by type. Use these same variance labels in Step 4 to trace the cause and update the register.
Step 4: Investigate Discrepancies and Correct the Asset Register
Use the Step 3 variance table to pin down the cause of each mismatch before you change the register. Go one variance at a time. Until the cause is confirmed, leave the register as-is.
Trace Each Discrepancy to a Specific Cause
For every flagged item, review the records that explain what happened: tickets, handoff logs, approval records, disposal logs, exit checklists, repair tickets, and purchase orders.
A Missing Asset often points to theft, an unreported disposal, or an informal transfer. A Location Mismatch may mean the device was moved without a record update, or there’s an IP/subnet mapping error. A Duplicate Record can come from a failed device swap process or a bad data import.
For missing user-assigned devices, review recent offboarding activity and contact the last known custodian to confirm whether an undocumented handoff took place. For assets that appear in the register but weren’t found on-site, use a 30- to 60-day investigation window to verify whether the item is with a repair vendor or was transferred informally before moving to a formal write-off request.
Recheck Uncertain Items Before Updating Records
If the evidence doesn’t clearly settle the issue, recheck the item in person instead of editing the register on partial information. Mark uncertain items as "Missing - Under Investigation" and assign a clear owner for follow-up.
Start with identity: verify the serial number and asset tag. Then confirm assignment and location. If identity is wrong, stop there and reclassify the record.
When you rescan serial number plates, take a photo instead of copying the number by hand. That cuts down on simple mistakes, like mixing up "0" and "O" or "5" and "S". Check high-risk conflicts right away and close them within 24 hours.
Log Every Correction With an Audit Trail
Never delete a record without a trace.
Once you’ve confirmed the root cause, update the register and document the change at the same time. Log:
- the change made
- the date
- the approver
- the evidence link
That evidence might be a disposal certificate, return log, purchase order, or user acknowledgment form.
If an asset still can’t be found after the investigation window ends, move it through a formal write-off request using the same approval chain as a purchase. Resolve routine discrepancies within 5 business days. For high-value or security-sensitive items, resolve them within 1 business day.
Once corrections are logged, Step 5 checks the final register against the reconciled inventory.
Step 5: Verify the Final Results and Document the Reconciliation
Once the fixes are logged, do one last pass to make sure the register lines up with the inventory you verified. Then document what happened so the next cycle starts from a clean baseline.
Confirm the Register Matches Verified Inventory
Run a final review of the register and check that every variance has a clear status. Each item should be either resolved or clearly marked for follow-up. Resolved items should show no open mismatch. Items that still need work should use a controlled status like "Missing - Under Investigation" or another approved exception label.
Give extra attention to high-risk open exceptions. If any are still hanging out there, they should be fixed or moved into a managed exception queue with an assigned owner before the cycle is closed. As a rule of thumb, rates under 5% point to strong record-keeping, while rates above 15% suggest deeper register problems.
Record the Date, Scope, and Results
Write up the reconciliation clearly enough that someone new to the process could read it and understand what was checked. At a minimum, include:
- The reconciliation date
- The sites or departments included, the asset categories covered, and any stated exclusions
- Total assets reviewed and total variances found
- How many were resolved and how many are still open
- The resolution status for each variance category
This summary becomes the reference record for IT, finance, and audit. Publish the reconciled register on a regular cadence so you keep a current golden record.
Use that record as the baseline for the next reconciliation.
Note Recurring Issues for Future Improvement
Look for patterns, not just one-off problems. If the same causes keep showing up, like offboarding gaps or repeated location mismatches, flag them.
Add those findings to a short lessons-learned note linked to the reconciliation record. Then use them to update procedures and SLA targets for the next cycle.
Feed those patterns into the next reconciliation plan.
Conclusion: The Five Reconciliation Steps in Review
The Five Steps at a Glance
Each step leads into the next. After Step 5, the process starts again for the next reconciliation cycle.
It moves in a clear sequence: scope setting, data collection, comparison, correction, and final verification. And it all points to one outcome: a trusted asset register.
Why a Repeatable Process Pays Off
A one-time cleanup helps, but it won’t last on its own. Reconciliation needs to happen again and again if you want the register to stay lined up with actual asset movement.
That matters more than it may seem at first. Small gaps don’t stay small for long. Unmanaged devices can turn into security blind spots, while misrecorded assets can throw off financial data.
Running the same five steps on a fixed schedule helps stop that drift before it grows. It also builds an audit-ready history that supports internal control reporting and asset management frameworks.
FAQs
How often should IT asset reconciliation be done?
It depends on the asset type and your organization’s policies. As a general rule, review critical queues weekly and publish a reconciled register monthly.
For portable, user-assigned assets like laptops, use a tighter schedule. Quarterly audits are often the minimum, and high-movement items may need monthly checks or more frequent spot checks.
What if an asset has no tag or serial match?
Hold the asset for review. In some cases, the issue comes down to a re-tagging mistake or a simple data-entry error.
If the serial number doesn’t match any record, or the asset has no tag at all, dig a little deeper to check for missing tags or gaps in the data.
If you still can’t match or verify the asset, flag it as missing or unconfirmed and document the issue so the inventory record stays accurate.
Who should own the reconciliation process?
The reconciliation process needs one clear owner. That person or team is responsible for keeping IT asset records accurate, consistent, and trustworthy.
That ownership can sit with whoever is closest to the asset lifecycle. In many companies, that means ITAM, the service desk, procurement, finance, or a dedicated asset manager.
The main point is simple: someone has to be accountable. They should own updates, handle verification, and be able to explain each record when questions come up.