
How to Manage Chromebooks at Scale with Google Sheets
Managing large Chromebook fleets can be overwhelming, especially with the limitations of the Google Admin Console. Bulk operations, detailed reporting, and accurate tracking often become time-consuming and inefficient. This article explains how Google Sheets, combined with tools like AdminRemix's Chromebook Getter, can simplify Chromebook management by enabling bulk edits, real-time collaboration, and automated workflows. Here's what you'll learn:
- Challenges with the Google Admin Console: Limited search, reporting, and bulk operation capabilities.
- Benefits of Google Sheets: Flexible data organization, cloud-based accessibility, and instant updates.
- AdminRemix Tools: Chromebook Getter streamlines bulk edits, device moves, and report generation.
- Step-by-Step Guidance: Exporting data, creating a structured inventory, and automating tasks.
Google Sheets offers a practical way to manage Chromebook fleets efficiently, ensuring accurate tracking and streamlined collaboration while saving time for IT teams.
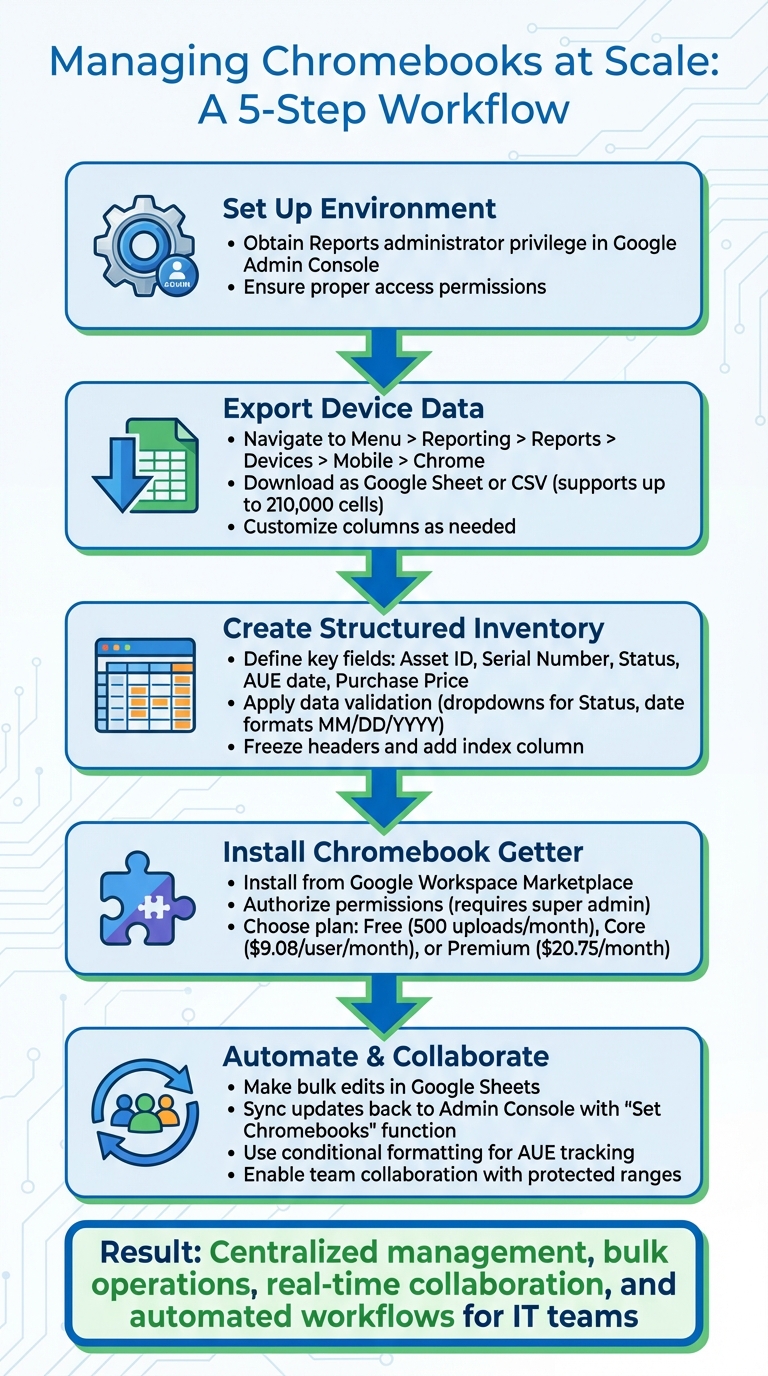
5-Step Process for Managing Chromebooks at Scale with Google Sheets
Setting Up Your Environment for Chromebook Management
Required Permissions in Google Admin Console
To get started, make sure you have the Reports administrator privilege in your Google Admin console. This permission is essential for accessing device reports and exporting the data you'll need for your Google Sheets workflow. If you're unsure about your access level, check in with your super admin.
How to Export Chrome Device Reports to Google Sheets
To export Chrome device reports, follow these steps in the Google Admin console:
- Go to Menu > Reporting > Reports > Devices > Mobile, then select Chrome to access the device reports.
- To customize the report, click on Manage Reports, adjust the columns as needed, and click Save.
- Once ready, click the Download icon, select the columns you want, and choose either Google Sheet or CSV format. Then, click Download.
Keep in mind that the export feature supports up to 210,000 cells, with row limits that depend on the number of selected columns.
Creating a Standard Data Schema for Chromebook Data
When managing a large number of devices, having a clear and organized data schema is crucial. Start by defining key fields such as:
- Asset ID
- Serial Number
- Status
- Auto Update Expiration date
- Purchase Price (in USD)
You can also include optional fields like Release Channel.
Stick to a consistent naming convention, like camelCase or underscores, and avoid spaces or special characters. Dates should follow the MM/DD/YYYY format, and currency should be displayed as $X,XXX.XX. To keep your data clean, set up validation rules. For example:
- Use dropdown lists for the Status field (e.g., "Active", "In Repair", "Retired", or "Lost").
- Restrict date columns to proper date formats.
- Ensure price fields only accept numeric values.
For better usability, freeze the header row, bold the header text, and add a numeric index column. This ensures that your data remains easy to sort and manage, even after edits.
With your permissions in place, reports exported, and a well-structured data schema, you're all set to manage your Chromebook inventory efficiently in Google Sheets.
How to use Macros in Google Sheets | Tips and Tricks Episode 23
Creating a Chromebook Inventory in Google Sheets
This section walks you through setting up and fine-tuning a Chromebook inventory using Google Sheets.
How to Structure Your Master Inventory Sheet
Start by organizing your sheet with clear column headers in the first row. These headers should include key details like serialNumber, deviceId, annotatedAssetId, and model. To make your inventory more functional, add fields for orgUnitPath, annotatedLocation, and annotatedUser - these help track where and with whom devices are deployed. For lifecycle tracking, include columns such as status, lastSync, lastEnrollmentTime, supportEndDate, and notes.
To make navigation easier, freeze the header row and the first few identifier columns (e.g., columns A through E) so they stay visible when scrolling through large datasets. Adding a numeric index column on the far left can help maintain proper sorting.
Using Data Validation to Improve Accuracy
Data validation is a great way to keep your inventory accurate and consistent. For instance, you can create dropdown menus for the Status column with options like "Active", "In Repair", "Retired", and "Lost." Set these dropdowns to reject invalid entries outright, ensuring cleaner data.
To prevent duplicate entries, use a custom formula like =COUNTIF(A:A, A1)=1. For fields like asset tags, enforce specific patterns using REGEXMATCH formulas - for example, requiring all tags to start with "CB-".
With these validations in place, you'll find it much easier to apply filters and formulas to your data.
Applying Filters and Formulas for Better Tracking
Once your data is structured and validated, you can use filters and formulas for efficient inventory tracking. Highlight your data range and go to Data > Create a filter. You can also set up filter views for different needs, such as "Devices Needing Refresh" or "Chromebooks in Repair", so team members can switch between views without disrupting others' work.
For quick calculations, functions like SUMIFS are incredibly useful. For example, to count active Chromebooks in a specific organizational unit, you can use a formula like:
=SUMIFS(quantity_column, OU_column, "Sales", status_column, "Active")
For more advanced reporting, the QUERY function is a game-changer. It allows you to group and summarize data by columns like model, organizational unit, or status. Sorting your sheet by key columns such as orgUnitPath or status can help you quickly identify trends or issues within specific groups.
Managing Chromebooks at Scale with Chromebook Getter
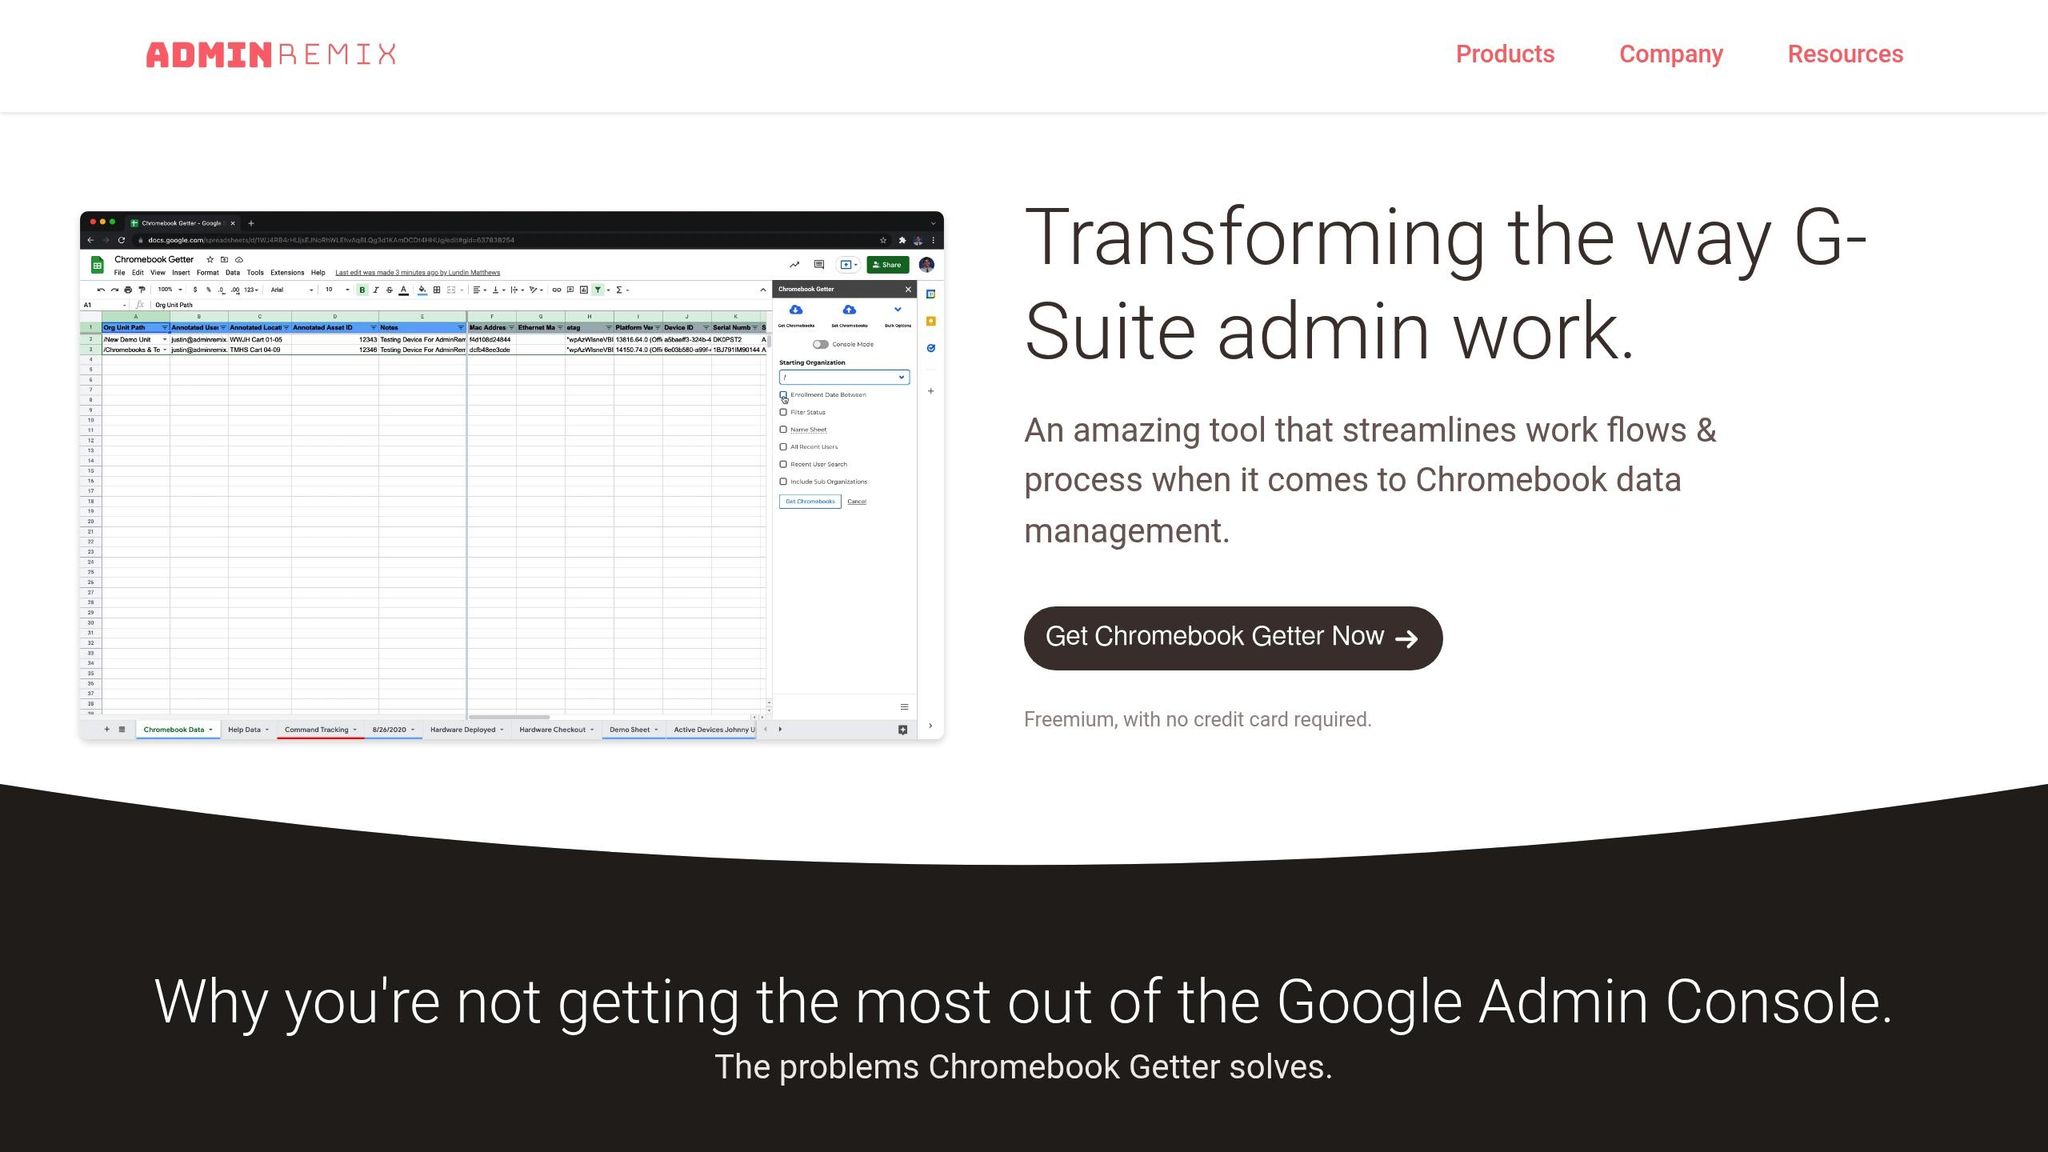
Once your inventory is set up in Google Sheets, you can connect it directly to your Chromebook fleet. Chromebook Getter is a handy Google Sheets add-on that acts as a bridge between your spreadsheet and the Google Admin Console. It allows you to pull device data and push bulk updates - all from one convenient tool.
Installing and Authorizing Chromebook Getter
To get started, install "Chromebook Getter by AdminRemix" from the Google Workspace Marketplace. Keep in mind that installation requires a GSuite domain super admin. During the setup process, you'll need to grant permissions to access Google Sheets, ChromeOS metadata, organizational units, and user provisioning data. These permissions are essential for the tool to read and update Chromebook details across your domain, so review them carefully before proceeding.
The tool offers different pricing options based on your needs. The free plan provides basic features with a 500-upload monthly cap. For more functionality, the Core plan costs $9.08 per user per month, while the Premium plan, which unlocks advanced features, is priced at $20.75 per month.
How to Import and Update Chromebook Data in Bulk
Once Chromebook Getter is installed and authorized, you can seamlessly integrate live data from your Chromebook fleet. Begin by downloading your fleet data into a Google Sheet. The add-on pulls metadata directly from the Admin Console, populating key details about your Chromebooks. This gives you a working copy of your fleet, ready for updates.
To make bulk edits, adjust the relevant columns in your sheet. For instance, you can update the orgUnitPath column to move devices between organizational units or use the annotatedLocation and annotatedUser fields for better tracking. After making changes, use the "Set Chromebooks" function to sync your updates back to the Google Admin Console. If you're on the Premium plan, you can access advanced features like deprovisioning devices, rebooting kiosks, and wiping user profiles - all directly from your spreadsheet.
Working with Multiple Team Members in Shared Sheets
When managing Chromebook data as a team, Google Sheets' collaboration tools make it easy to work together. Multiple technicians can update the same inventory simultaneously without stepping on each other's toes. For organizations with larger teams, the Domain Plan offers unlimited user access starting at $36.66 per month.
To maintain data integrity, protect critical columns by setting permissions under Data > Protect sheets and ranges. This ensures that only specific team members can modify sensitive areas. You can also create separate filter views for columns like status or notes to reduce conflicts. Additionally, Google Sheets' version history feature helps track changes and resolve any issues that arise. By combining these tools, you can streamline collaboration while keeping your Chromebook data accurate and secure.
sbb-itb-c68f633
Automating Chromebook Management Tasks
Streamlining Chromebook management can save time and ensure your data stays up-to-date. By combining tools like conditional formatting, Google Apps Script, and AdminRemix, you can automate workflows and reduce manual labor. For example, conditional formatting can help flag important device dates instantly.
Tracking Device Lifecycle Events with Conditional Formatting
Every Chromebook comes with an Auto-Update Expiration (AUE) date - the point when it stops receiving Chrome OS updates and security patches. After this date, devices become vulnerable. Keeping track of these dates is critical to maintaining security and avoiding unexpected issues.
"Every Chromebook comes with a fixed period during which Google provides automatic software and security updates. This period is called the Auto-Update Expiration (AUE) date." – Inspiroz Editorial Team
You can use conditional formatting to highlight devices nearing their AUE dates. For instance, set cells to turn yellow when a device is 12–18 months from expiration and red when it’s within six months or already expired. This visual system makes it easy to identify at-risk devices during IT audits. The same approach can be applied to warranty expiration dates or repair thresholds, prompting timely replacements.
The Sheet Automation add-on for Google Sheets can take this further by automatically adjusting cell styles or borders based on date conditions. It can even send reminders as deadlines approach. This automation integrates smoothly into your inventory processes, ensuring you stay on top of critical updates.
Connecting Sheets with AdminRemix Tools and Google Workspace
Integrating your spreadsheets with AdminRemix tools can help create unified IT workflows. For example, AssetRemix allows you to manage hardware beyond Chromebooks - like laptops, monitors, and other peripherals - giving you a complete overview of your IT assets. Meanwhile, User Getter pulls G Suite user metadata into Sheets, making it easy to cross-reference device assignments with user accounts and organizational units.
These integrations eliminate the hassle of switching between platforms. If an employee leaves your organization, you can quickly locate their assigned Chromebook, update its status, and reassign it - all within your central spreadsheet. This connected system reduces errors and ensures your data remains consistent across tools. Once set up, you can automate updates to keep everything synchronized.
Automating Data Updates and Reports
Google Apps Script can automate the process of pulling fresh Chromebook data from the Google Admin Console on a regular schedule. By writing a script, you can update inventory daily or weekly, keeping your records accurate.
You can also automate report generation and schedule email summaries for your team. These summaries might include details like devices by location, upcoming AUE dates, or quarterly repair costs. Such automation complements the earlier integrations with AdminRemix tools, making the entire workflow more efficient. With large fleets of devices to manage, automation isn't just helpful - it’s a necessity for staying organized.
Maintaining Data Quality and Security
Keeping your Chromebook data secure is essential to avoid potential risks. A shared spreadsheet containing serial numbers, user assignments, and device locations can be both a valuable resource and a vulnerability if not properly protected. As automated workflows update data in real-time, strong security practices are key to maintaining both the accuracy and confidentiality of your inventory. These measures work hand-in-hand with earlier automation and collaboration strategies to ensure data integrity.
Setting Up Access Control and Permissions
Limit editing access for the master inventory to IT administrators. Instead of granting full access to everyone, create separate Google Sheets tailored for specific needs. For instance, restrict the primary inventory to IT administrators, while providing help desk staff with a secondary sheet that only includes basic device details. This separation keeps sensitive information - like purchase costs or administrative notes - accessible only to those who require it.
To further protect your data, use forms for data submissions rather than granting editing rights. This prevents accidental deletions or formatting errors that could disrupt your records. Forms act as a controlled gateway, allowing contributions without compromising the core inventory system.
Additionally, implement protected ranges to lock down non-editable fields, even in collaborative settings. Combined with Google Drive's sharing settings, these controls create a secure environment that balances collaboration with data protection.
Tracking Changes with Version History
Google Sheets' version history feature is a lifesaver for managing changes. Navigate to File > Version history > See version history to undo unintended edits or errors. Label key versions with clear names, such as "End of Q1 2025 Inventory", to establish checkpoints. This practice makes it easier to track changes, ensures accountability when multiple administrators are involved, and allows for quick comparisons across time periods.
Running Regular Data Quality Checks
Regular audits go beyond correcting errors - they help maintain the overall accuracy of your inventory.
Plan routine audits to catch mistakes. In March 2021, Cerini & Associates recommended that school districts conduct an annual inventory of Chromebook devices, ideally through physical inspections or regular device pinging. These checks can uncover duplicate serial numbers, missing asset tags, or inconsistencies in location data. Use data validation rules to enforce standardized entries and minimize errors from the outset.
Promptly update device statuses when Chromebooks are lost, stolen, or deprovisioned. Record all repairs in your system, noting each device's current status and location. This ensures your inventory reflects the actual state of your devices. Consider setting quarterly calendar reminders to review device assignments and confirm that each Chromebook is still with its designated user and functioning correctly. These regular quality checks strengthen the reliability of your automated inventory system.
Conclusion
Managing thousands of Chromebooks no longer means wrestling with endless spreadsheets or struggling with complex command-line operations. By using Google Sheets alongside AdminRemix's Chromebook Getter, fleet management becomes a smoother, more efficient process. This tool simplifies workflows, saves time, and minimizes errors - benefits already recognized by many experienced G Suite admins.
At the heart of this approach lies centralization and automation, two key elements driving efficiency. Instead of manually updating device records one by one in the Google Admin Console, you can export your entire inventory, make bulk edits, and push updates - all within the familiar environment of Google Sheets. According to industry professionals, this method significantly speeds up routine tasks. This is especially critical when managing devices across multiple locations, planning budgets by tracking Auto Update Expiration dates, or quickly deprovisioning lost devices.
Data quality and security are non-negotiable for keeping your Chromebook fleet running smoothly. The strategies outlined here - like applying access controls, maintaining version histories, and conducting regular audits - ensure your records remain accurate and protected. When your data is clean and secure, every other management task becomes far more manageable. These practices collectively build a foundation for a system that can grow with your needs.
FAQs
How can IT administrators use Google Sheets to better manage large Chromebook fleets?
Google Sheets provides IT administrators with a smarter, more efficient way to manage large Chromebook fleets, offering an alternative to relying solely on the Google Admin Console. It enables you to handle tasks like bulk inventory updates, automated data syncing, and asset organization - all within a single, cloud-based platform.
Thanks to its smooth integration with Google Workspace tools, Google Sheets makes it easier to track devices, maintain accurate records, and simplify updates. This approach helps save time while keeping your Chromebook management organized and current.
How can I set up and manage a Chromebook inventory using Google Sheets?
To organize a Chromebook inventory in Google Sheets, begin by setting up a new spreadsheet. Add columns for essential details such as serial number, organizational unit, location, status, and last sync date. You can then use a Chromebook management tool or a script to pull in existing device data, or manually upload the information in bulk. If you’re managing a larger fleet, integrating with an API can streamline the process by automatically syncing and updating records. Make it a habit to review and update the data regularly to maintain accuracy and keep everything running smoothly.
How can I use Chromebook Getter with Google Sheets to manage large Chromebook fleets?
Managing large fleets of Chromebooks can be a daunting task, but Chromebook Getter simplifies the process by integrating directly with Google Sheets. This tool lets you quickly retrieve and update Chromebook inventory and metadata in bulk, all within the familiar Sheets interface.
By using this integration, you can easily organize, track, and update Chromebook details on a large scale. It helps streamline inventory management tasks while ensuring your data remains accurate and current, saving you both time and effort.