
How to Ensure MDM Compliance for Google Workspace
Managing mobile devices in Google Workspace is critical for security and compliance. Mobile Device Management (MDM) helps IT teams enforce policies, secure devices, and meet regulations like GDPR and HIPAA. Here's what you need to know:
- Set Up Permissions: Assign proper admin roles in the Google Admin Console to control MDM settings effectively.
- Define Compliance Needs: Use tools like the Security Health page and DLP templates to align with industry standards.
- Organize Devices: Create an inventory of personal and company-owned devices, grouping them by operating system.
- Enable Device Management: Configure Basic or Advanced management to enforce security policies, like encryption and password rules.
- Monitor Compliance: Use audit logs, automated alerts, and inactivity reports to track device usage and address risks.
- Educate Users: Notify employees about policies and provide guidance to resolve compliance issues.
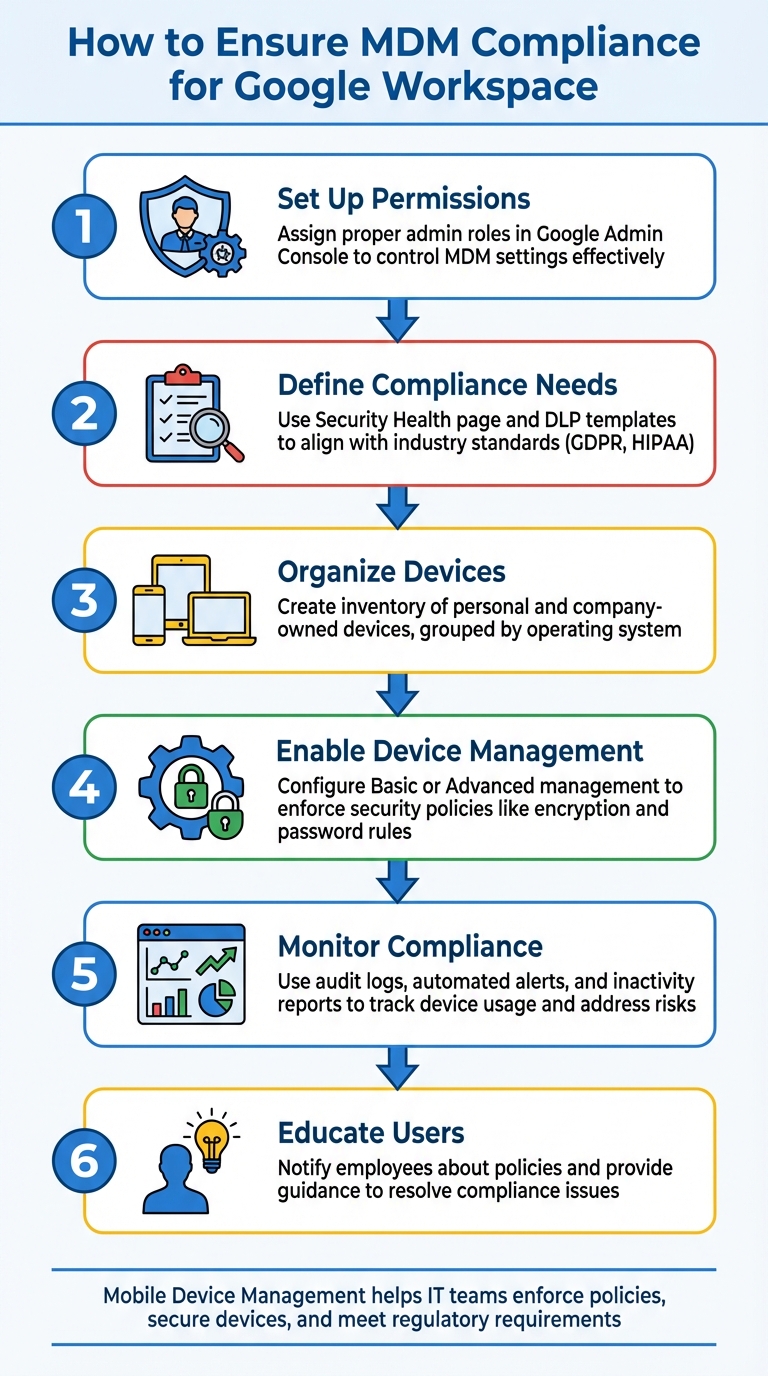
6-Step Process for Ensuring MDM Compliance in Google Workspace
Google Workspace: Mobile & Endpoints
sbb-itb-c68f633
Prerequisites for Setting Up MDM Compliance
Before diving into configuring Mobile Device Management (MDM) in Google Workspace, there are a few foundational steps to address. These include securing the right permissions, understanding your compliance needs, and preparing a detailed IT asset management inventory of devices. Taking care of these ensures your setup meets both regulatory and security benchmarks.
Verify Administrative Access in Google Workspace
While the Super Admin role provides full control over MDM settings, it's not necessary to grant this level of access to everyone on your IT team. Instead, create custom admin roles tailored to specific needs. For MDM, include the Mobile Device Management privilege, which allows access to the "Mobile & endpoints" section in the Admin Console.
Additionally, administrators will need Organizational Units privileges (either "Read" or "Update") to apply compliance policies to specific teams or departments. For any third-party integrations, grant Admin API privileges like Manage Customer and User Security Management. To enhance data protection, assign the View and Manage DLP rules privilege.
To check existing permissions, go to the Admin Console, navigate to Users, select a user, and review the Admin roles and privileges section. Keep in mind that changes to administrative roles may take up to 24 hours to take effect.
| Privilege Category | Specific Privilege Name | Purpose for MDM Compliance |
|---|---|---|
| Mobile Management | Mobile Device Management | Enable advanced management, set password policies, and wipe devices |
| Organizational Units | Read / Update | Apply compliance policies to specific departments |
| Security | User Security Management | Manage individual user security settings and block compromised devices |
| Reports | Reports | Access inactivity reports and audit logs |
| Rules | View and Manage DLP rules | Create rules to scan for sensitive content on devices |
Once you've set up the necessary permissions, the next step is to define your compliance requirements.
Identify Compliance Requirements for Your Industry
The Security Health page in the Google Admin Console is a great tool for monitoring security settings and receiving tailored recommendations to address potential risks. Google Workspace also offers predefined Data Loss Prevention (DLP) templates for common scenarios, such as preventing the sharing of financial or health information.
Regularly check the Status column in the Security Health section to identify risky configurations within specific organizational units. Use the gray icon links to get actionable recommendations. If your organization deals with sensitive data, consider enabling Context-Aware Access. This feature allows you to define access levels based on factors like device security, IP address, or geographic location.
With compliance needs identified, it’s time to organize your device inventory.
Prepare a List of Devices for Enrollment
Start by creating separate inventories for personal (BYOD) and company-owned devices since management policies differ between the two. Group devices by operating system - Android, iOS, ChromeOS, Windows, macOS, and Linux - because setup steps vary depending on the platform (e.g., iOS devices require Apple Push Certificates).
Use the Company owned inventory section under "Mobile & endpoints" in the Admin Console to track organization-purchased devices. To identify unmanaged devices accessing company data, deploy the Endpoint Verification extension. Export this data as a CSV or Google Sheet for easier management.
Make sure to track critical information such as Device ID, Serial Number, Asset ID, Management Type (Basic or Advanced), Last Sync Date, and MAC Address. Use fields like Asset ID, Location, and Notes in the Admin Console to add context to each device. Finally, confirm that users assigned to these devices have Google Workspace licenses that support Advanced Mobile Management, such as Business Plus or Enterprise editions.
How to Configure MDM in Google Workspace
Once you've completed the prerequisites, it's time to set up Mobile Device Management (MDM) in Google Workspace to ensure compliance and security.
Access the Admin Console and Enable Device Management
Start by signing into the Google Admin console. From there, go to Menu > Devices > Mobile & endpoints > Settings > Universal, then select General > Mobile management to choose the level of management you need.
By default, Basic management is enabled. This option provides essential security features like password enforcement and account wiping without requiring users to install additional apps. For more control, you can switch to Advanced management. This level includes features like remote device wiping, app management, and work profiles, but it does require users to install a device policy app. For iOS devices, you’ll also need to set up an Apple push certificate, which must be renewed every year.
You can apply these MDM settings to your entire organization or tailor them to specific departments. To do this, select an Organizational Unit from the side panel before saving your changes. When prompted by "Sync on Mobile", choose which device types will be allowed to sync work data.
Once you've enabled device management, the next step is to establish security policies that meet your compliance requirements.
Set Core Security Policies for Compliance
If you're using Advanced management, you can access additional security features to ensure compliance. Enable Block compromised devices to prevent jailbroken or rooted devices from accessing company data. Turn on Device encryption to protect sensitive information in case a device is lost or stolen. You can also set Mobile password requirements, such as minimum length and expiration periods, to meet industry standards.
For added security, enable Auto-wipe to automatically remove corporate data from devices that have been inactive for a set number of days or no longer comply with policies. To protect sensitive information, configure Data Loss Prevention (DLP) rules. Google's predefined templates for categories like "Financial information" or "Health information" can help you quickly align with regulations such as HIPAA and GDPR. Finally, disable high-risk features like USB file transfers and camera access to minimize potential data leaks.
With these policies in place, the next step is to set up device enrollment and approval processes.
Configure Device Enrollment and Approval Processes
After defining your security policies, you’ll need to control how devices are enrolled and approved. Go to Menu > Devices > Mobile & endpoints > Settings > Universal. Under the Security section, select Device approvals and check the option to Require admin approval for device access. This ensures that devices cannot sync work data until an administrator approves them through the Admin console.
Make sure to notify users about the new device management setup and provide clear instructions for installing the required policy apps. For company-owned Android devices, you can use zero-touch enrollment to automatically configure devices as soon as they’re turned on. For iOS devices, enrollment can be completed via Apple Business Manager. Windows, Mac, and Linux devices, however, will require manual inventory uploads by adding their serial numbers to the Admin console.
Monitoring and Maintaining MDM Compliance
After setting up your Mobile Device Management (MDM), keeping an eye on device compliance is essential. Google Workspace offers several tools to help you monitor device activity, spot security issues, and maintain detailed audit trails.
Enable and Review MDM Reports
The Admin console provides access to device audit logs that track compliance-related events. To review these logs, go to Reporting > Audit and investigation > Device log events. Use filters like "Device compliance state" or "Device compromised state" to pinpoint specific issues, such as devices that fail password policies, lack required apps, or are rooted/jailbroken.
For organizations using Enterprise or Education Standard/Plus editions, the Security Investigation Tool allows exporting up to 30 million rows of device audit data from the past 180 days through the Reports API. You can save this data in Google Sheets or as CSV files, though exports are limited to 210,000 cells per file.
Set up automated alerts to stay informed about security events. These alerts can notify you via email about incidents like compromised devices or suspicious activity. For example, you can configure rules to flag excessive failed unlock attempts. Additionally, the Security Health page offers a centralized view of essential MDM settings.
To keep track of unused assets, enable Mobile inactivity reports, which send monthly emails listing company-owned Android devices that haven’t synced work data in 30 days. This makes it easier to identify and deprovision inactive devices.
Audit Security Settings Regularly
While automated tools and alerts are helpful, regular audits are equally important for sustained compliance. Periodically review your MDM configurations to identify potential gaps. Use the "Device compliance state" attribute in the Audit and Investigation tool to find devices that aren't in device owner mode or lack required work profiles. Cross-check your settings with Google's recommended security checklist to confirm that features like 2-Step Verification and Context-Aware Access are correctly implemented.
For a broader view, check the Device reports section under Reporting > Reports > Devices > Mobile. This area provides graphs showing managed devices by operating system version, helping you ensure all devices meet minimum security patch levels. For specific troubleshooting, access a device’s audit log by navigating to Directory > Users > [User Name] > Show Audit Info.
| Audit Tool | Primary Function | Monitored Attributes |
|---|---|---|
| Security Health Page | Configuration Monitoring | Password strength, Encryption status, Auto-wipe settings |
| Audit & Investigation Tool | Security Issue Triage | Compliance state, Compromised state, Failed password attempts |
| Device Audit Log | Individual Device Tracking | OS version, Sync events, Device property changes |
| Inactivity Reports | Asset Management | Last sync date, Unused company-owned devices |
Keep in mind that audit logs stop collecting new data if your organization downgrades to a Google Workspace edition that doesn’t support them. However, historical data remains accessible. For comprehensive audit tracking, ensure devices are managed using "Advanced" device management rather than "Basic". If you need to monitor app changes on Android devices, you’ll need to manually enable "application auditing" in the settings.
Best Practices for Maintaining MDM Compliance
Automate Policy Enforcement
Automating policy enforcement is a key step in maintaining compliance, as it reduces the need for constant manual oversight. Google Workspace includes automated device management rules that can trigger specific actions when security events occur. For instance, you can set up a rule to automatically block a device after more than five failed screen unlock attempts or wipe corporate data if suspicious changes are detected on the device. Context-Aware Access (CAA) takes this further by dynamically granting or denying access to apps like Gmail and Drive based on real-time device attributes, ensuring immediate action when a device falls out of compliance.
Predefined rule templates make it easy to set up baseline security measures, such as "Perform wipe on suspicious event" or "Block account on multiple failed screen unlocks". For stricter enforcement, you can configure blockAfterDays to 0, which ensures immediate action. Android devices that violate core policies are blocked right away and factory reset after 10 days of non-compliance. Keep in mind that changes to device management rules may take up to 24 hours to apply across your organization.
To make compliance easier for users, you can configure remediation messages within Context-Aware Access. These messages provide clear instructions for resolving issues without needing IT intervention. Additionally, automating inactivity cleanup - such as wiping devices that haven’t synced work data for 30 days - helps mitigate risks from lost or abandoned devices.
Educate Users About Compliance
Technical safeguards are only part of the solution - user awareness is equally important. Data Loss Prevention (DLP) rules can be configured to send notifications explaining why certain actions are blocked, turning these moments into learning opportunities for employees.
When introducing new security measures, such as Two-Step Verification, consider providing a grace period (e.g., "Effective from [a specific date]") to allow users to enroll without immediate pressure. According to Google, enabling Two-Factor Authentication can prevent 99.9% of automated account compromise attempts. Automated notifications in Google Workspace can also alert users when their devices fall out of compliance, giving them the chance to resolve issues on their own without immediate IT involvement.
Focus training efforts on issues with the biggest impact, like managing passwords, recognizing phishing attempts, and proper file-sharing practices. These areas are often linked to non-compliance. Establish a simple rule, such as "If in doubt, don’t click", and provide an easy way for employees to report suspicious emails. This approach strengthens your organization’s overall security posture.
With informed users and robust policies in place, the next step is to ensure accurate device tracking for sustained compliance.
Leverage AdminRemix for Asset Management
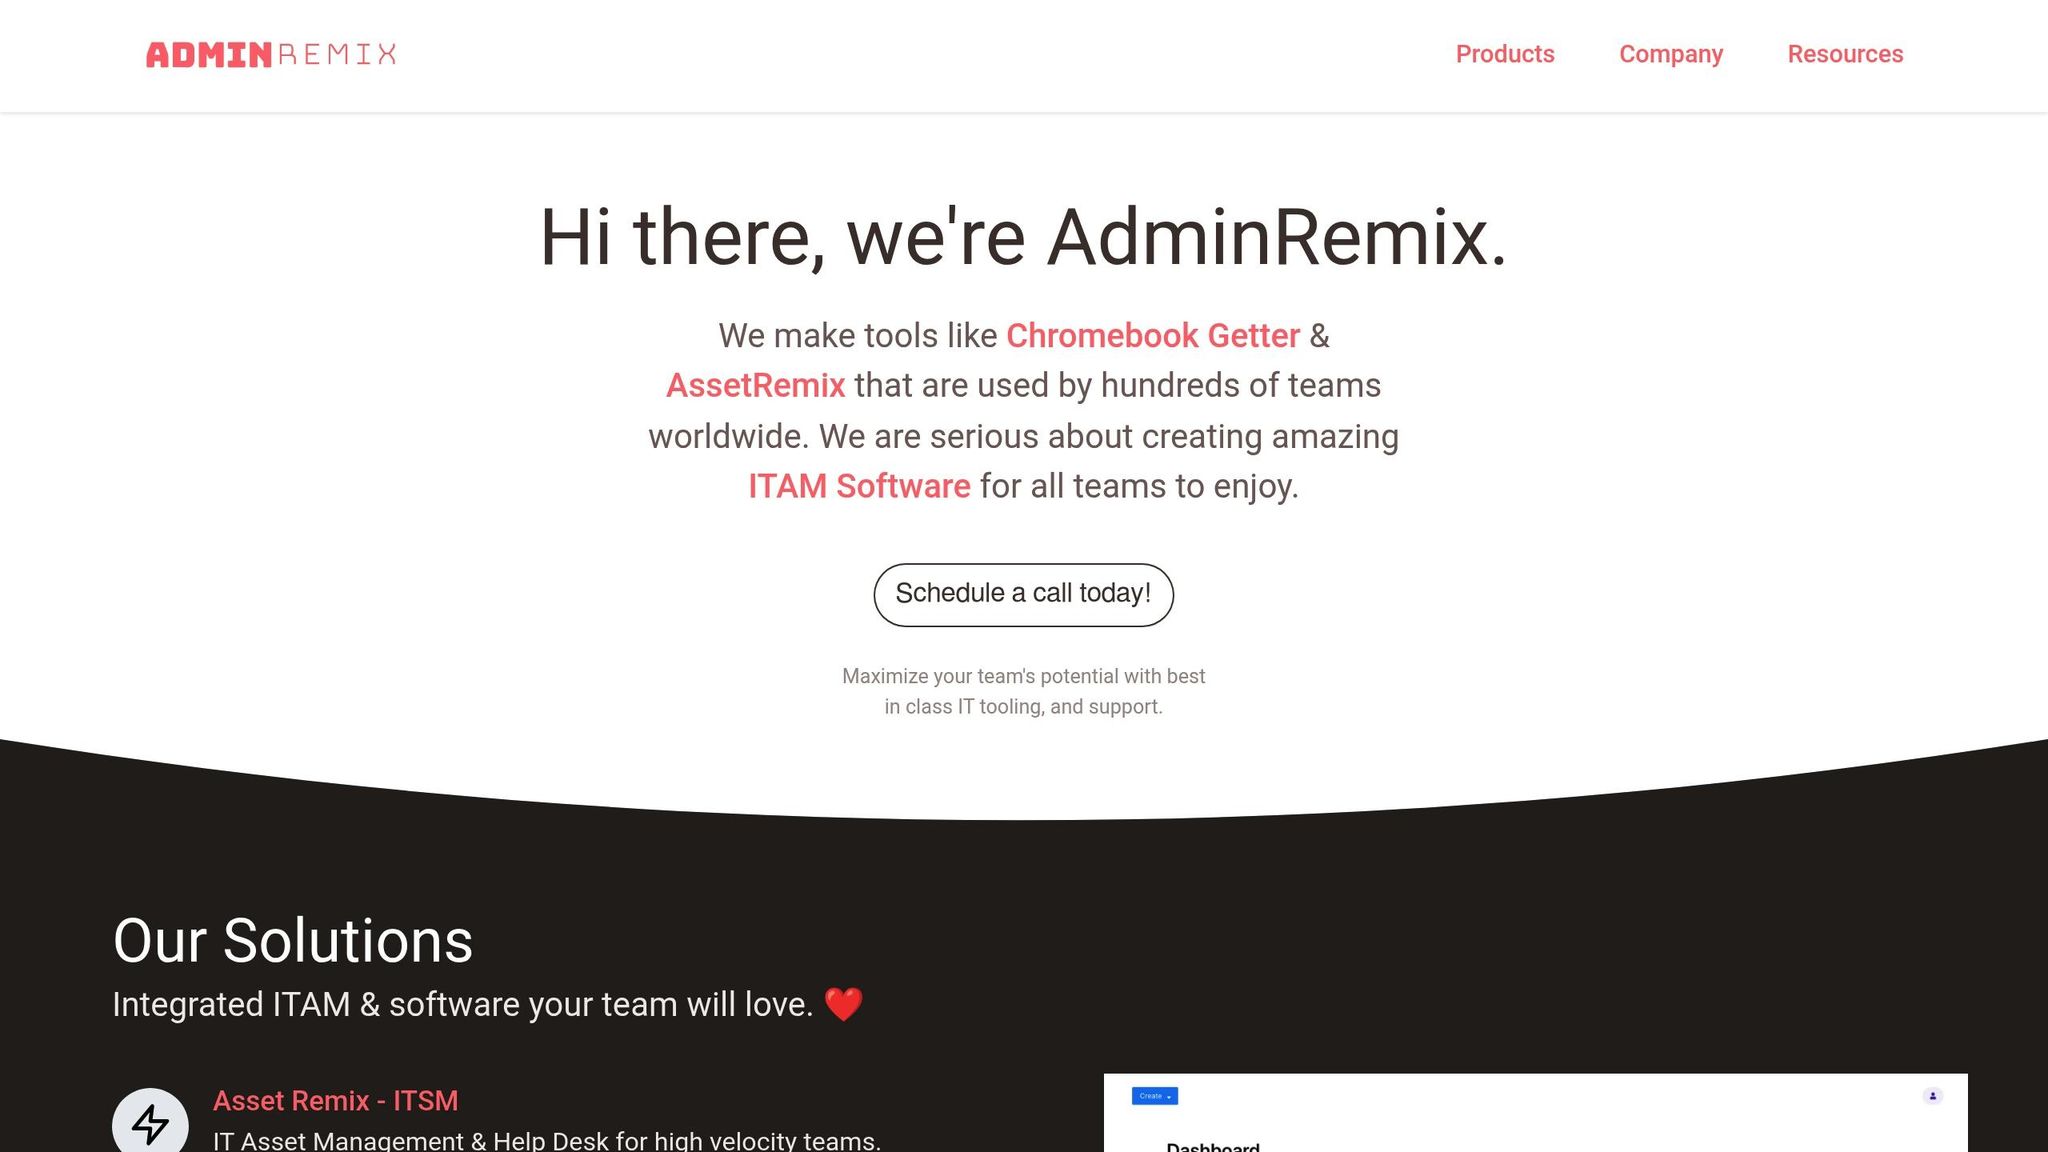
Maintaining an accurate inventory of devices is critical for staying compliant with MDM policies. Tracking key device identifiers ensures that every endpoint is monitored and meets compliance standards.
AdminRemix simplifies this process with tools designed for bulk metadata management. Their Chromebook Getter and User Getter tools allow you to manage Chromebook and G-Suite metadata directly through Google Sheets, making it easier to maintain a detailed device inventory.
For more comprehensive asset management, AssetRemix offers features like unlimited asset tracking, help desk agents, and issue management for $99 per month or $999 annually. This centralized system reduces the manual workload of tracking devices and ensures all endpoints are enrolled and monitored, supporting ongoing compliance efforts.
Conclusion
Managing MDM compliance in Google Workspace is about more than just protecting your data - it’s about ensuring your organization runs efficiently without unnecessary disruptions. The steps covered in this guide take you from setup to ongoing monitoring, helping your devices meet security requirements while minimizing friction for users. These steps form the groundwork for a strong, sustainable compliance program.
Achieving long-term success means finding the right balance between automated security measures and user awareness. Google Workspace’s tools, like blocking non-compliant devices or wiping data after policy violations lasting more than 10 days, handle immediate risks effectively. But users also need to understand the purpose of these safeguards. As Adam Currie, CISO at HCLSoftware, explains:
"User productivity and security are traditionally at odds with each other - the more secure you are, the less productive you are. With Google Workspace, that no longer holds true".
By combining these built-in tools with automated alerts for suspicious activity, you can address potential issues before they escalate into major breaches.
Considering that 38% of breaches involve credential theft, features like Two-Step Verification and Context-Aware Access become critical. When paired with thorough asset tracking, these controls create a scalable system that adapts to your organization’s growth. Together, they reduce risks and simplify IT management, aligning with the guide’s focus on effective MDM compliance.
Investing in proper MDM configuration not only decreases security incidents but also makes device management more efficient. It ensures your organization meets key standards like GDPR, HIPAA, and ISO/IEC 27001. With the right policies and ongoing monitoring, MDM compliance becomes a seamless part of your IT strategy, rather than a recurring challenge.
FAQs
Do I need Basic or Advanced MDM?
If your needs are straightforward - like securing devices with a screen lock or passcode, remotely wiping corporate accounts, and managing apps on Android devices - then Basic MDM is the way to go. However, if you need greater control, such as enforcing detailed device policies, managing passwords, and overseeing both Android and iOS devices, consider choosing Advanced MDM.
How do I keep BYOD devices compliant?
To keep BYOD devices in line with company policies, set up MDM (Mobile Device Management) settings in Google Workspace. Start with universal safeguards like enabling screen locks, enforcing encryption, and verifying device ownership.
For more control, advanced mobile management lets you fine-tune access permissions, manage notifications, and enforce compliance policies. By using access levels, you can check critical details like the OS version and encryption status, ensuring every device aligns with your organization’s security requirements.
What should I audit every month?
To keep your organization secure and aligned with regulatory requirements in Google Workspace, make it a habit to review these areas every month:
- User Access Rights: Ensure that each user's access aligns with their role and responsibilities. Remove access for inactive or unauthorized accounts.
- Sharing Settings: Check file and folder sharing permissions to prevent data from being shared inappropriately.
- Admin Controls: Review admin roles and privileges to confirm they are assigned only to trusted personnel.
- Audit Logs: Regularly monitor audit logs for any unusual or unauthorized activities.
This proactive approach helps safeguard sensitive information and keeps your Google Workspace environment secure.