
Best Practices for Google Meet Participant Management
If I’m running a large Google Meet, I need rules set before the call starts. That means assigning host duties, setting join and mute defaults, limiting who can share, and deciding how I’ll track attendance and recordings.
Here’s the short version:
- Set roles early: host, co-host, and support lead
- Control entry: admit guests carefully and use join rules
- Limit noise fast: mute people, mute everyone when needed, and remove disruptors
- Guide participation: use reactions and hand-raising instead of open discussion
- Plan breakouts: choose room size, assignment method, and return timing ahead of time
- Use a repeatable runbook: keep the same process for recurring sessions
- Track records: attendance logs, recordings, and CSV exports matter for schools, training, and regulated teams
A few facts shape the approach. In a meeting with hundreds of attendees, even one open mic can disrupt the session. And when the same event happens every week, saving even 1 to 2 minutes per task on admission, muting, and attendance adds up fast.
If I need more than Google Meet’s built-in controls, I can look at extra tools for bulk muting, mass removal, auto-admit/deny, auto-record, and attendance export.
One quick comparison helps:
| Area | Built-in Google Meet | Extra meeting tools |
|---|---|---|
| Guest entry | One-by-one approval | Auto-admit or auto-deny |
| Audio control | Mute people one at a time | Mute everyone in one click |
| Removal | Remove people one at a time | Remove everyone in one click |
| Attendance | Depends on Workspace plan | CSV export in paid plans |
| Recording | Start manually | Start when host joins |
So the core idea is simple: large meetings run better when I reduce manual work, keep permissions tight, and use the same workflow every time.
Host controls and role setup for large meetings
Assign host and co-host roles with a clear purpose
For large meetings, assign roles before the event starts. The host should handle setup and final calls. Co-hosts should manage admissions and step in when someone causes trouble. A support lead should watch chat, track attendance, and help with tech snags.
Put simply, these roles should line up with three job areas before the meeting begins: entry, moderation, and attendance.
Use the table below to set ownership ahead of time.
| Role | Core Responsibilities | Key Controls |
|---|---|---|
| Host | Session setup, recording, final decisions | Session setup, recording, final decisions |
| Co-host / Moderator | Admit guests, mute, remove disruptors | Admit guests, mute, remove disruptors |
| Support Lead | Monitor chat, attendance, and tech issues | Monitor chat, attendance, and tech issues |
| Regular Participant | Attend and follow host guidance | No moderation access |
| External Guest | Join only with host approval | Joins only after host approval |
Configure join, chat, and recording rules before the event
Your pre-meeting settings shape everything that happens next. In big sessions, focus first on join rules, audio defaults, and recording. Set microphones and cameras to mute on join, and auto-admit expected attendees to cut down on entry delays.
It also helps to lock in recording and chat rules ahead of time. Auto Record makes sure the session is documented from the moment the host joins. During presentations, use a distraction-free view so people stay focused on the material instead of the screen clutter. And if a support lead is watching chat, keeping Auto Pin Chat visible makes it easier to follow questions and keep things organized.
With roles set and entry rules sorted, live moderation gets a lot easier.
sbb-itb-c68f633
Core participant control practices during the meeting
When to mute, remove, and restrict sharing
Once the room is live, the host’s job changes. It’s no longer about setup. It’s about keeping the meeting on track with fast, low-friction moderation.
Even with good prep, live meetings rarely run without a hitch. So the rule of thumb is simple: use the least disruptive control that fixes the problem fast.
Muting one person works best when a single participant has accidental background noise. It’s the lightest-touch fix. But if several people start talking over each other, Mute All is the better move. It works well when the meeting shifts from discussion into presentation mode. Just give people a quick verbal warning first, since they’ll need to unmute themselves manually afterward.
Remove participants only when there’s repeated disruption or an unauthorized person in the room. And in large public or open-invite meetings, it makes sense to restrict screen sharing to hosts only.
| Action | Primary Goal | Best Use Case | Trade-offs |
|---|---|---|---|
| Mute Individual | Silence specific noise | One participant with accidental background interference | Requires manual identification; may feel personal |
| Mute All | Immediate room order | Transitioning to a presentation or stopping cross-talk | Participants must manually unmute; may silence co-hosts |
| Remove Participant | Security and safety | Persistent disruption or uninvited guests | Participant can't rejoin without host intervention; disrupts flow |
| Restrict Screen Sharing | Prevent unauthorized sharing | Large webinars where only hosts should present | Limits spontaneous collaboration |
Use reactions and hand raising to keep order
In large meetings, loose verbal participation can get noisy in a hurry. The fix is usually pretty simple: keep non-speakers muted by default, and guide participation through clear signals.
Use reactions for quick feedback and hand raising for speaking turns. Emoji reactions let people respond, agree, or signal they’re following along without cutting into the speaker’s audio. Hand raising adds a bit more structure. When people signal before they speak, open mics and accidental interruptions happen far less often.
This works especially well in interactive sessions where participants need to jump in often, but only for short comments. The one catch is that people need to know the keyboard shortcut, so a short reminder at the start can save trouble later. Used together, these tools take some of the pressure off the host and help the meeting run with less hands-on intervention.
With the room under control, the next step is structuring smaller-group discussion.
Google Meet Host Tools and How to Use Them
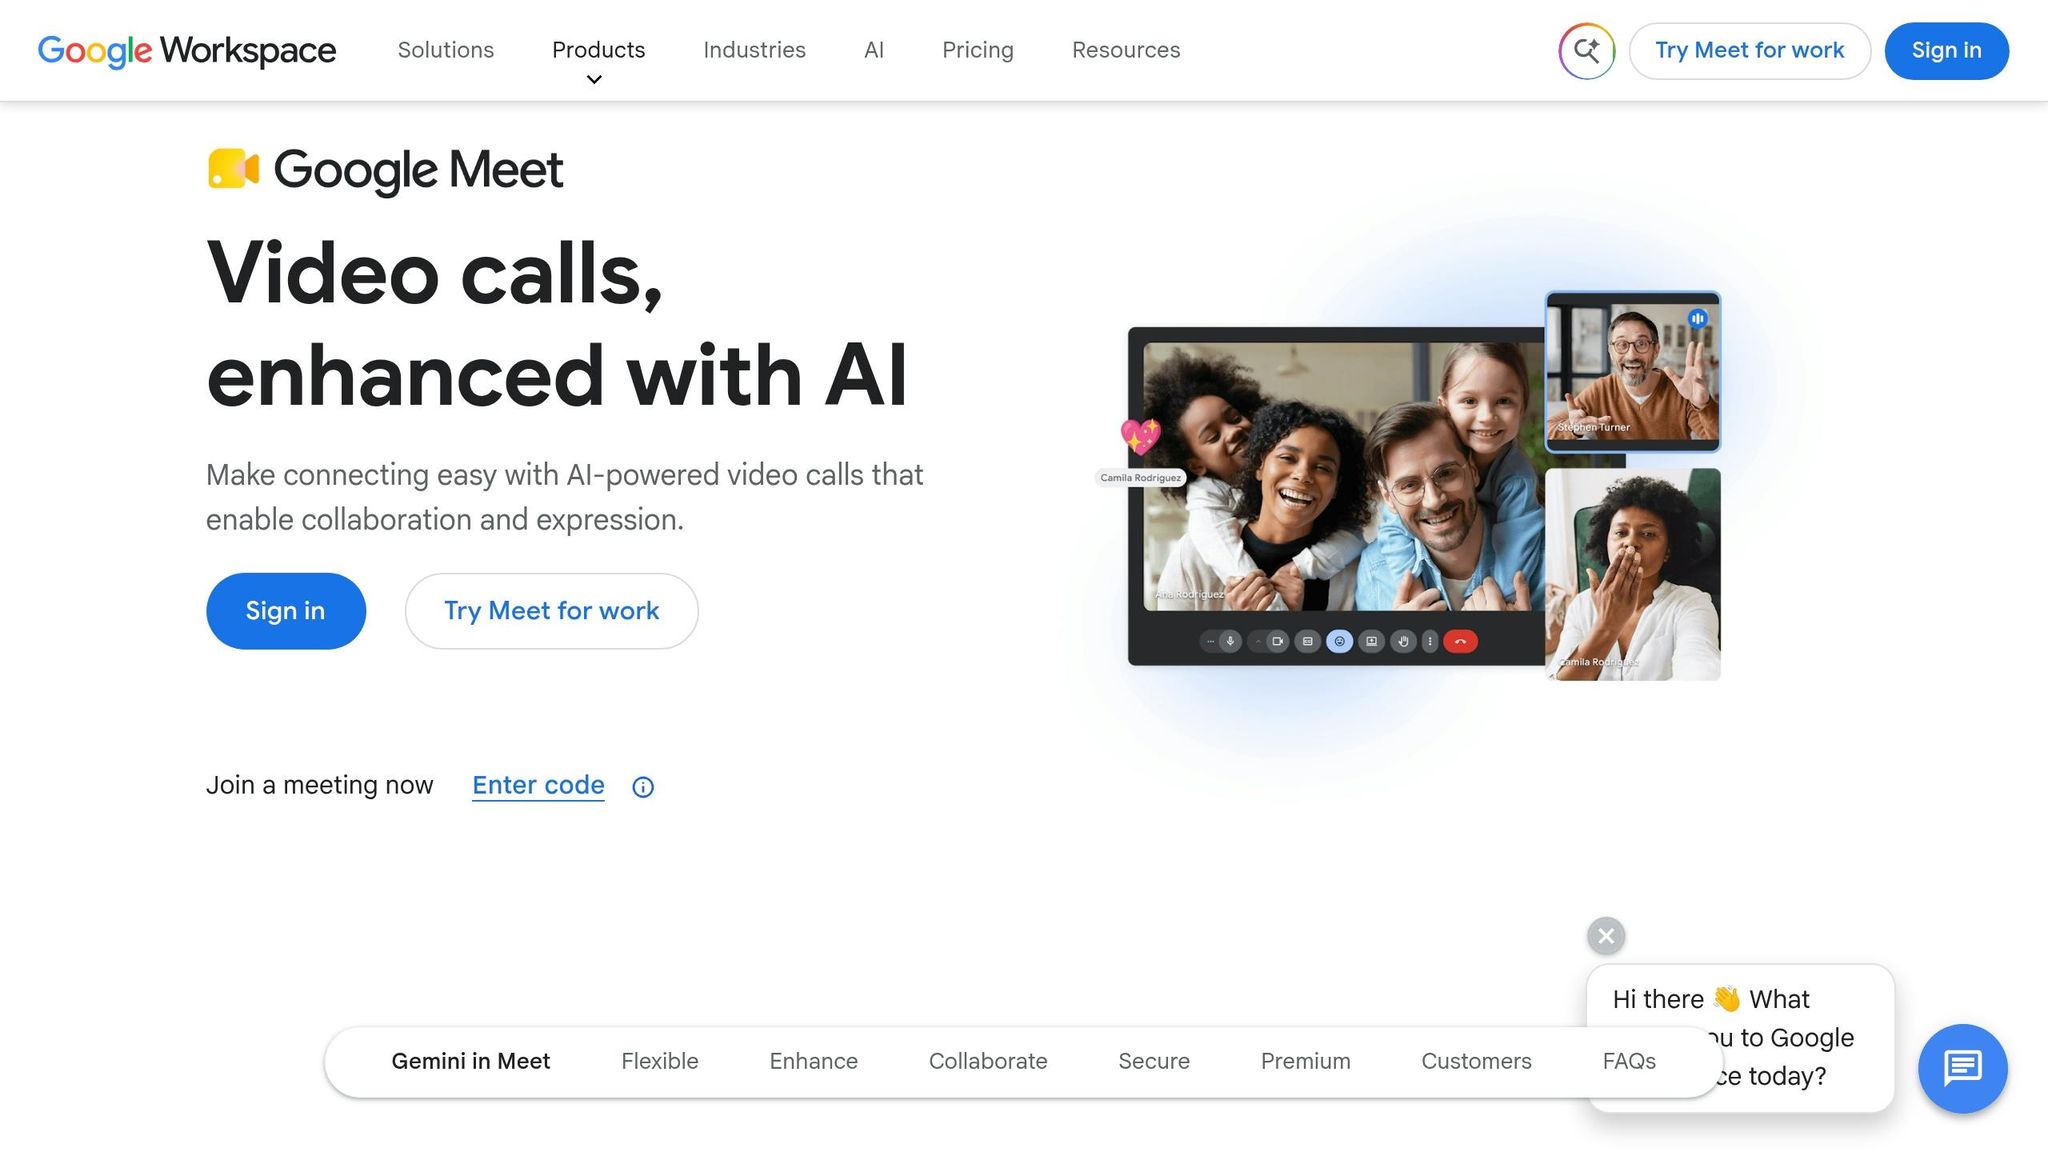
Breakout rooms and structured activity flow
Once the main room is stable, breakout rooms change the host’s role. You’re no longer managing one big conversation. You’re coordinating several smaller ones at the same time.
Breakout rooms tend to run better when the host keeps instructions on screen, matches room size to the task, and manages how people come back into the main session. That structure matters more than people think. Without it, even a simple activity can get messy fast.
Choose room size and assignment method based on the event
Pick smaller rooms when the goal is discussion. They give people more space to talk and make it harder for anyone to disappear into the background.
Larger rooms make more sense for presentations or training, where the task is less about back-and-forth and more about listening, sharing, or reviewing something together.
For setup, automatic assignment is the fast option. It works well when speed matters and the groups don’t need much planning.
Manual assignment takes more effort, but it helps when people need to stay together or when groups need to stay balanced. If you’re trying to split experience levels evenly, keep teams intact, or place facilitators in certain rooms, manual assignment gives you that control.
Plan room timing and the return to the main session
Timing can make or break breakout sessions. A visible timer helps people pace themselves instead of guessing how much time is left. Keep breakout instructions pinned too, so no one has to rely on memory once they’re inside the room.
Before rooms close, give a clear warning that everyone will be returning to the main session. That short heads-up gives groups time to wrap up, pick a speaker, or save their last point instead of getting cut off mid-sentence.
It also helps to reset audio before reopening the main session so the room comes back cleanly. In recurring meetings, use the same closeout sequence each time. People learn the rhythm, and the handoff back to the main room feels smoother and less chaotic.
Managing large meetings with admin workflows and tools
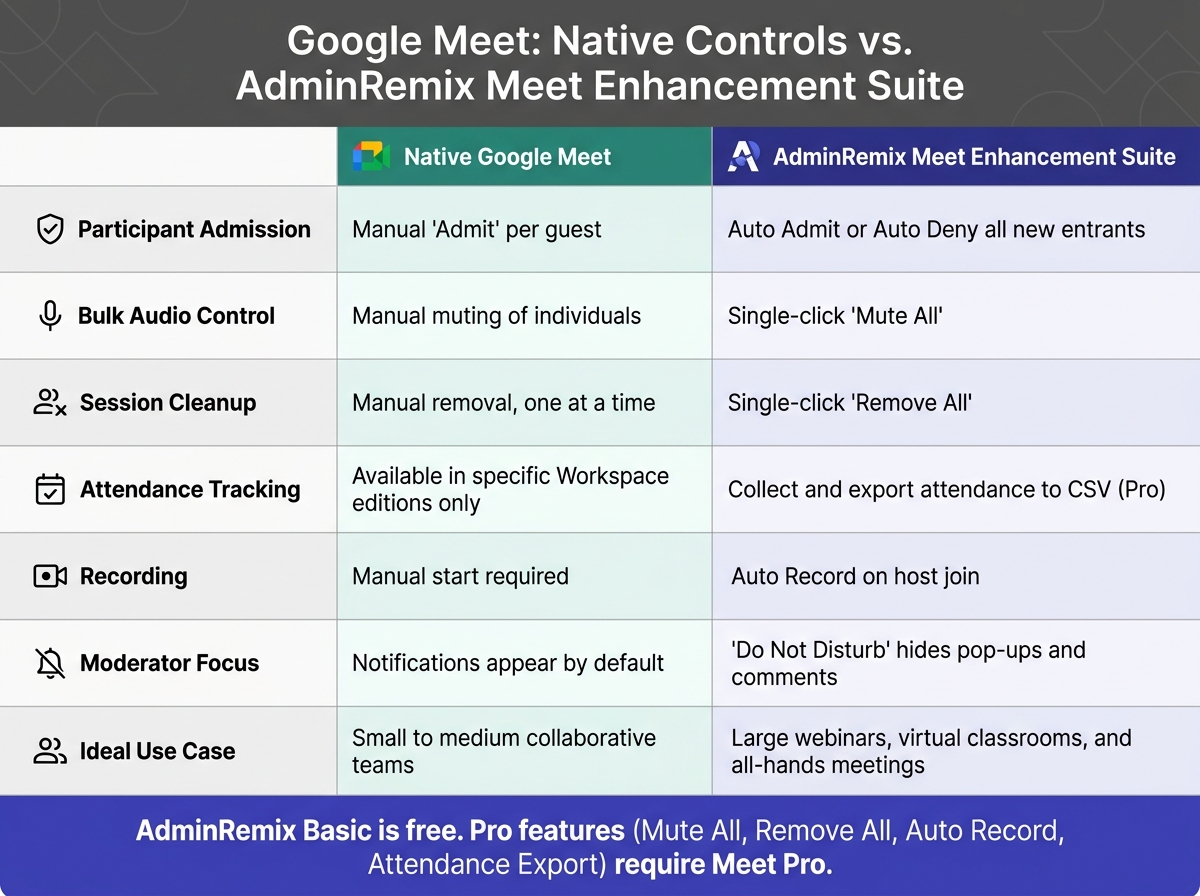
Native Google Meet vs. AdminRemix Meet Enhancement Suite: Large Meeting Controls Compared
When the same meeting happens again and again, participant controls work best when they’re handled through a documented admin workflow.
Build repeatable workflows for recurring meetings
Large recurring meetings need a clear runbook before each session starts. Set one up for recurring meetings that covers host and co-host roles, join rules, recording, and post-meeting attendance export.
If native attendance reporting doesn’t give you enough, export participant data to CSV after each meeting.
That kind of setup matters because bulk controls and automated defaults can cut down the time it takes to run the process.
Native Google Meet controls vs. AdminRemix Meet Enhancement Suite

Native Google Meet gives hosts solid control. But in large sessions, doing things one person at a time - like muting or removing participants - can slow everything down.
AdminRemix Meet Enhancement Suite is built to ease that pain point in big meetings. The most useful additions for large sessions are Mute All, Remove All, and Auto Admit/Auto Deny. Each one turns a repetitive manual task into a single click. Auto Record starts the recording as soon as the host joins, and Do Not Disturb hides notifications during presentations.
Here’s where the two options differ most for large meeting management:
| Feature | Native Google Meet | AdminRemix Meet Enhancement Suite |
|---|---|---|
| Participant admission | Manual "Admit" per guest | Auto Admit or Auto Deny all new entrants |
| Bulk audio control | Manual muting of individuals | Single-click "Mute All" |
| Session cleanup | Manual removal, one at a time | Single-click "Remove All" |
| Attendance tracking | Available in specific Workspace editions | Collect and export attendance to CSV (Pro) |
| Recording | Manual start | Auto Record on host join |
| Moderator focus | Notifications appear by default | "Do Not Disturb" hides pop-ups and comments |
| Ideal use case | Small to medium collaborative teams | Large webinars, virtual classrooms, and all-hands meetings |
The Meet Enhancement Suite has a free Basic version. Pro features like Mute All, Remove All, Auto Record, and attendance export require Meet Pro.
With a documented runbook and bulk moderation tools, recurring large meetings take less manual effort.
Conclusion: Key practices for large Google Meet events
Large Google Meet sessions work best when you set roles and defaults before anyone joins. Assign host and co-host roles, turn on Auto Admit or Auto Deny, and set microphones and cameras to off by default. Those choices cut out most of the friction before the meeting even begins.
After that, the big win is consistency. Recurring meetings run better when you use the same workflow every time. For sessions that happen on a regular schedule, automated attendance tracking and CSV export cut manual work and keep records consistent. That kind of process is much easier to keep up when the right Meet tools take care of the repetitive parts.
At scale, participant management comes down to steady moderation, smart meeting defaults, and repeatable workflows. AdminRemix Meet Enhancement Suite supports that workflow with Mute All, Auto Admit, and attendance tracking.
FAQs
How many co-hosts do I need for a large Google Meet?
The right number of co-hosts depends on how your team runs meetings and how much hands-on moderation each session needs. Google Meet lets you assign multiple co-hosts, which makes it easier to manage settings without putting everything on one person.
If you want to cut down on manual work, tools like Meet Enhancement Suite can help. They can automate tasks such as muting all participants, removing attendees, and auto-admitting new entrants.
What should my Google Meet runbook include?
For large meetings, your Google Meet runbook should standardize participant management so things stay secure, organized, and efficient.
Start with pre-meeting setup. That means setting the right access controls ahead of time, confirming who can join, and deciding how participants will be managed once the meeting begins. For bigger sessions, a little prep goes a long way.
You’ll also want clear organizer roles. Spell out who is responsible for tasks like muting participants, removing attendees when needed, and handling disruptions. If no one owns those actions, large meetings can get messy fast.
Attendance matters too. Your runbook should include a simple process for collecting attendance, whether that’s through Google Meet reports, a form, or another approved method. The key is to make sure attendance tracking is consistent from one meeting to the next.
It should also cover recording management and data retention. If the meeting is recorded, note who can start or stop the recording, where the file is stored, who can access it, and how long it should be kept. That way, any captured content lines up with your organization’s compliance policies.
When should I use breakout rooms in a large meeting?
Use breakout rooms when a large Google Meet session needs to move from a broad presentation into smaller, focused discussions.
They work well for collaborative brainstorming and team conversations. Instead of having everyone sit through one long group discussion, you can split people into smaller groups where it’s easier to talk, share ideas, and stay involved.
This shift can cut meeting fatigue and help people stay engaged.