
Best Practices for Chromebook Hardware Audits
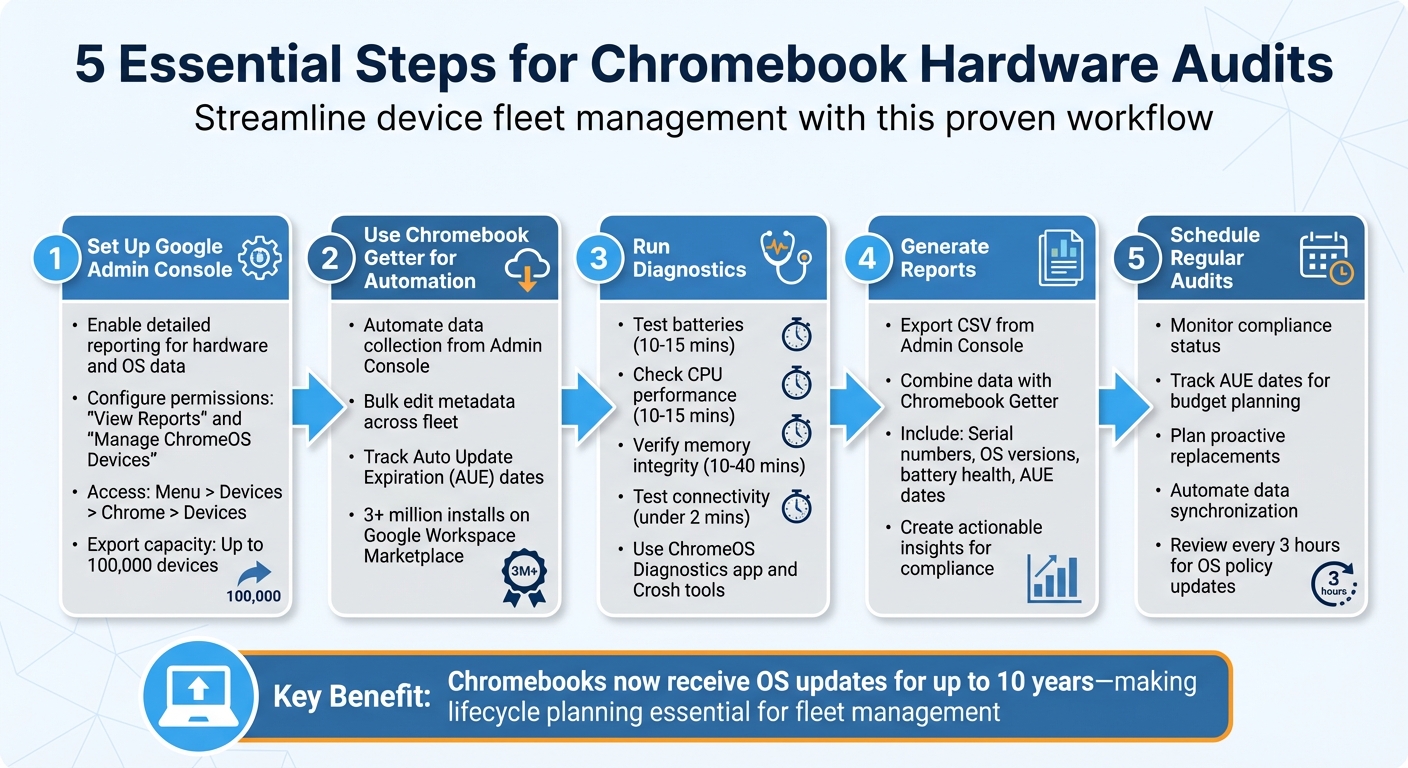
Auditing Chromebook hardware is critical for managing large device fleets. It ensures devices are secure, compliant, and performing well. Here's a quick breakdown of how to streamline the process:
- Set Up Google Admin Console: Enable detailed reporting for hardware and OS data.
- Use Tools Like Chromebook Getter: Automate data collection, bulk edit metadata, and track key metrics like Auto Update Expiration (AUE) dates.
- Run Diagnostics: Test batteries, CPUs, memory, and connectivity using ChromeOS tools.
- Generate Reports: Combine Admin Console exports with tools like Chromebook Getter for clear, actionable insights.
- Schedule Regular Audits: Monitor compliance, track AUE dates, and plan replacements proactively.
5-Step Chromebook Hardware Audit Process for IT Administrators
How to Access Chromebook Diagnostics: Easy Steps
sbb-itb-c68f633
Preparing for a Chromebook Hardware Audit
Getting your Google Admin Console properly set up is the first step toward a smooth Chromebook hardware audit. This setup ensures that all the necessary hardware data is captured, giving you a complete view of your Chromebook fleet.
Setting Up Google Admin Console for Hardware Audits
To begin, go to Menu > Devices > Chrome > Devices in the Google Admin Console. This section provides a detailed list of your fleet and allows you to export up to 100,000 devices with all their metadata.
Make sure your admin account has the necessary permissions, specifically "View Reports" and "Manage ChromeOS Devices". Without these, you won’t be able to access key hardware metrics or export a full dataset for your audit.
Take advantage of the natural language search feature to quickly filter your fleet. For example, you can type "devices enrolled last month" to narrow down results. Need a device’s serial number or ChromeOS version? Simply press Alt+V on the sign-in screen of any Chromebook.
Once your console is ready to collect basic data, the next step is enabling detailed reporting and syncing policies.
Enabling Device Reporting and Policy Sync
To get a comprehensive view of your fleet, enable detailed reporting settings. These settings are essential for generating actionable audit reports and maintaining compliance.
Head over to Devices > Chrome > Settings > Device settings and find the User and device reporting section. Activate the following options:
- "Report device hardware information": This captures details like CPU model, architecture, and maximum clock speed.
- "Report device telemetry": This provides real-time metrics such as battery health (calculated as full charge capacity divided by design capacity), cycle count, and storage usage.
Additionally, check the "Last policy sync" column in your device list. This shows which devices haven’t recently communicated with the console. Since OS version policies update every 3 hours, devices with outdated sync timestamps may not be running the latest configurations. Filtering by this column ensures you’re working with up-to-date data before exporting.
| Required Reporting Setting | Data Collected for Audit |
|---|---|
| Report device OS information | OS version, update status, and compliance |
| Report device hardware information | CPU model, architecture, and max clock speed |
| Report device telemetry | Battery health, cycle count, and storage usage |
| Device system log upload | Event-based logs for troubleshooting hardware issues |
Using Chromebook Getter for Automated Data Collection
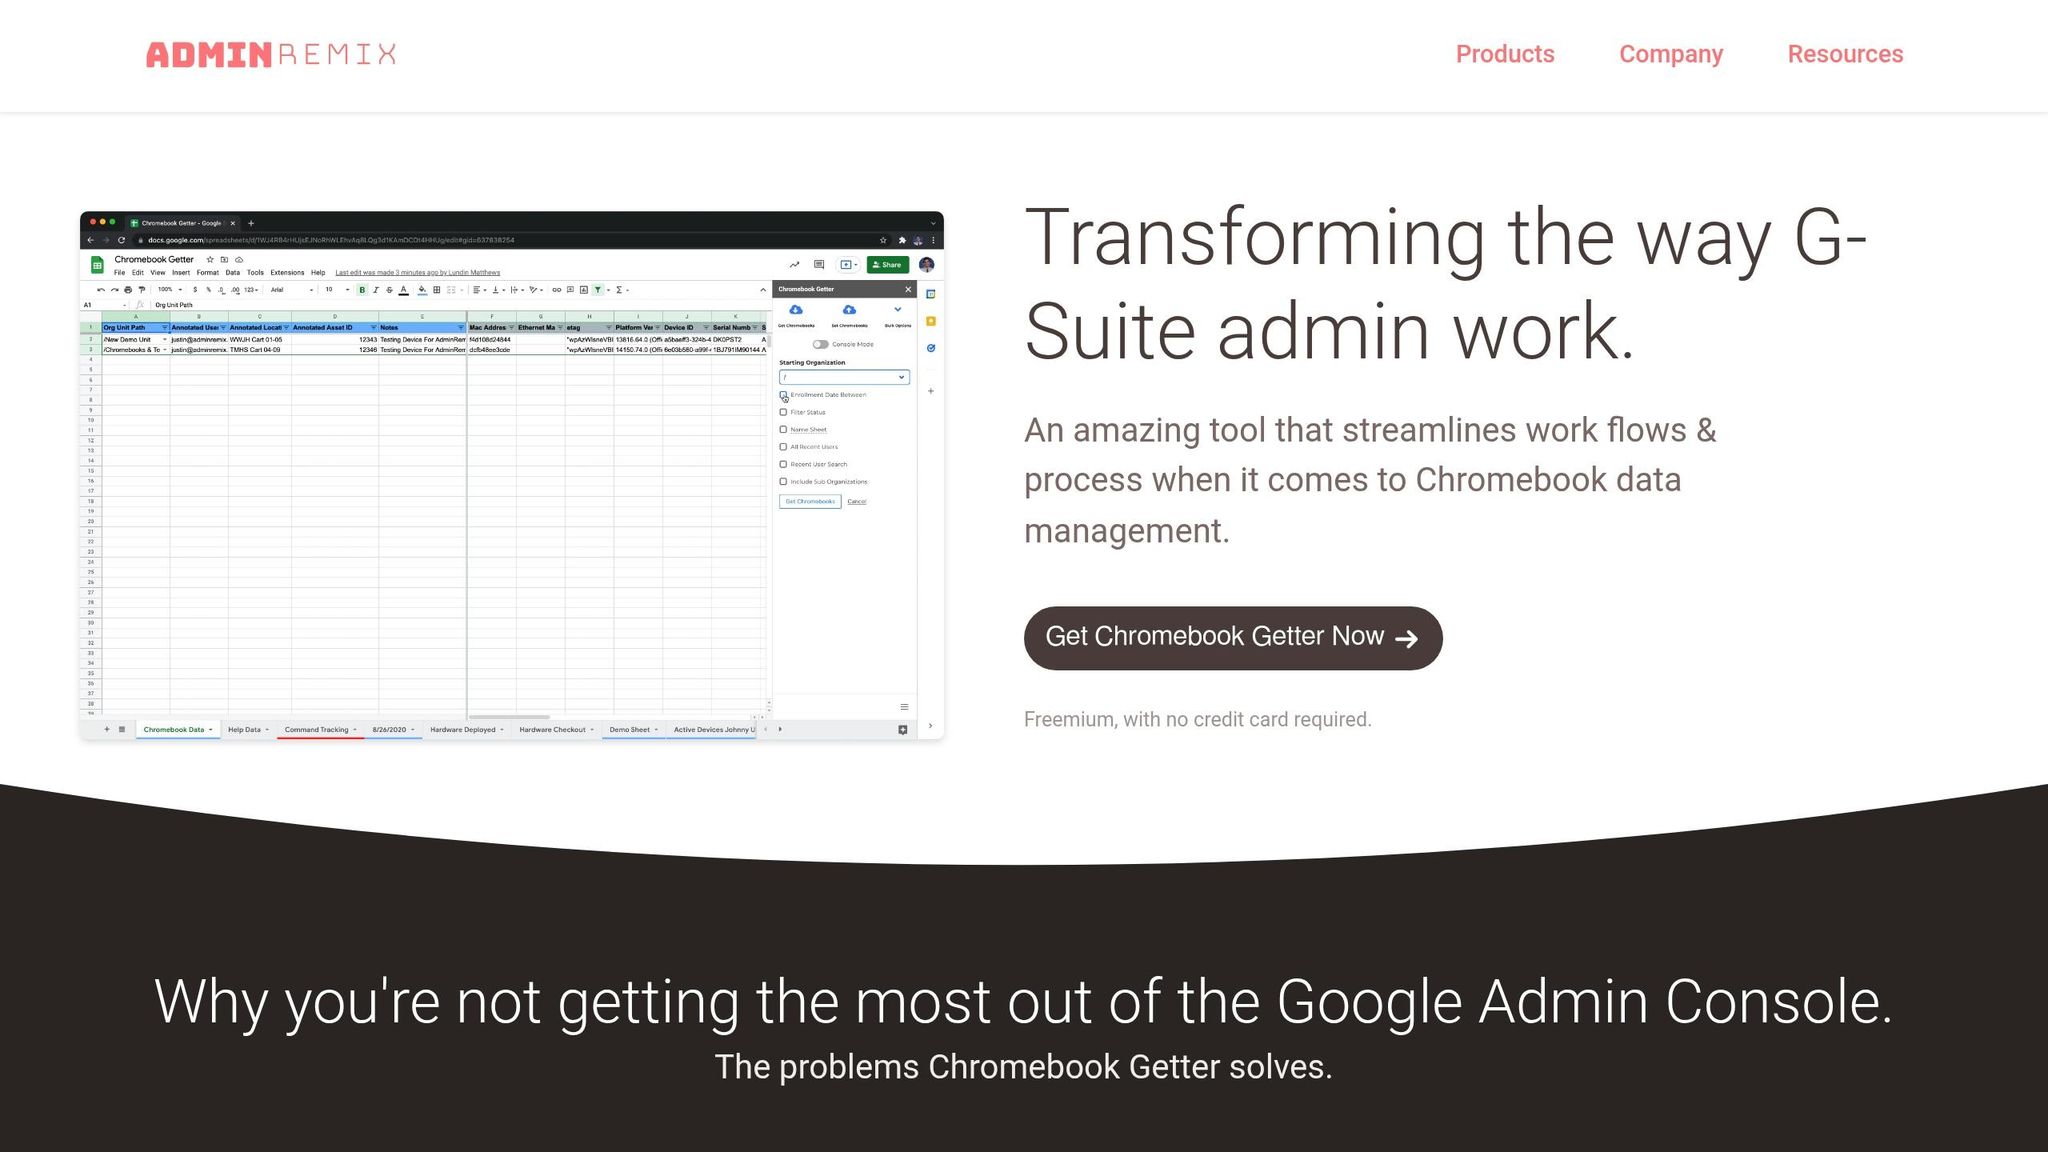
Once you've configured detailed reporting, the next step is importing your Chromebook metadata - and that's where Chromebook Getter comes in. This tool, developed by AdminRemix, integrates directly with Google Sheets, pulling your Chromebook metadata from the Admin Console into an easy-to-use spreadsheet. From there, you can manipulate, filter, and analyze the data all in one place. It simplifies the process of handling detailed device information, making it accessible for quick analysis.
With over 3 million installs on the Google Workspace Marketplace, Chromebook Getter has become a go-to tool for IT administrators managing large Chromebook fleets. It automatically retrieves critical data like serial numbers, OS versions, Auto Update Expiration (AUE) dates, and telemetry data - all directly from the Admin Console.
"I signed up for Chromebook Getter because it's faster than getting what I need with GAM command lines." - Philip Helmers, SWBOCES LHRIC
Setting Up Chromebook Getter
To get started, install the Chromebook Getter add-on from the Google Workspace Marketplace and open it in Google Sheets. You'll need to authenticate with Super Admin credentials. Use the "Get Started/Refresh Token" option to enable syncing. During setup, map your Asset Tag to either the Device ID or Serial Number - these fields are required for syncing with Google Admin. Be sure to enable syncing for at least one field.
Once everything is mapped, click "Execute" and then "Sync" to pull in your data. You can choose to filter by specific Chromebook statuses (e.g., provisioned or deprovisioned), or you can import data for your entire fleet. For larger fleets, the Premium plan provides a Download Service Worker feature, which helps manage high-volume data transfers efficiently. After syncing, all your data is centralized, ready for bulk edits and automated reporting.
Benefits of Bulk Chromebook Metadata Management
Once the setup is complete, Chromebook Getter transforms your Chromebook management workflow. Instead of jumping between multiple Admin Console screens or typing out complex command-line scripts, you have a single, sortable view of your fleet. This includes key details like serial numbers, OS versions, AUE dates, and telemetry data.
One standout feature is bulk editing, which is especially useful during audits. You can update fields like asset tags, locations, and notes across hundreds of devices in one go. Additionally, you can move devices between organizational units in bulk or even issue remote commands like reboots or power washes.
"Chromebook Getter has been an amazing tool in my Chromebook management process. I've been able to ditch GAM when it comes to Chromebooks." - Curtis Doherty
For compliance reporting, the Premium plan ($20.75/month or $249.00/year) offers specialized tools. These include detailed reports on AUE dates and OS versions across multiple organizational units, as well as access to telemetry data like storage and processor information. This data integrates seamlessly into audit reports, ensuring your hardware metrics are always accurate and up to date - without the hassle of manual data entry.
Conducting Hardware Testing and Diagnostics
Once you've synced Chromebook Getter data, it's time to ensure your devices are functioning properly. Hardware diagnostics go beyond metadata collection, helping you validate performance. ChromeOS simplifies this process with its built-in Diagnostics app (available on version 90 and later). This app allows you to test and monitor key components like the battery, CPU, memory, connectivity, and input devices. To access it, search for "Diagnostics" in the Launcher or navigate to Settings > About ChromeOS > Diagnostics.
For more advanced troubleshooting, you can use Crosh (accessed via Ctrl+Alt+T). This command-line tool offers detailed hardware data using commands like battery_test and memory_test. Always remember to click "Save session log" after running tests. This creates a .txt file you can attach to support tickets or include in audit reports.
While Chromebook Getter organizes essential metrics, manual diagnostics provide a more hands-on way to confirm performance.
Testing Key Components
Start with input devices by running the interactive keyboard test under Diagnostics > Input. Press each key to ensure proper functionality. Keep the test window open, as closing it will pause the process.
For multimedia features like cameras, microphones, and speakers, the Diagnostics app offers quick checks. Connectivity tests cover Wi‑Fi, Ethernet, cellular signals, and DNS settings, usually completing in under two minutes. CPU testing is a bit more intensive, involving stress tests, cache checks, floating-point accuracy tests, and prime calculations. These tests can take 10–15 minutes and may slow down the Chromebook during the process.
"CPU tests can stress the device and make regular use difficult. Your device may run slowly and tests may take a long time to run." - Google Support
Memory tests evaluate RAM integrity and can take anywhere from 10 to 40 minutes, depending on the device's capacity. Before running these tests - or CPU tests - close all applications to ensure accurate results and avoid unresponsiveness. For storage health, the Crosh command storage_test_1 is your go-to tool, but keep in mind it only works for SSDs and won't provide results for eMMC storage.
Assessing Battery Health and Performance
The battery is one of the most important components to test, as it directly impacts device longevity. The Diagnostics app shows key metrics like battery health percentage, cycle count, and discharge rate. Typically, a battery with over 50% health is considered in good condition. However, if a battery drops below 50% within its first year, it may need replacement.
To perform a discharge test, unplug the charger, close all apps, and lower the screen brightness to its minimum setting. This will measure the rate of charge and discharge over a set period, usually taking 10–15 minutes.
"If the rate of charge and discharge is very low, there may be a problem with the battery or charging port." - Google Support
Key Metrics and Tools Overview
| Component | Tool Used | Key Metrics | Estimated Time |
|---|---|---|---|
| Battery | Diagnostics App / Crosh | Health %, Cycle Count, Discharge Rate | 10–15 mins |
| CPU | Diagnostics App | Temperature, Speed, Usage, Stress Test | 10–15 mins |
| Memory | Diagnostics App / Crosh | Available RAM, Integrity Check | 10–40 mins |
| Connectivity | Diagnostics App / Crosh | DNS, Signal Strength, IP Configuration | Under 2 mins |
| Keyboard | Diagnostics App (Input) | Key Press Recognition | Manual |
| Storage | Crosh (storage_test_1) |
SSD Health (Non-eMMC only) | Under 5 mins |
Generating Reports and Ensuring Compliance
Creating Audit Reports
Once you've run diagnostics, it's time to export your findings in a clear, shareable format. Start by exporting your fleet's CSV file from the Admin Console. This file includes key details such as serial numbers, model names, OS versions, battery health, and Auto Update Expiration (AUE) dates. Keep in mind that the accuracy of the exported data depends on the "Report device hardware information" and "Report device telemetry" settings you've already configured.
For IT teams managing large device fleets, tools like Chromebook Getter simplify the process of consolidating data. This tool allows you to create custom reports and manage bulk data more efficiently. By combining data from the Admin Console with automated tools like Chromebook Getter, you can ensure your audit reports are both thorough and easy to work with.
If your organization uses AssetRemix, enabling the "Sync On" feature for Serial Numbers can automatically update hardware changes in your asset management database. AssetRemix also offers the option to map custom fields - like linking Asset Tags to Device IDs or Serial Numbers - providing a centralized and reliable source for all your hardware audits.
With these audit reports ready, you can move on to analyzing compliance and hardware metrics to gain deeper insights.
Analyzing Compliance and Hardware Metrics
After gathering diagnostic data and metadata, evaluating compliance becomes a more streamlined process. The Admin Console, combined with Chromebook Getter, offers real-time OS and telemetry metrics to help you stay on top of compliance. The "OS version policy compliance" field in the Admin Console categorizes devices as Compliant, Pending Update, or Not Compliant based on your organizational policies. This field refreshes every three hours, ensuring your data stays up to date.
Devices nearing their AUE dates - especially those within six months - should be flagged for replacement planning. Chromebook Getter can provide a full list of "Auto-update until" dates, which is helpful for long-term budgeting and planning refresh cycles. Additionally, reviewing telemetry data can reveal devices with significant battery wear or high cycle counts, signaling the need for battery replacements or device retirements.
To make audits even easier, the Admin Console supports Natural Language Processing (NLP) searches. This feature lets you use plain English queries like "which devices were enrolled last month" to quickly filter and sort your audit data. These tools and insights allow you to maintain compliance while keeping your hardware in top shape.
Remediation and Ongoing Monitoring
Fixing Issues with Non-Compliant Devices
When dealing with non-compliant devices, it's crucial to act quickly. Start by deprovisioning devices that are being retired, resold, or sent in for repairs. Without deprovisioning, service providers can't fully test or repair a device properly. If you're returning a defective device under a Return Materials Authorization (RMA), make sure it’s deprovisioned beforehand.
Tools like Chromebook Getter can simplify bulk actions, such as initiating reboots, performing power washes, and handling deprovisioning tasks.
For devices that are lost or stolen, disable them to prevent unauthorized access. Similarly, deprovision devices slated for retirement or repair. Keep in mind that accidentally deprovisioned devices will need to be wiped and manually re-enrolled to reuse their licenses.
To keep everything running smoothly, combine these remediation strategies with regular reviews to ensure compliance over time.
Setting Up Regular Audit Schedules
Once devices are back in compliance, regular audits are key to staying ahead of potential problems. One critical task is tracking Auto Update Expiration (AUE) dates. This helps you plan ahead for budgeting and identify devices nearing the end of their support period. Chromebook Getter makes it easy to pull AUE dates for your entire fleet, so you can schedule hardware upgrades before devices fall out of compliance.
Automating data synchronization between tools like the Google Admin Console and AssetRemix can save time and reduce errors. By mapping asset tags to Device IDs or Serial Numbers, you’ll maintain consistent and accurate inventory records. This automation minimizes manual data entry and ensures your audit logs are reliable during routine checks.
Conclusion
Conducting effective Chromebook hardware audits hinges on four key practices: preparation, automated data collection, thorough testing, and continuous monitoring. Start by enabling all relevant reporting policies in the Google Admin Console - such as device hardware details, telemetry, and OS information - to ensure you're capturing all essential data points.
Tools like Chromebook Getter streamline the process by centralizing fleet data in Google Sheets, allowing for bulk extraction of critical metrics like Auto Update Expiration (AUE) dates. With Chromebooks now receiving OS updates for up to 10 years, planning device lifecycles becomes essential for managing budgets effectively.
Don’t skip hands-on testing for peripherals and battery health. While console reports provide valuable insights, functional tests often uncover issues with peripherals that automated tools might miss. Monitoring battery health - by comparing the full charge capacity to the original design capacity - helps identify devices nearing the end of their usability, minimizing the risk of unexpected failures in the field.
The true benefit of hardware audits lies in their consistency. Establish recurring audit schedules to ensure your fleet remains compliant and operational over time. While the Admin Console updates OS version compliance every three hours, regular reviews help catch devices that may not have synced policies or are nearing their end-of-life. By combining preparation, automation, hands-on testing, and ongoing monitoring, IT administrators can maintain a reliable, secure Chromebook fleet that minimizes disruptions and supports user productivity.
FAQs
What’s the fastest way to audit 10,000+ Chromebooks?
Managing over 10,000 Chromebooks can seem overwhelming, but bulk management tools like Chromebook Getter make it much easier. These tools allow you to quickly export inventories, update metadata, and handle tasks like bulk deprovisioning or rebooting - all through Google Sheets. By integrating seamlessly with the Google Admin console, they ensure fast synchronization, cutting down on manual effort and simplifying the management of large Chromebook fleets.
How do I flag devices that aren’t syncing policies or reporting telemetry?
To spot devices with sync or telemetry problems, start by conducting a sync audit to pinpoint those with outdated sync statuses. Use your asset management tools to find devices that haven’t synced in a while. In the Google Admin console, enable reporting features and configure notifications for devices that repeatedly fail to sync or re-enroll. By using these steps together, you can stay on top of sync issues and resolve them efficiently.
What battery health or cycle count indicates a Chromebook should be replaced?
When a Chromebook's battery cycle count hits somewhere between 300 and 500 cycles, or its battery health dips well below 100%, it might be time to consider a replacement. These indicators suggest the battery is losing its ability to hold a full charge, which can start to affect the device's overall performance.